Easy Crafts to Do with Kids: 27 Creative Ideas for Fun
Getting kids away from screens and into creative play can feel like a challenge, but the right craft projects make it effortless.
Crafting with children offers more than just entertainment: it builds fine motor skills, sparks imagination, and creates memories that last long after the glue dries.
Whether dealing with a rainy afternoon or planning a weekend activity, having a collection of go-to crafts transforms ordinary moments into opportunities for bonding and learning.
The beauty of crafting lies in its simplicity. Most projects require supplies already sitting in the kitchen drawer or recycling bin.
From paper plates to popsicle sticks, everyday items become the foundation for extraordinary creations.
The following collection features crafts suitable for children of all ages and skill levels, ensuring every child can participate and feel proud of what they make.
Creative Craft Projects That Spark Joy and Imagination
These simple yet engaging craft ideas use everyday materials to create memorable experiences. Each project encourages creativity while developing essential skills through hands-on fun.
1. Paper Plate Animals
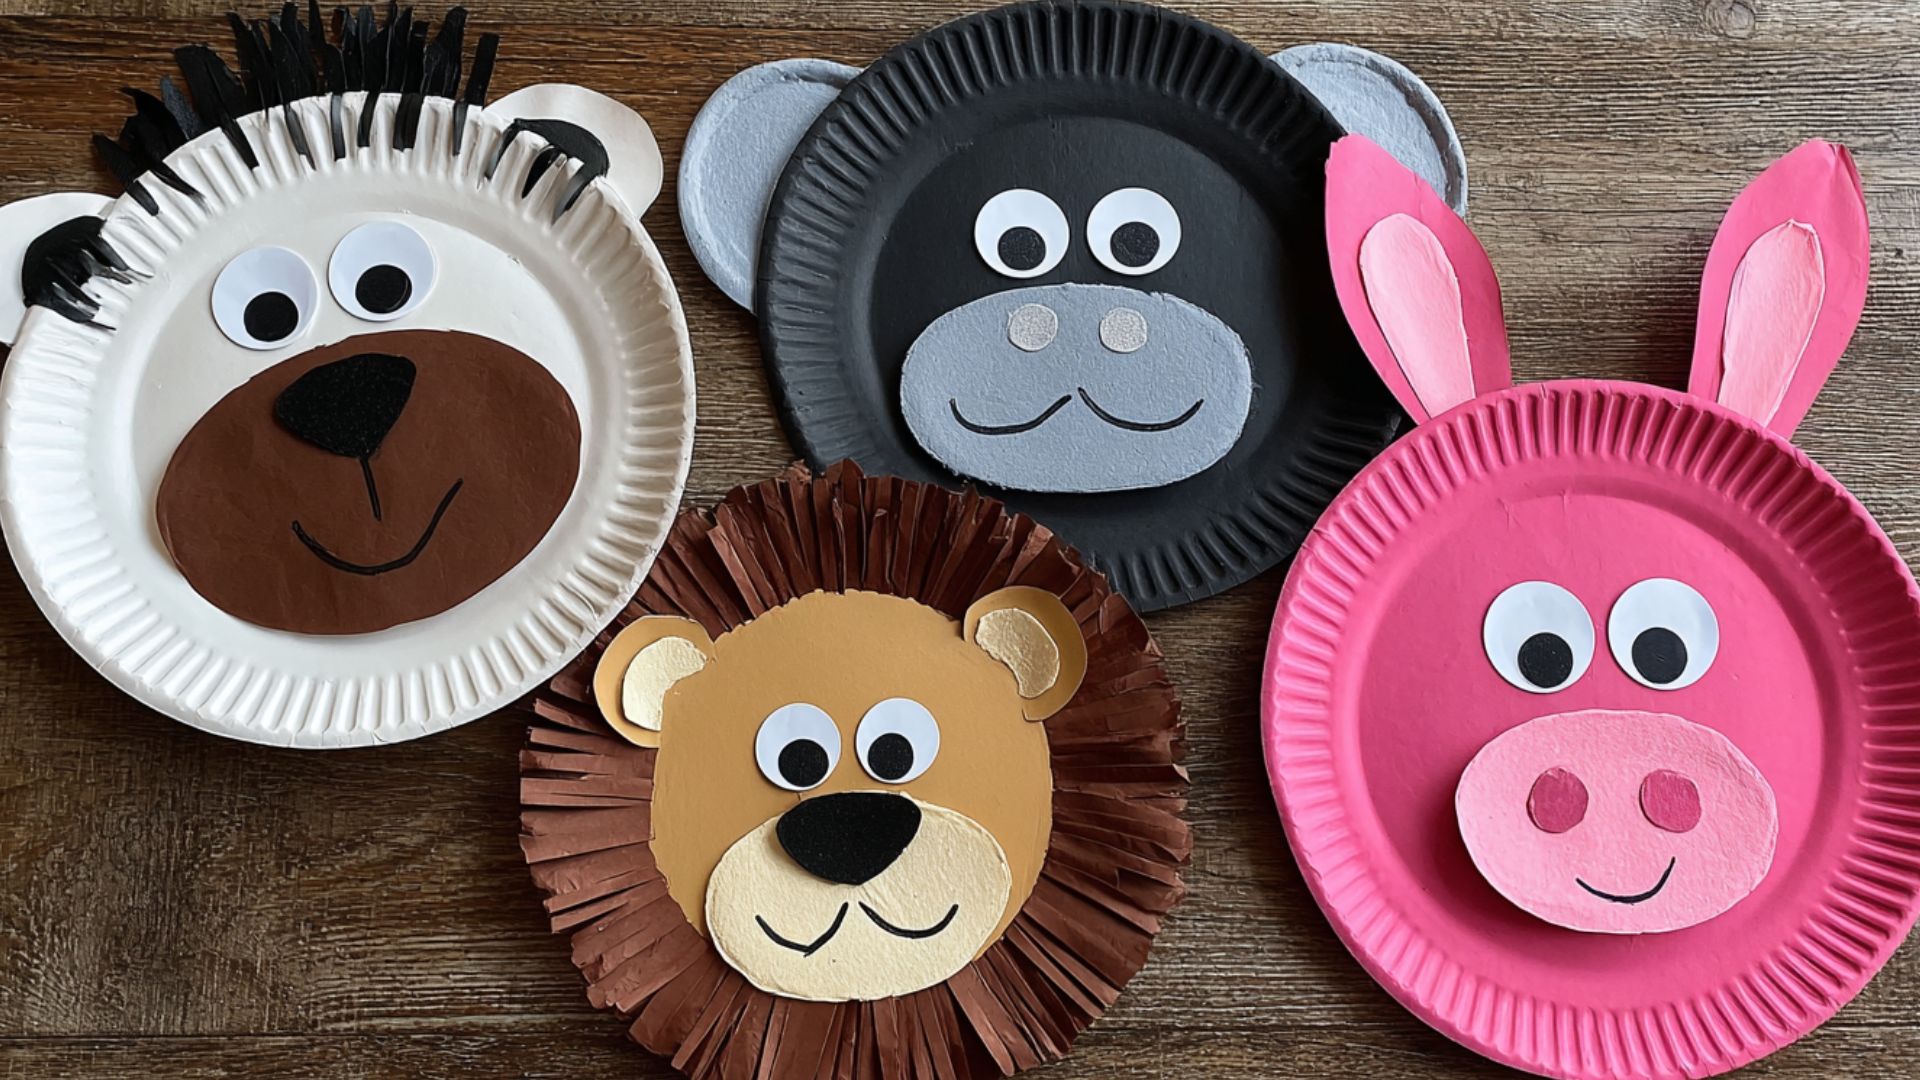
Turn ordinary paper plates into a zoo full of colorful creatures. This classic craft allows kids to explore different animals while practicing cutting and gluing skills.
Supplies:
- Paper plates
- Construction paper
- Googly eyes
- Markers or crayons
- Glue stick
- Scissors
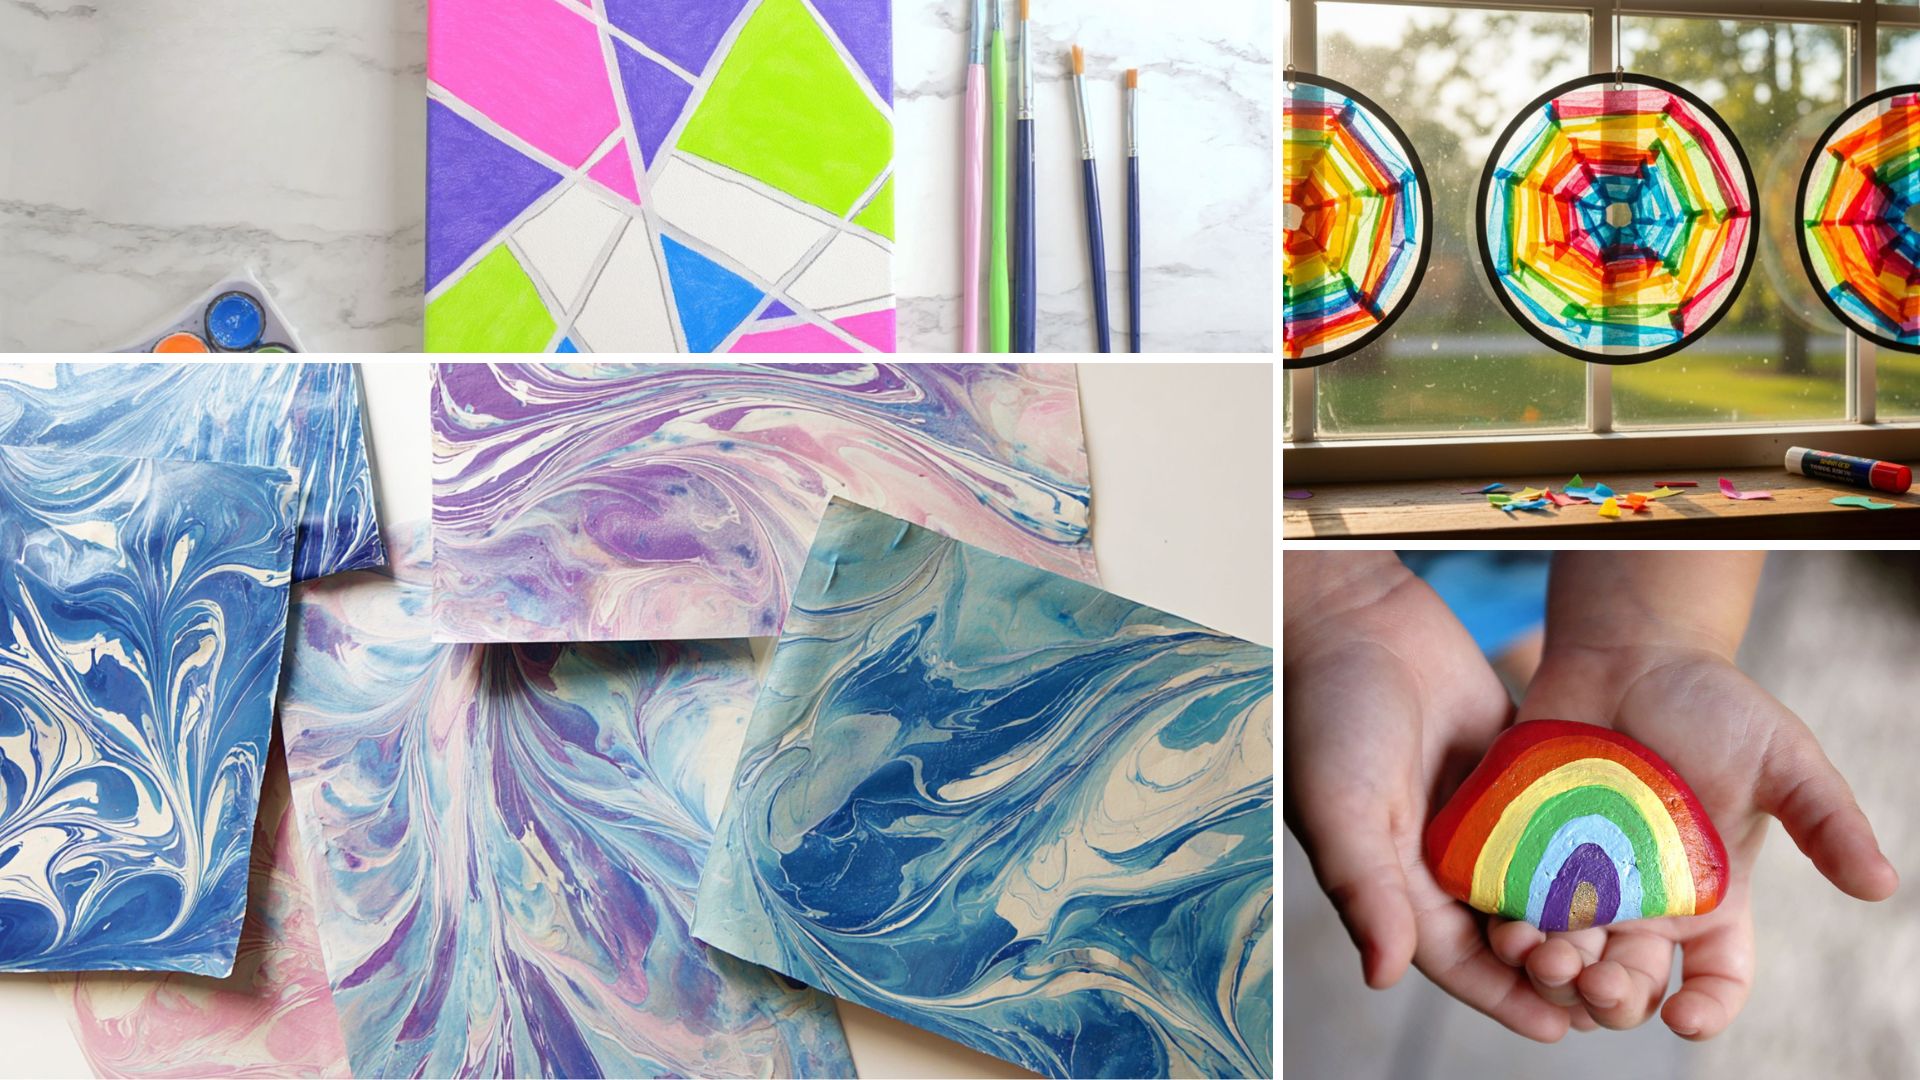
Steps:
- Choose an animal and identify which parts to create
- Cut ears, tails, or other features from construction paper
- Glue features onto the paper plate
- Add googly eyes and draw facial details with markers
- Display the finished animal on the fridge or wall
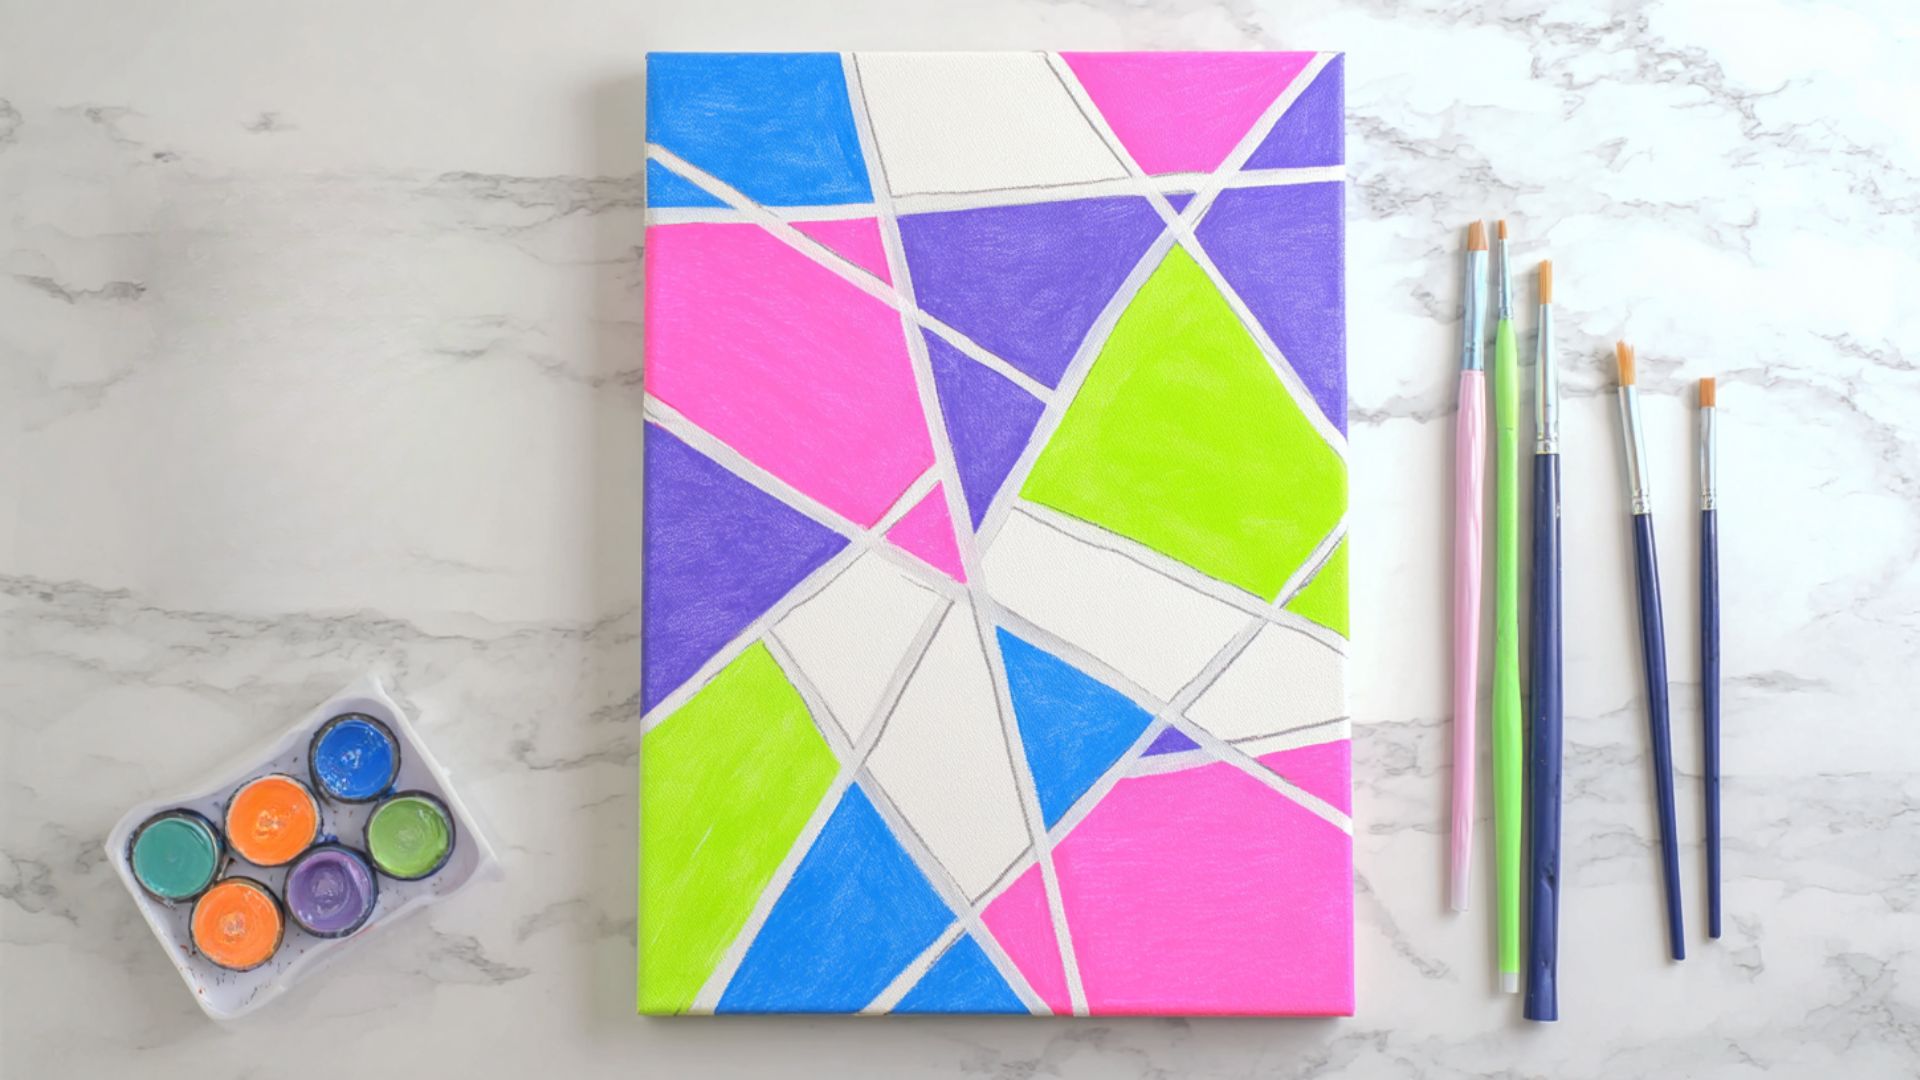
2. Handprint Art
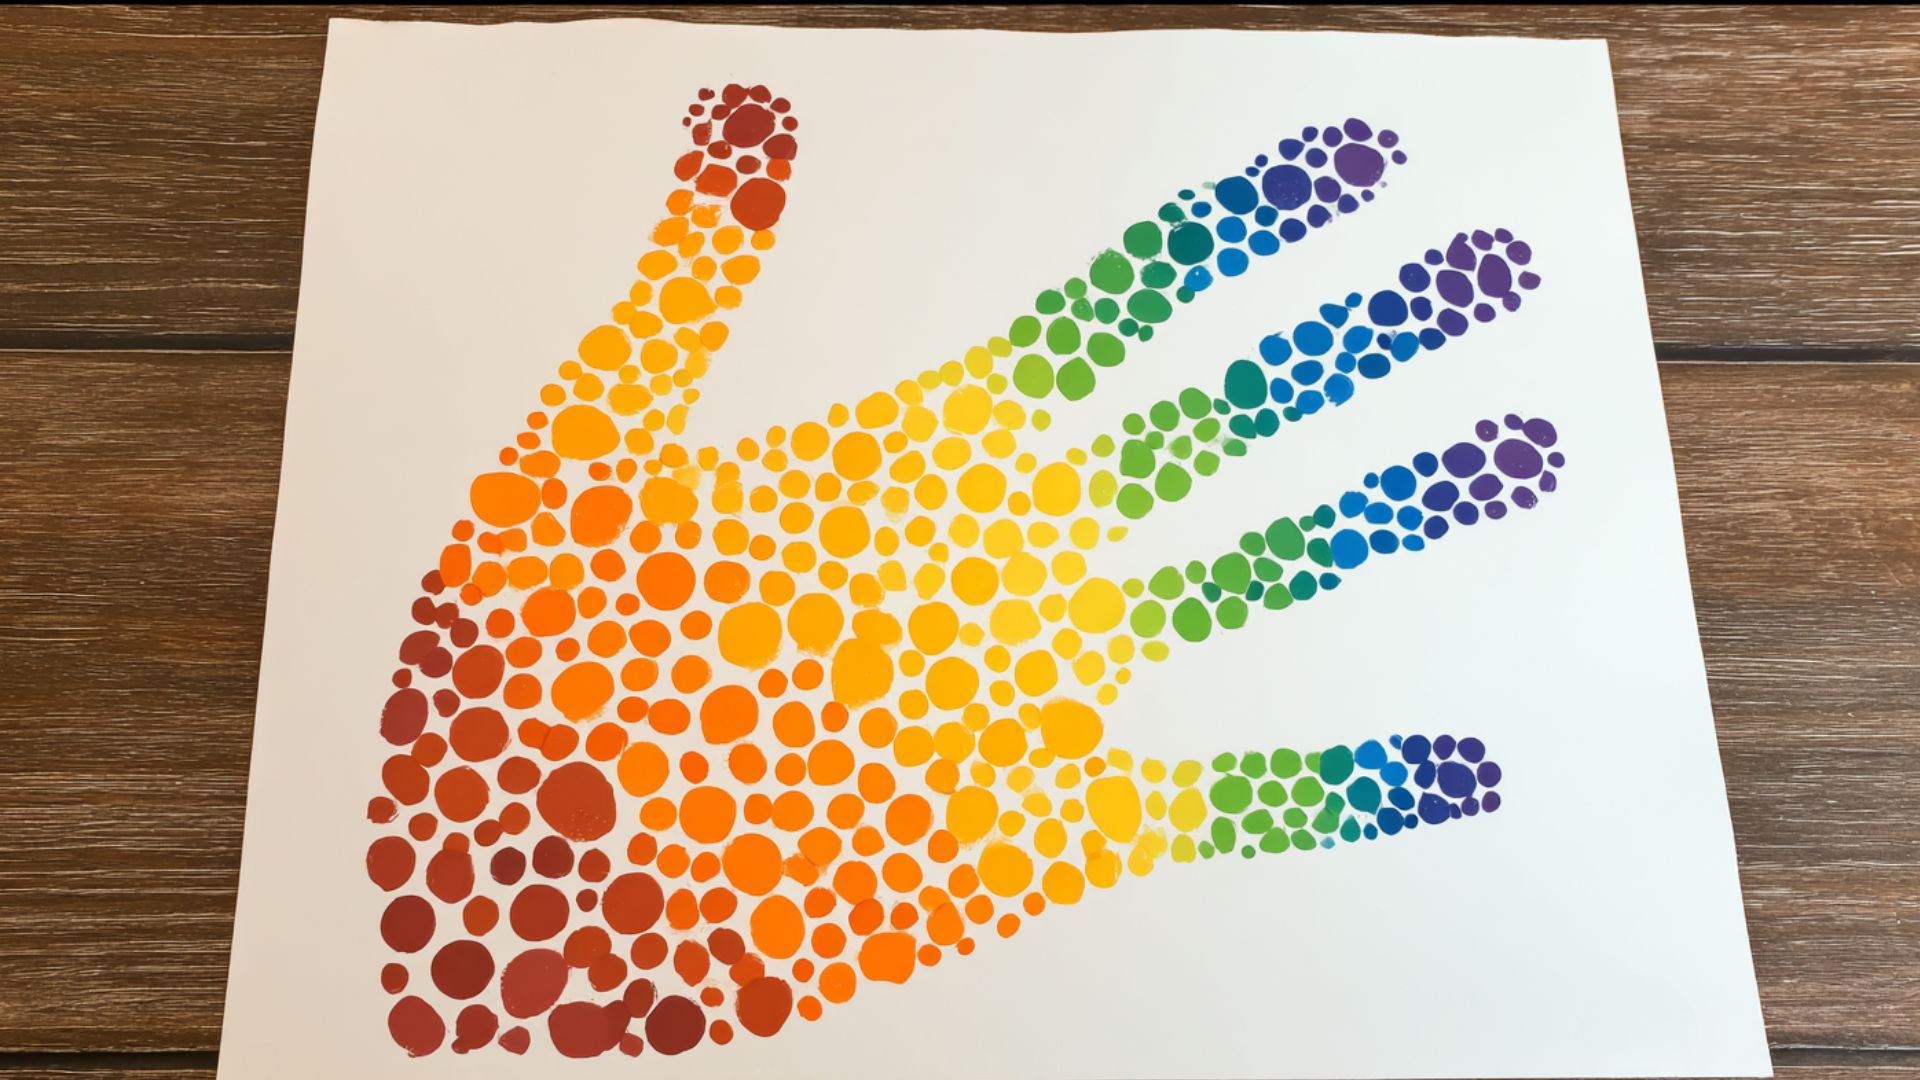
Capture a moment in time by creating artwork using tiny handprints. These projects become treasured keepsakes that families cherish for years.
Supplies:
- Washable paint
- Canvas or thick paper
- Paintbrushes
- Wet wipes for cleanup
- Markers for details
Steps:
- Apply paint to the child’s hand using a brush
- Press your hand firmly onto the paper or canvas
- Allow to dry completely
- Add details with markers to transform prints into animals or flowers
- Frame the artwork as a keepsake
3. Popsicle Stick Picture Frames
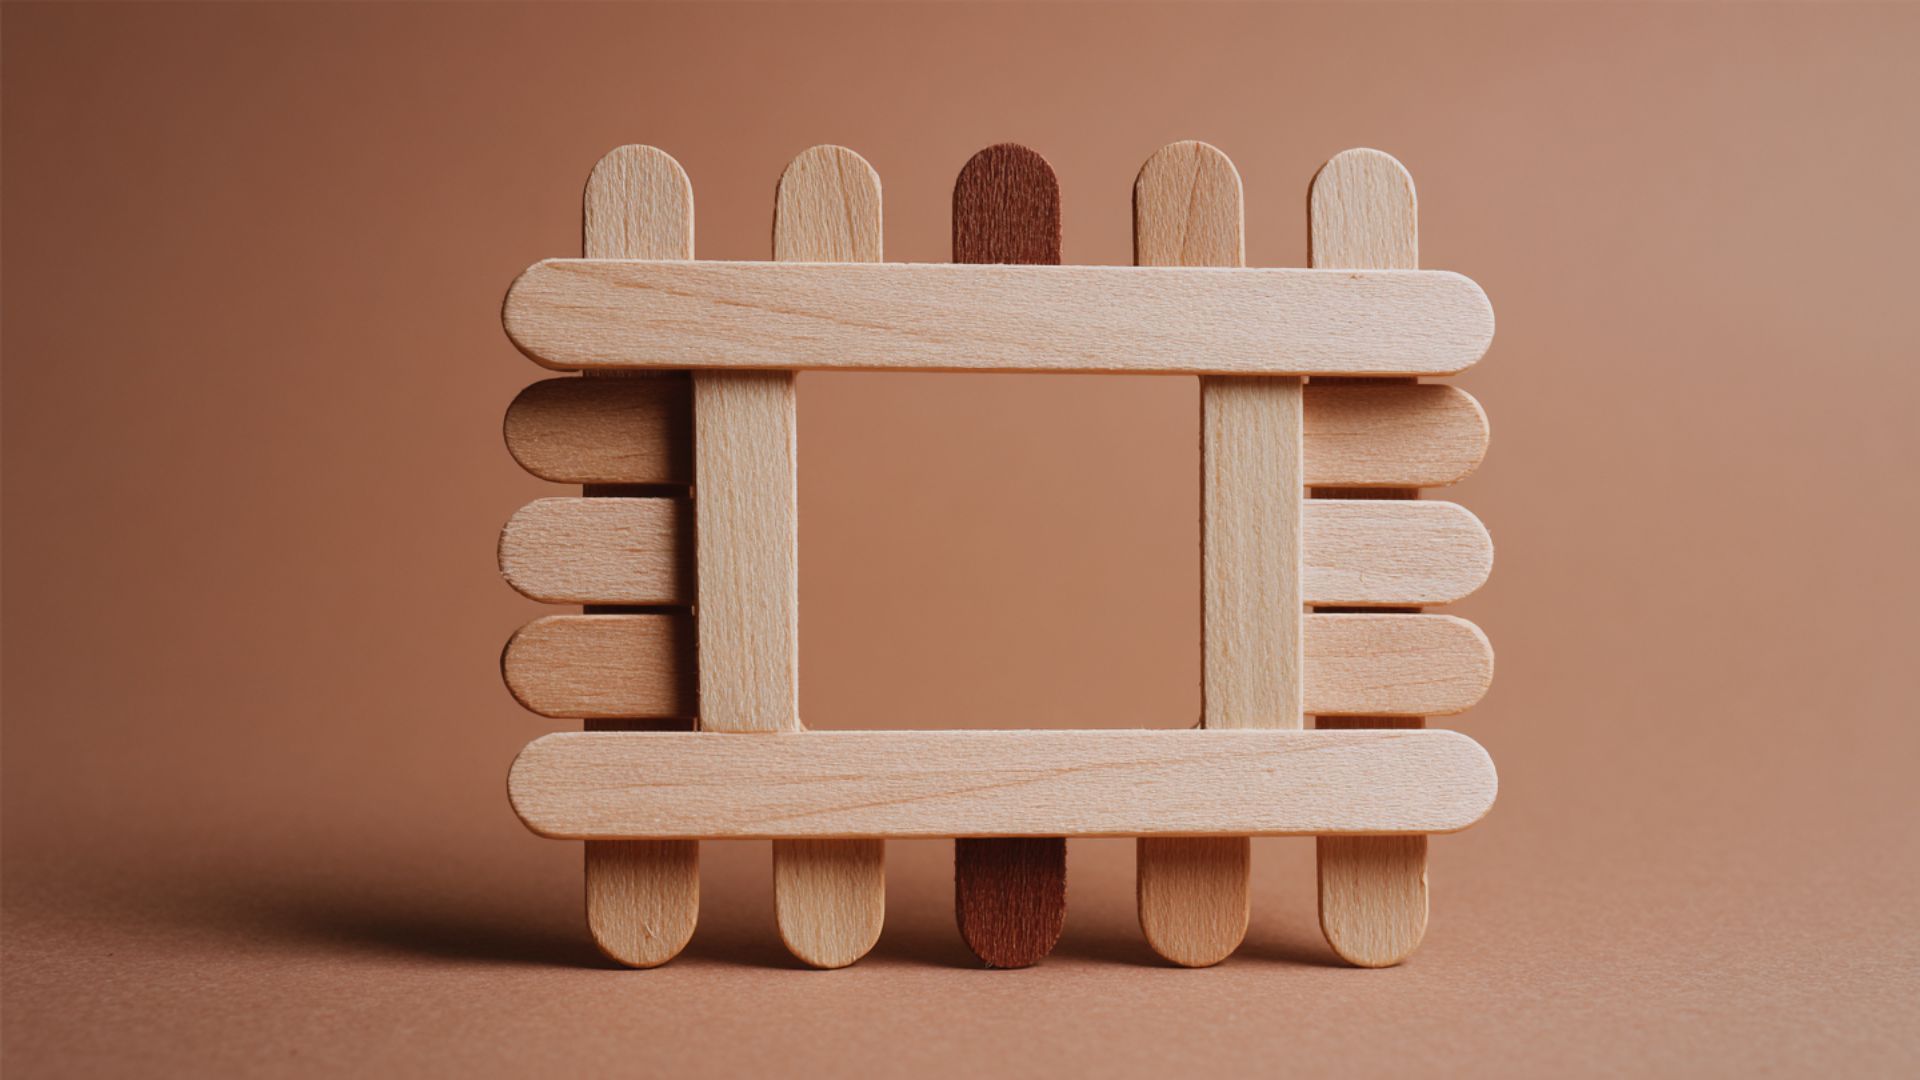
Create personalized frames that showcase favorite photos or artwork. This craft teaches basic construction techniques while producing a functional item kids can gift to loved ones.
Supplies:
- Popsicle sticks
- White glue or hot glue
- Acrylic paint
- Decorative items like buttons, sequins, or stickers
- Photo or artwork to frame
Steps:
- Arrange four Popsicle sticks in a square shape
- Glue the corners together and let them dry
- Paint the frame in your favorite colors
- Decorate with buttons, gems, or other embellishments
- Attach the photo to the back with tape
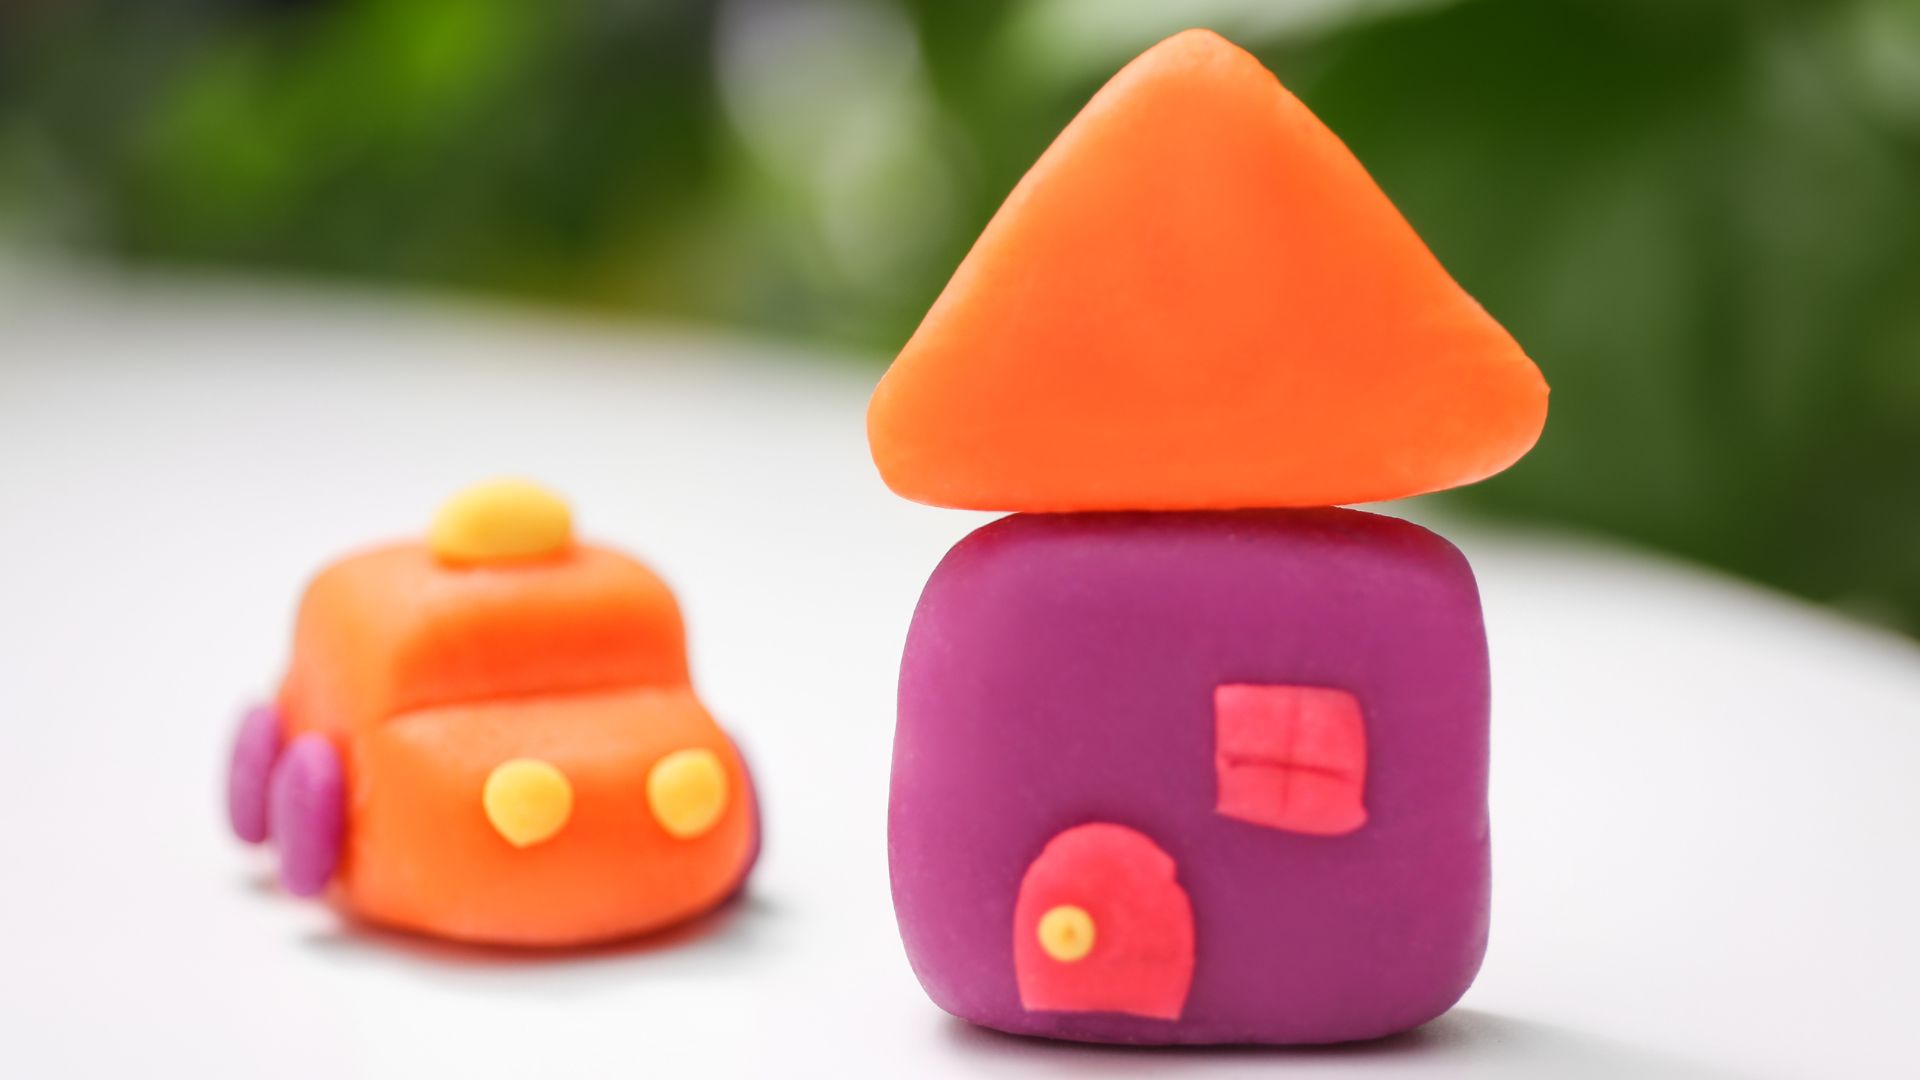
4. Salt Dough Ornaments
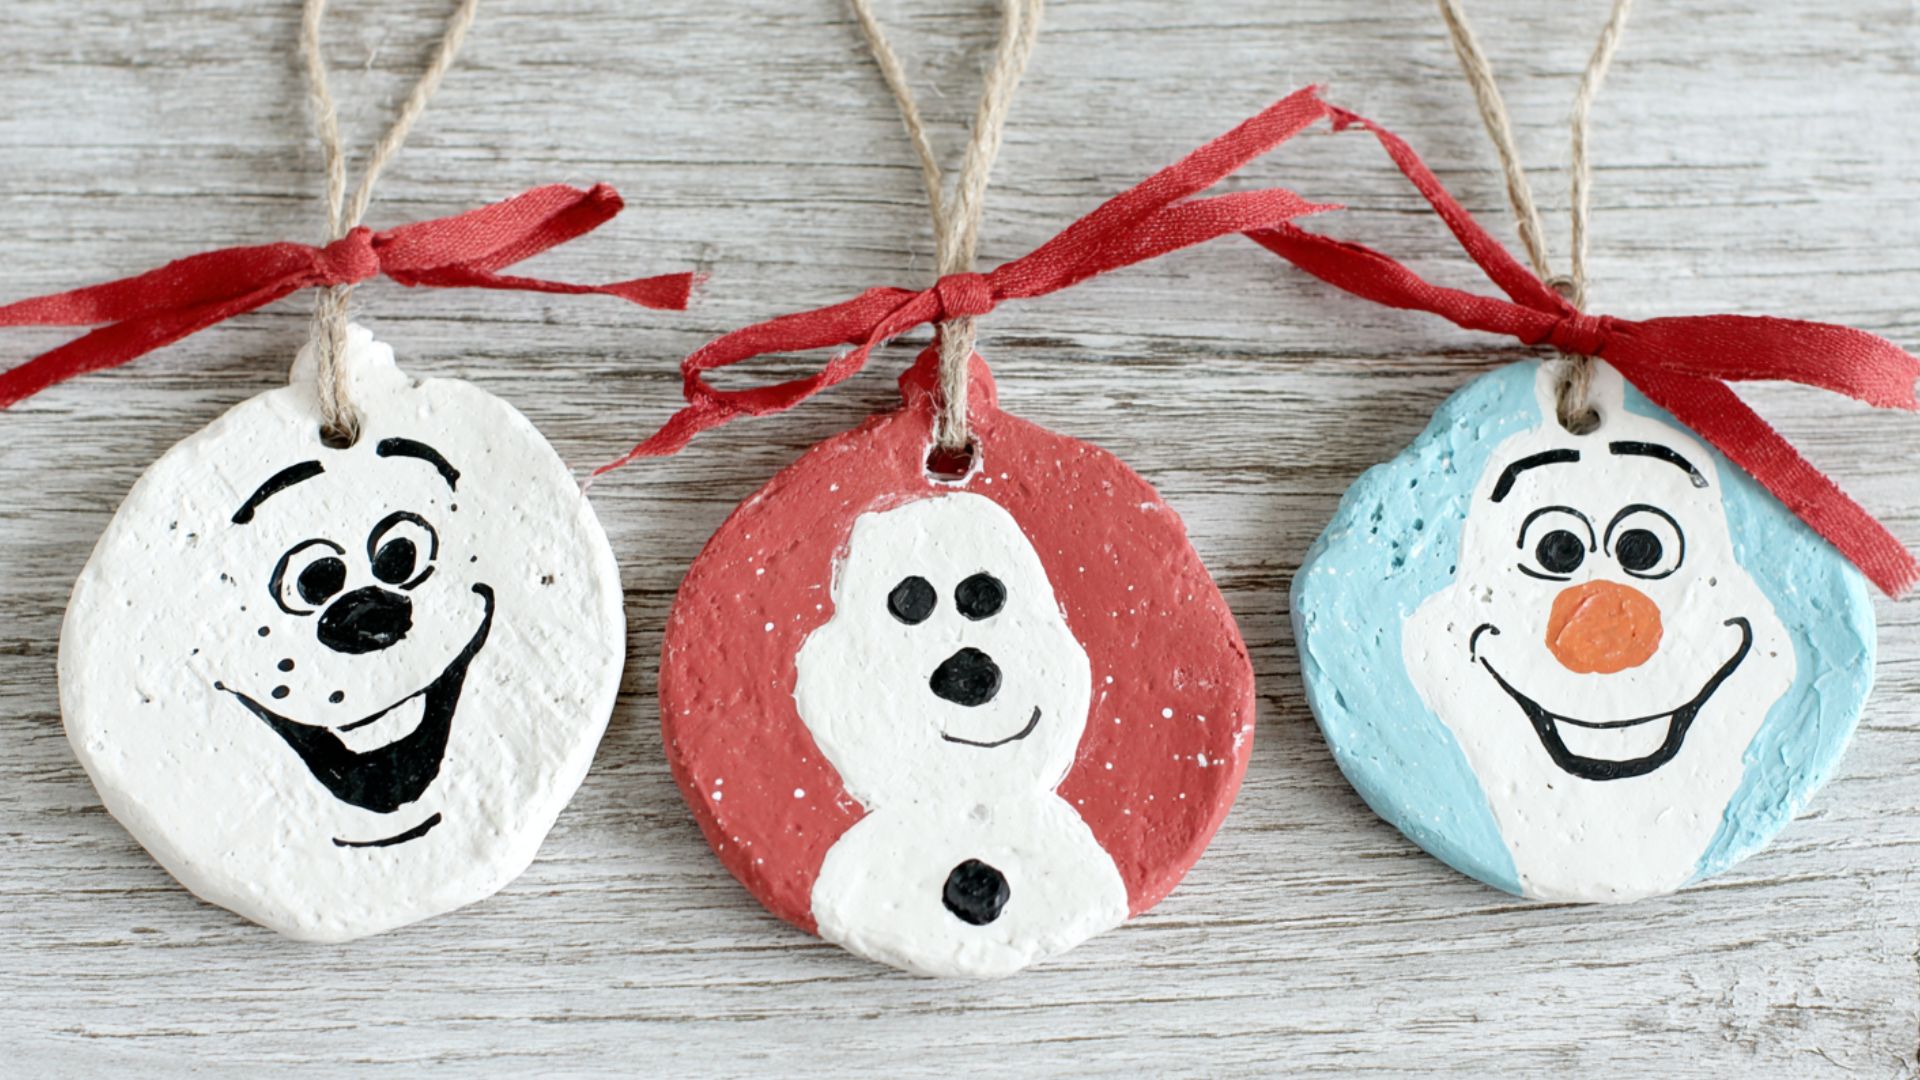
Make beautiful ornaments from pantry ingredients. Salt dough creations can be painted and preserved, making them perfect for holiday decorations or gifts.
Supplies:
- Two cups of flour
- One cup of salt
- One cup of water
- Cookie cutters
- Rolling pin
- Paint and brushes
Steps:
- Mix flour, salt, and water until dough forms
- Roll the dough flat to a quarter-inch thickness
- Cut shapes using cookie cutters
- Poke holes for hanging with a straw
- Bake at 200 degrees for three hours, then paint when cool
5. Cardboard Tube Binoculars
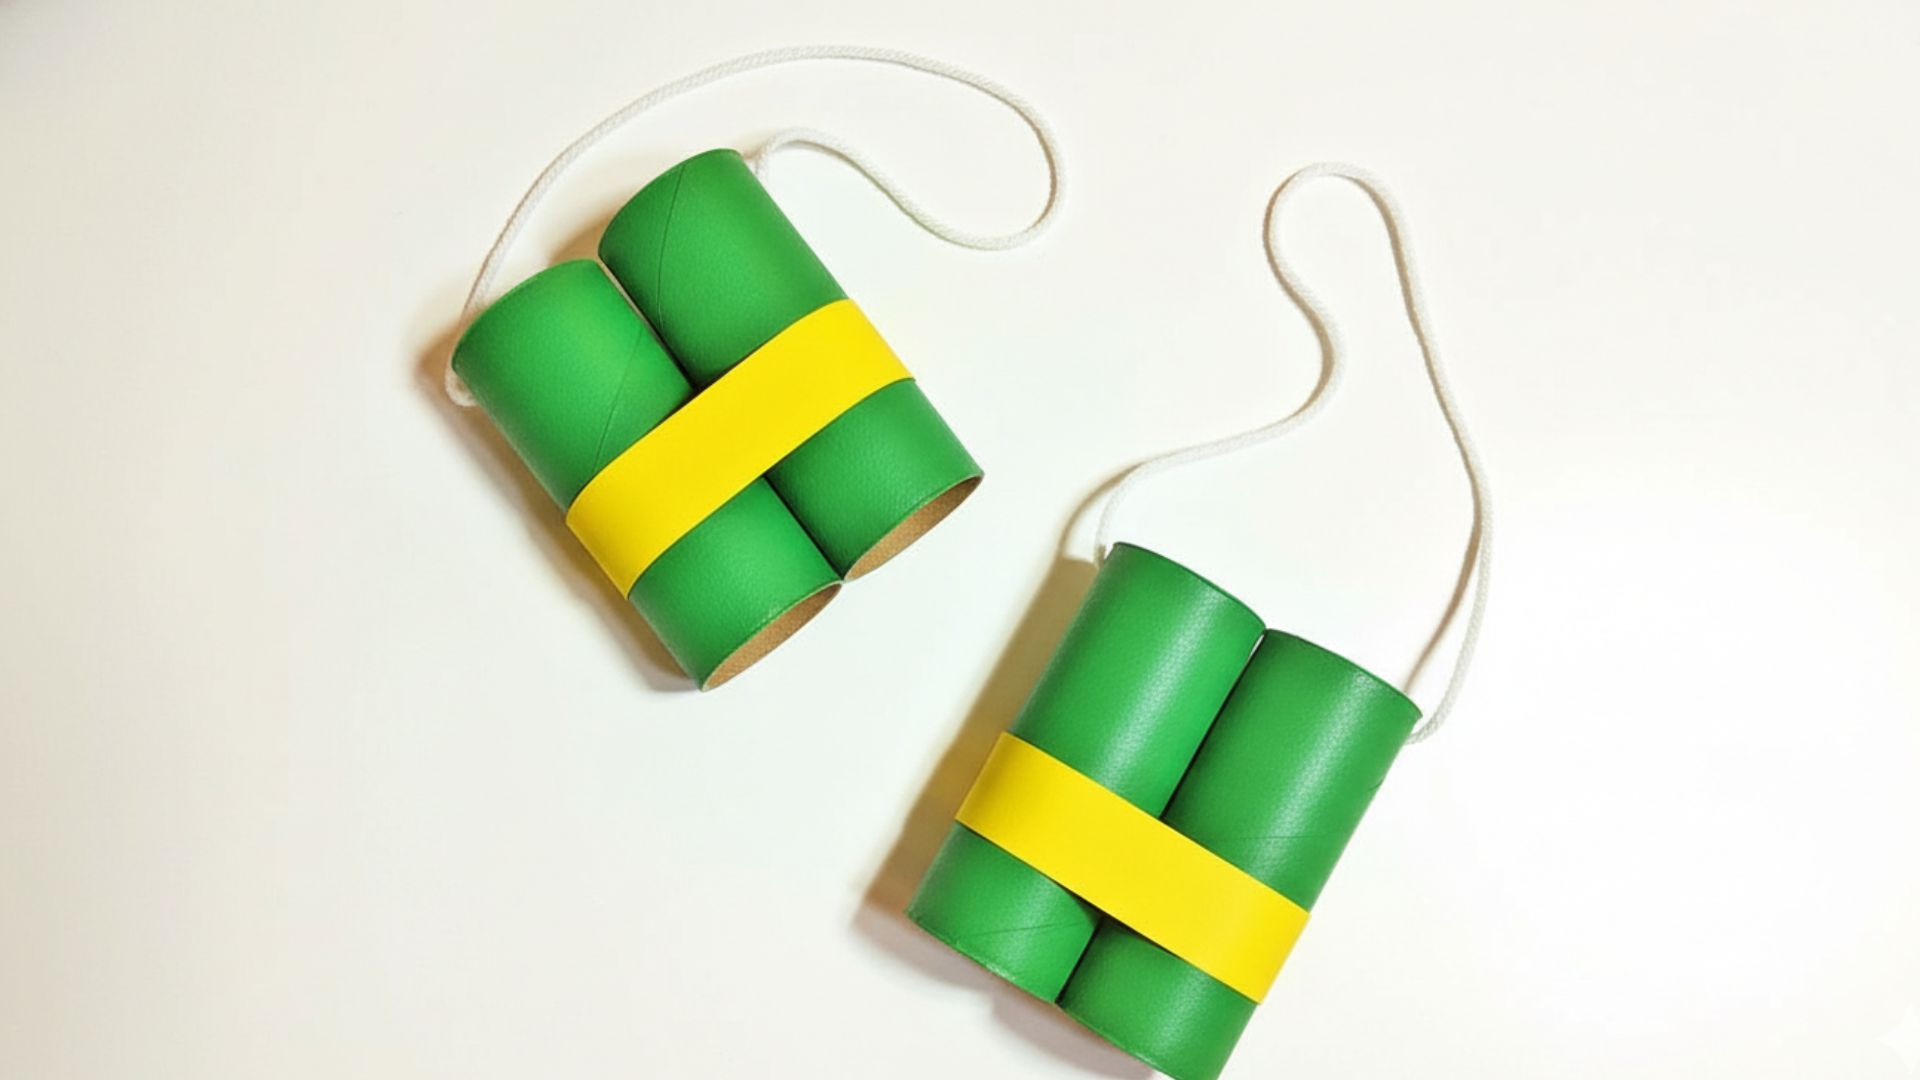
Transform toilet paper rolls into adventure-ready binoculars. This recycling craft encourages imaginative play and outdoor exploration.
Supplies:
- Two toilet paper rolls
- Paint or markers
- String or yarn
- Tape or glue
- Stickers for decoration
- Hole punch
Steps:
- Paint or color both toilet paper rolls
- Glue rolls together side by side
- Punch holes in the outer edges
- Thread the string through the holes for the neck strap
- Decorate with stickers and go exploring
6. Button Art
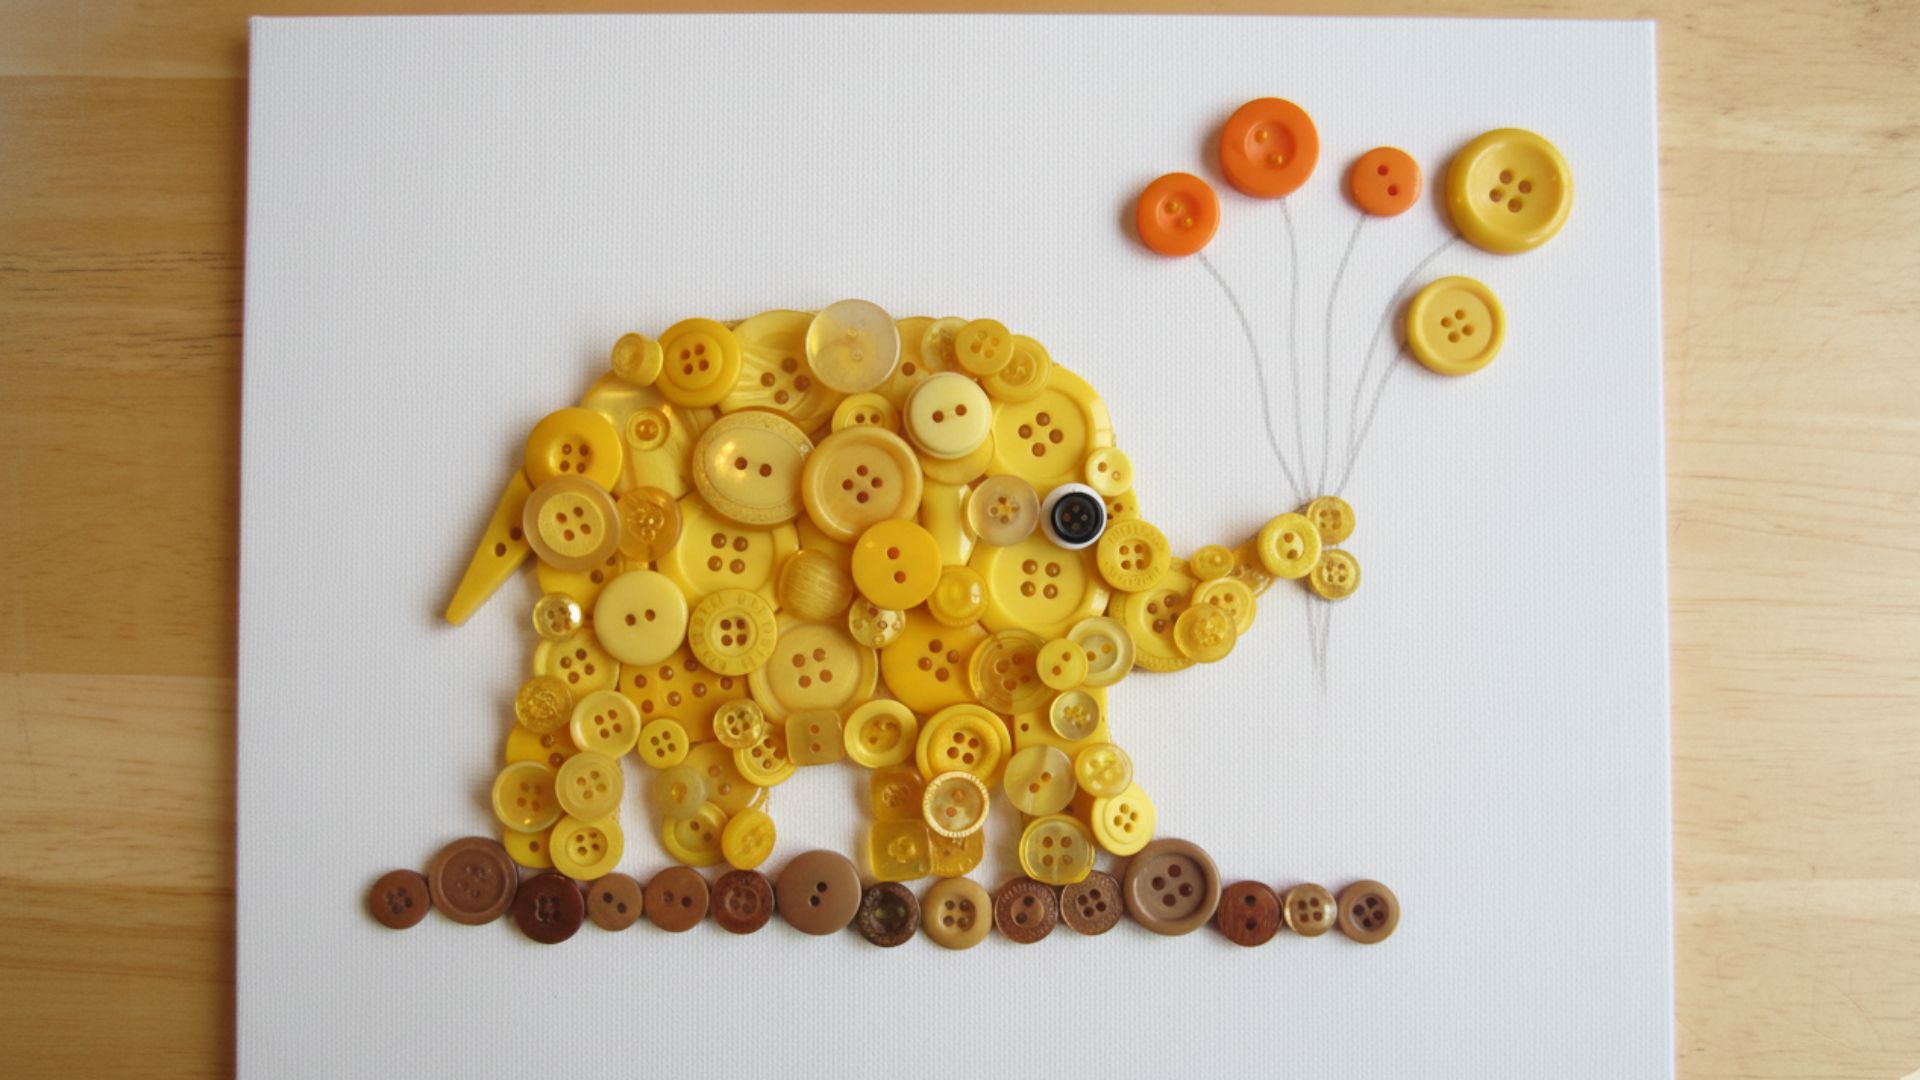
Create colorful pictures using buttons of various sizes and colors. This craft improves fine motor skills and teaches color sorting and pattern recognition.
Supplies:
- Assorted buttons
- Cardstock or canvas
- White glue
- Pencil for sketching
- Optional frame
Steps:
- Sketch a simple design on cardstock
- Sort buttons by color and size
- Apply glue to small sections at a time
- Press buttons onto the glue following the design
- Let dry overnight before displaying
7. Nature Collages
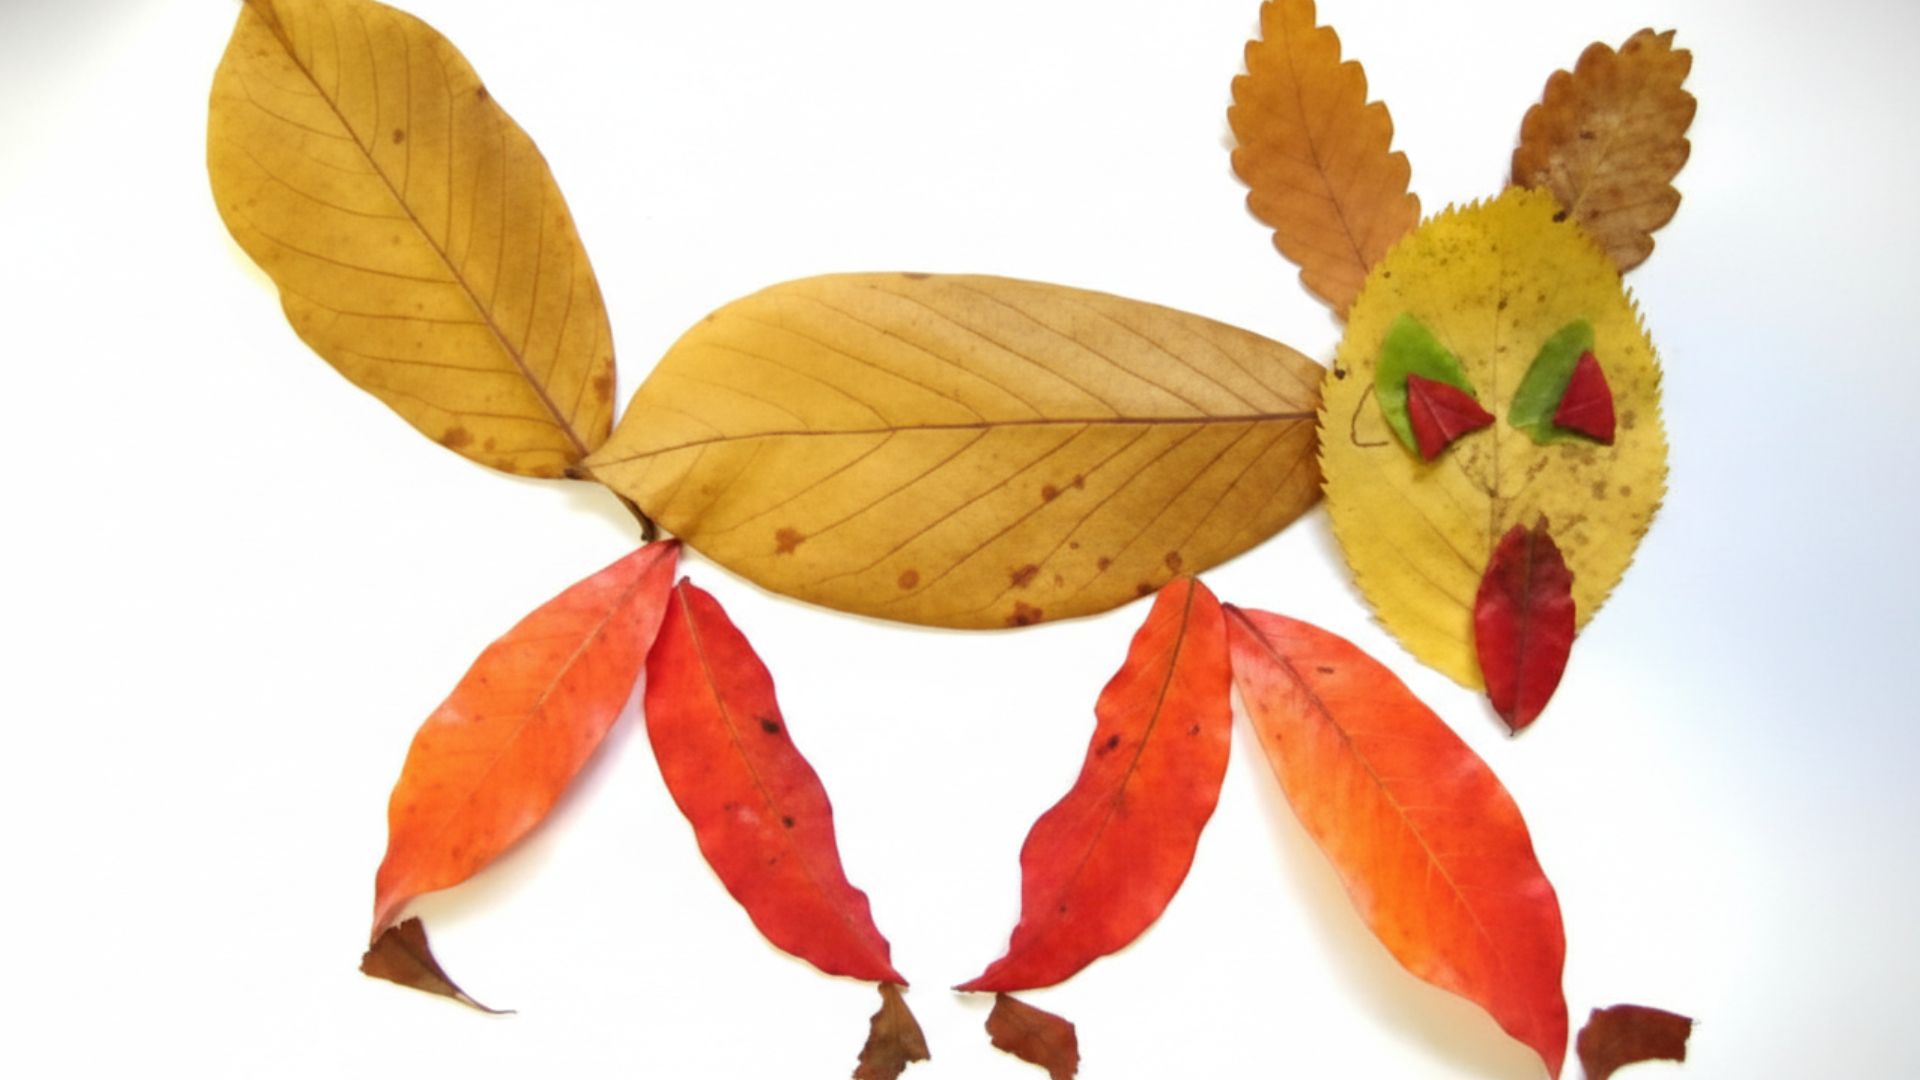
Bring the outdoors inside by creating artwork with leaves, flowers, and twigs. This craft combines a nature walk with creative expression.
Supplies:
- Collected nature items like leaves and flowers
- Cardboard or poster board
- White glue
- Clear contact paper for preservation
- Markers for adding details
Steps:
- Take a nature walk and collect interesting items
- Arrange items on cardboard in a pleasing design
- Glue each piece down carefully
- Add drawn details with markers if desired
- Cover with contact paper to preserve
8. Sock Puppets
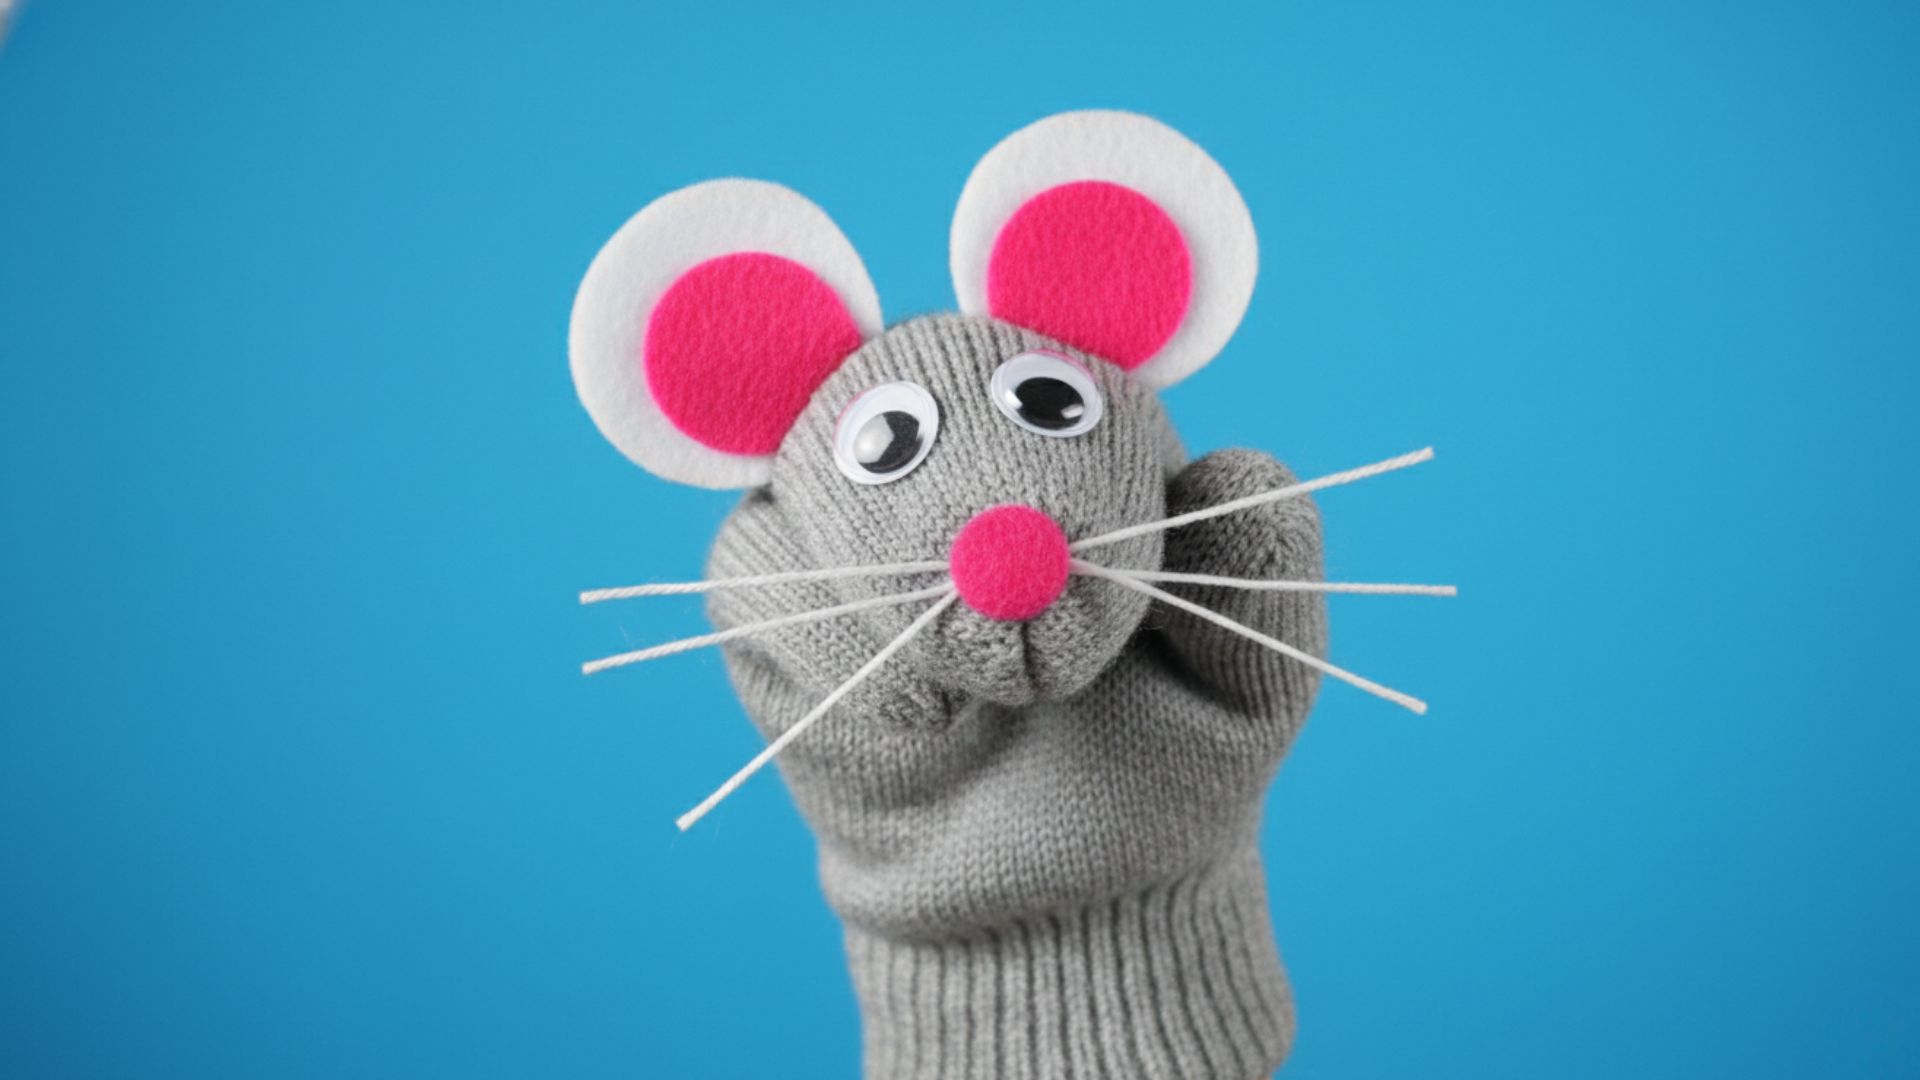
Give lonely socks new life as adorable puppet friends. This craft sparks storytelling and dramatic play while teaching basic sewing concepts.
Supplies:
- Clean socks
- Googly eyes
- Felt scraps
- Fabric glue
- Yarn for hair
- Buttons for decoration
Steps:
- Choose a sock and decide on a character design
- Glue googly eyes near the toe area
- Cut felt pieces for ears, nose, or mouth
- Attach yarn for hair if desired
- Let dry, then put on puppet shows
9. Rainbow Pasta Necklaces
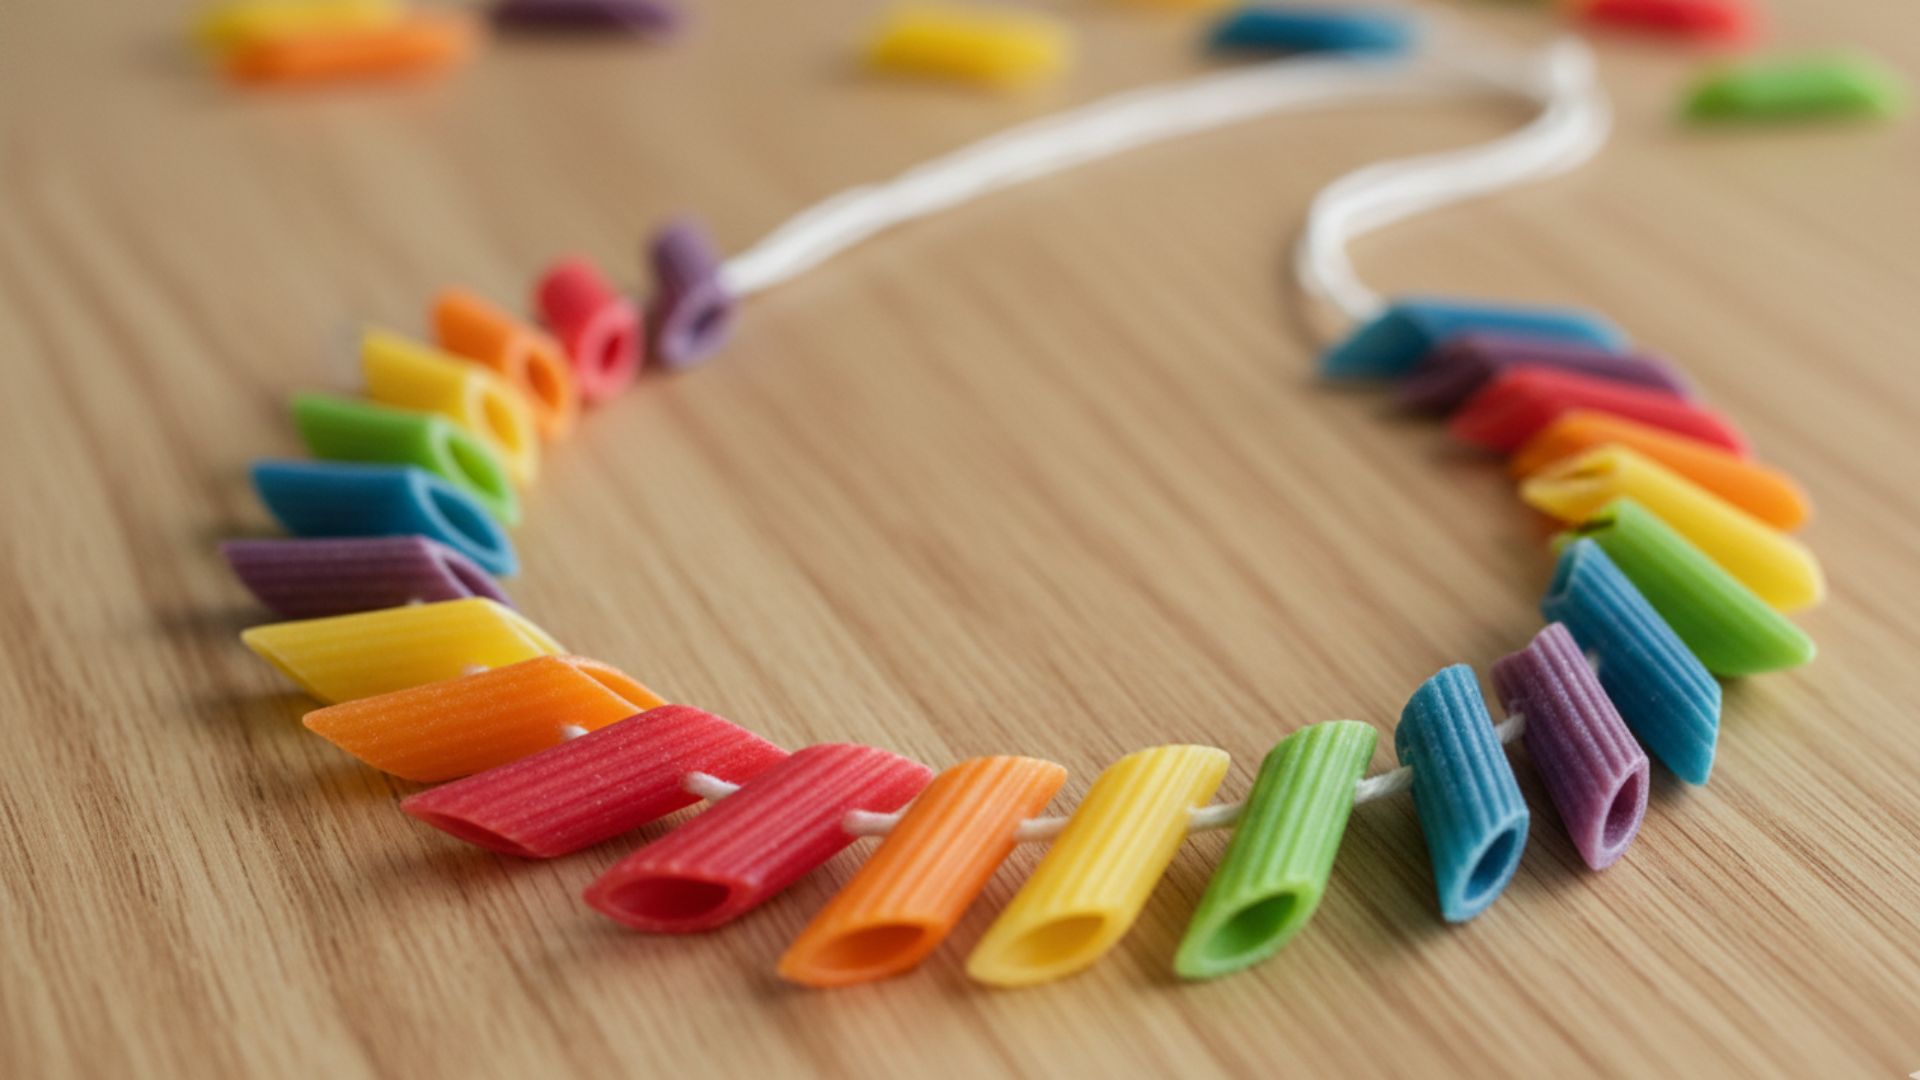
Dye pasta in rainbow colors to create wearable art. This craft teaches patterning and sequencing while developing hand-eye coordination.
Supplies:
- Uncooked pasta with holes
- Food coloring
- Rubbing alcohol
- String or elastic cord
- Ziplock bags for dyeing
Steps:
- Mix food coloring with rubbing alcohol in bags
- Add pasta to each color and shake
- Spread on paper towels to dry completely
- Thread pasta onto a string in desired patterns
- Tie ends together to complete the necklace
10. Paper Bag Puppets
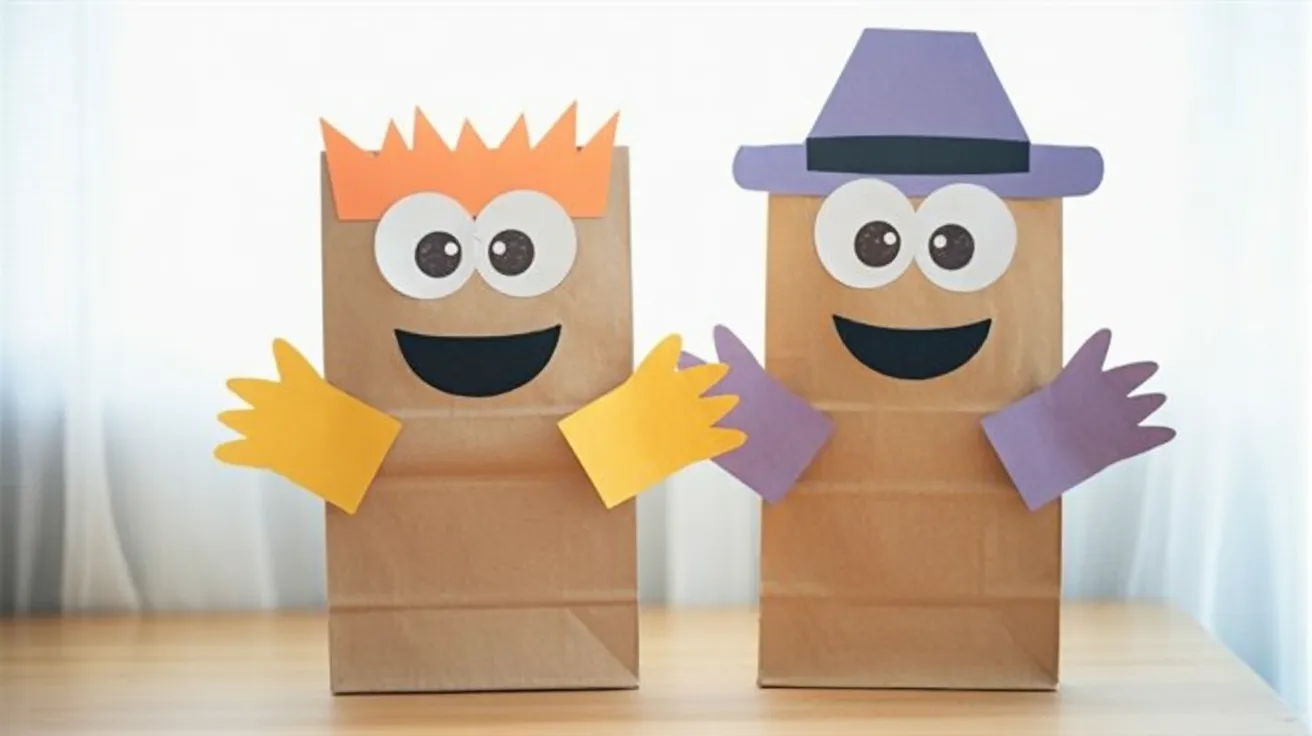
Simple paper bags transform into expressive puppet characters. This budget-friendly craft provides endless entertainment through imaginative storytelling.
Supplies:
- Brown paper lunch bags
- Construction paper
- Markers or crayons
- Glue stick
- Scissors
- Googly eyes
Steps:
- Keep the bag folded with the bottom flap as puppet’s mouth
- Cut and glue paper features onto the bag
- Add googly eyes above the fold
- Draw details like teeth inside the mouth
- Create multiple puppets for performances
11. Rock Painting
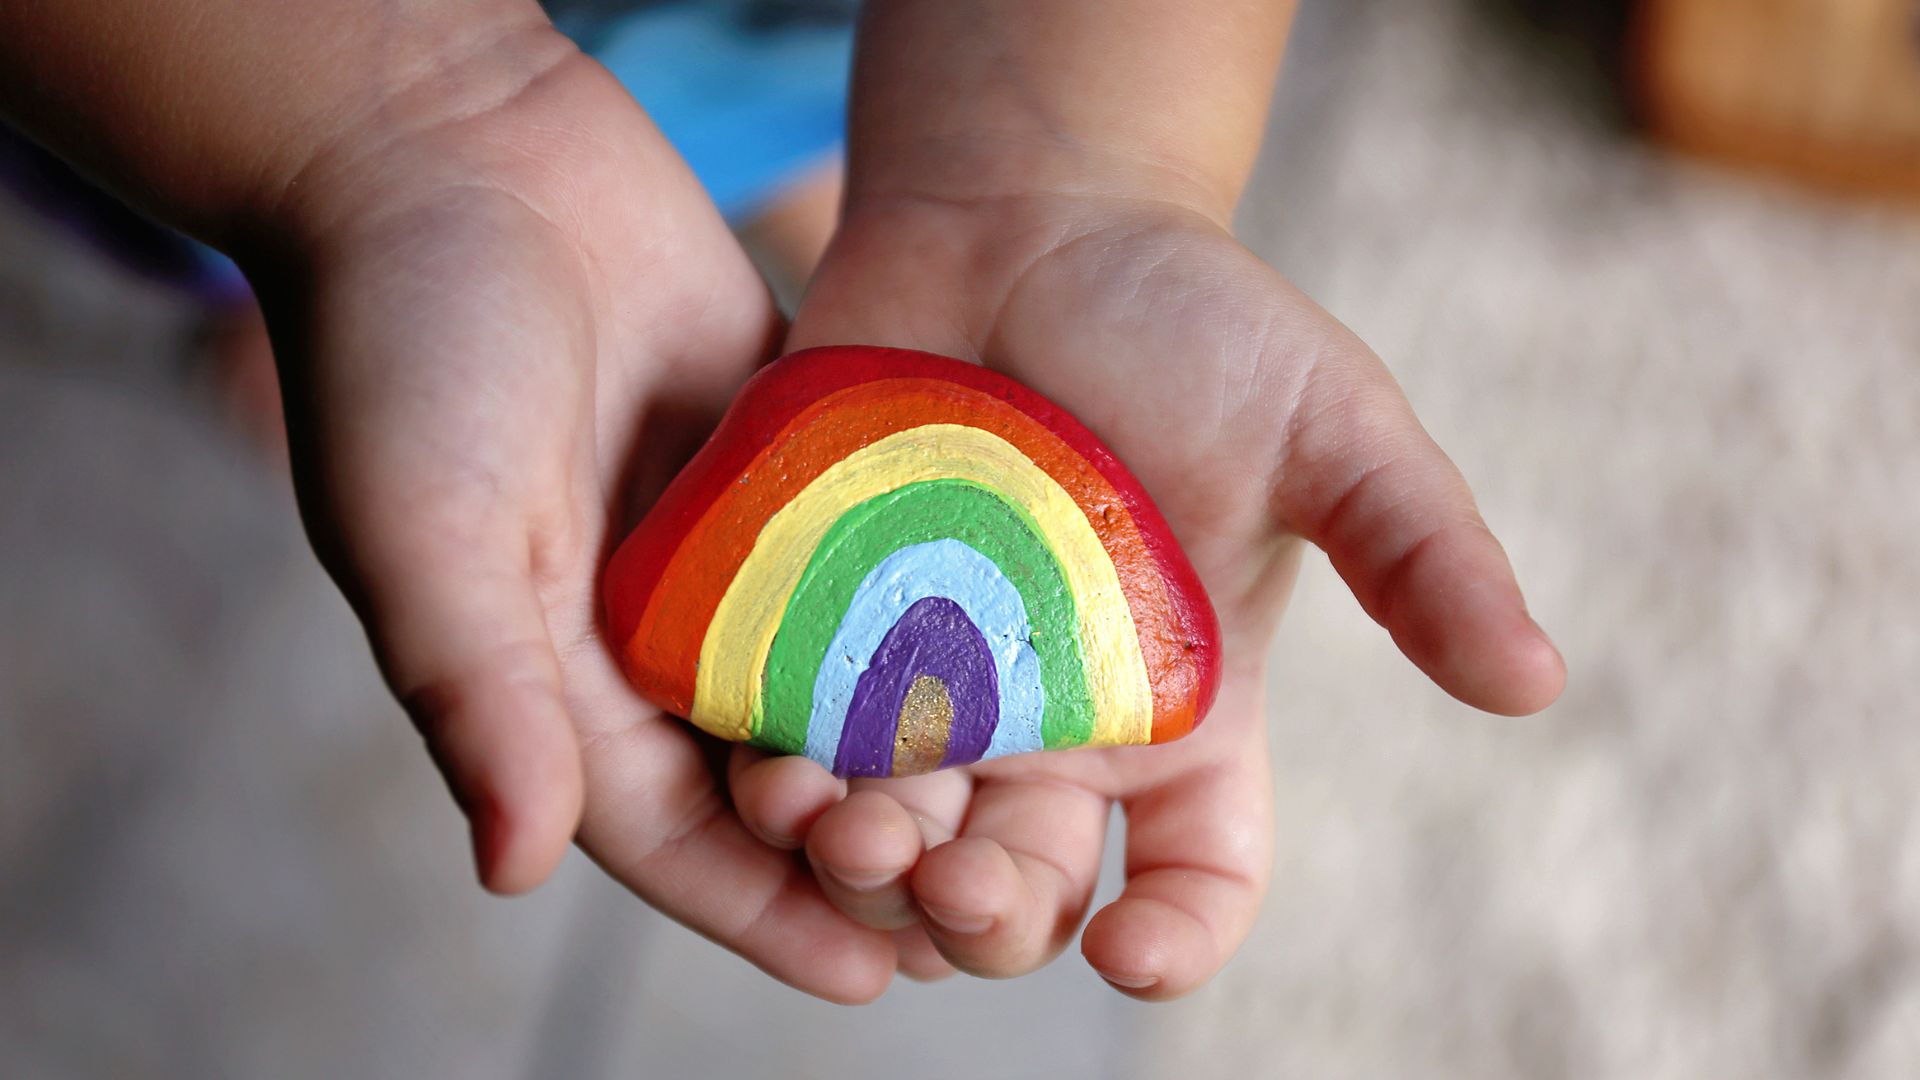
Turn ordinary stones into miniature works of art. Painted rocks can become paperweights, garden decorations, or kindness rocks to hide in the community.
Supplies:
- Smooth rocks or stones
- Acrylic paint
- Paintbrushes in various sizes
- Sealer spray or Mod Podge
- Pencil for sketching
Steps:
- Wash and dry rocks thoroughly
- Sketch design lightly with a pencil
- Paint the base coat and let it dry
- Add details and patterns with smaller brushes
- Seal with clear coat when completely dry
12. Coffee Filter Butterflies
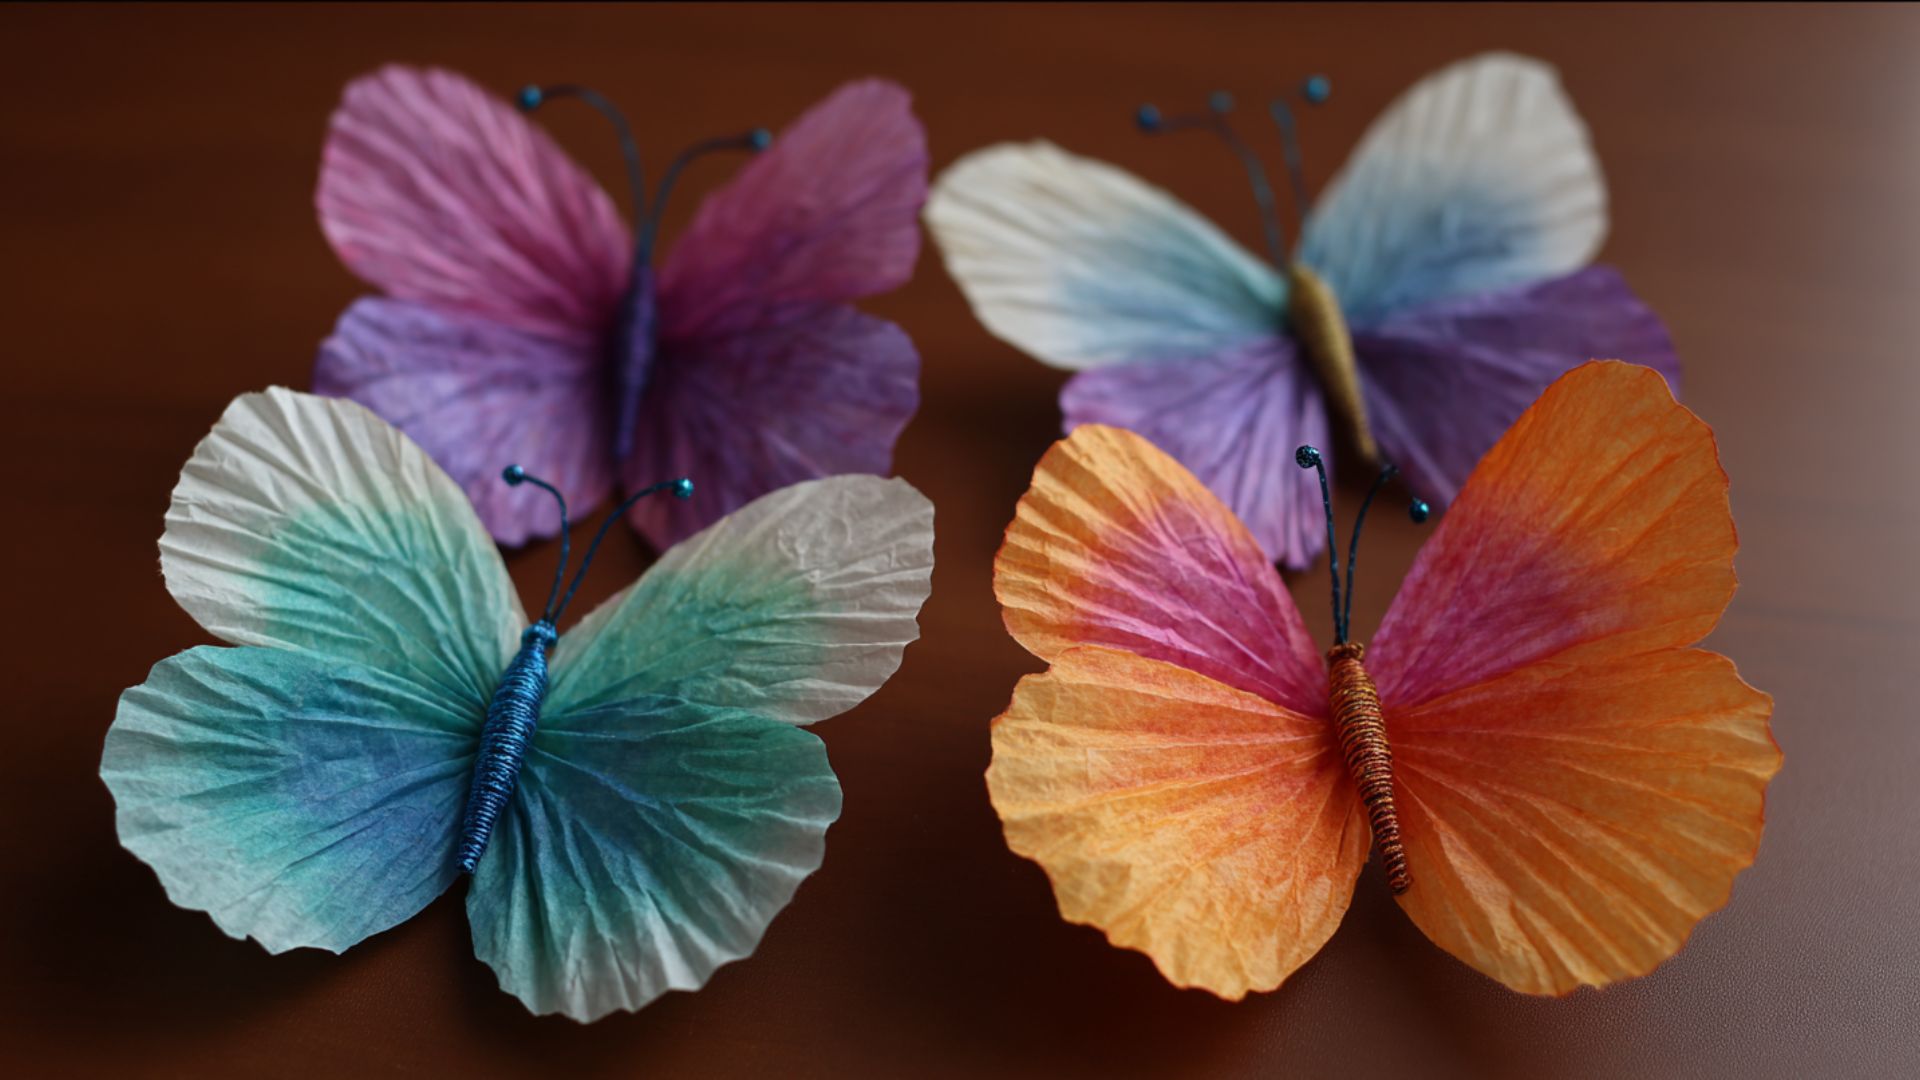
Create delicate butterflies using coffee filters and watercolors. This craft explores color mixing and symmetry while producing beautiful window decorations.
Supplies:
- White coffee filters
- Washable markers or watercolors
- Spray bottle with water
- Pipe cleaners
- Clothespins
Steps:
- Color the coffee filter with markers or paint
- Spray lightly with water to blend colors
- Let dry completely
- Pinch the center and secure with a pipe cleaner
- Shape pipe cleaner ends into antennae
13. Tissue Paper Suncatchers
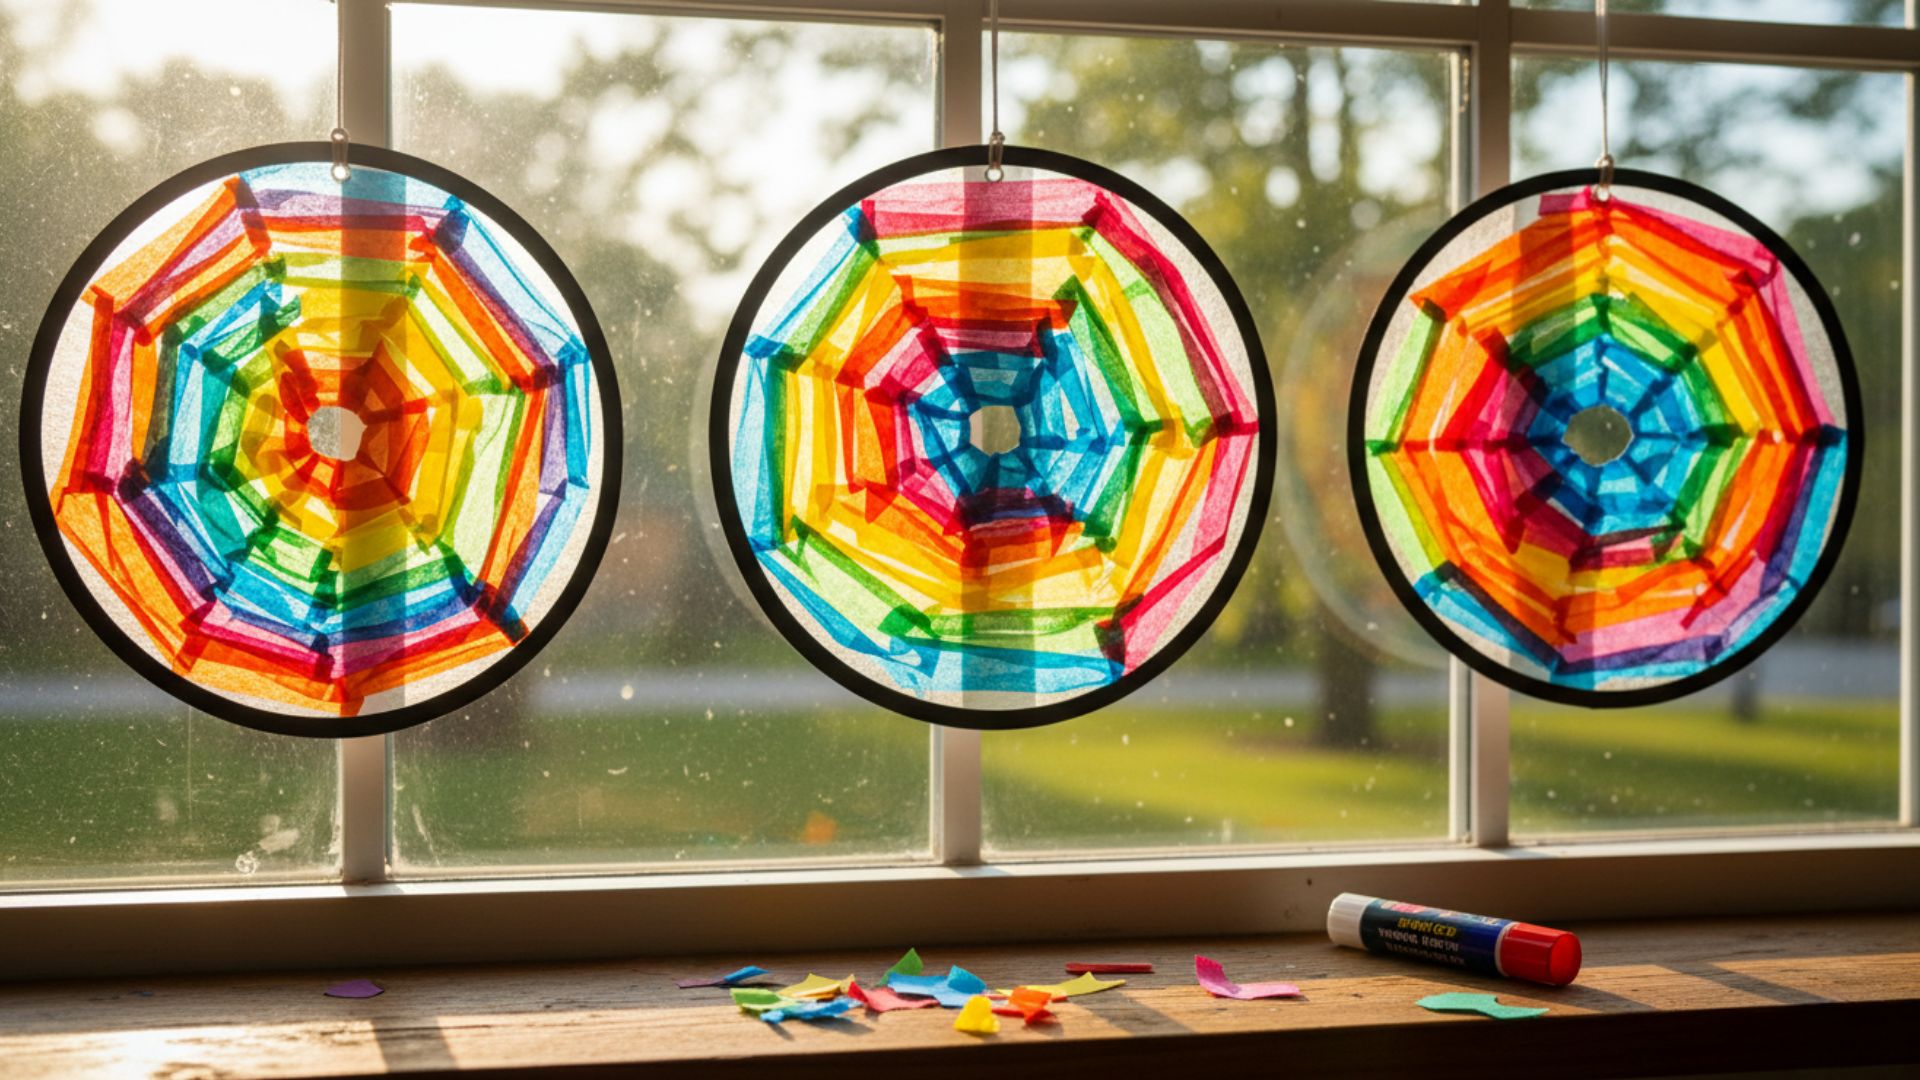
Make colorful window decorations that glow when sunlight shines through. This craft teaches layering techniques and basic color theory.
Supplies:
- Contact paper
- Tissue paper in various colors
- Scissors
- Black construction paper for frames
- String for hanging
Steps:
- Cut the contact paper into the desired shape
- Peel the backing and place the sticky side up
- Let kids stick tissue paper pieces onto contact paper
- Cover with the second piece of contact paper
- Add a black paper frame and string for hanging
14. Tin Can Pencil Holders
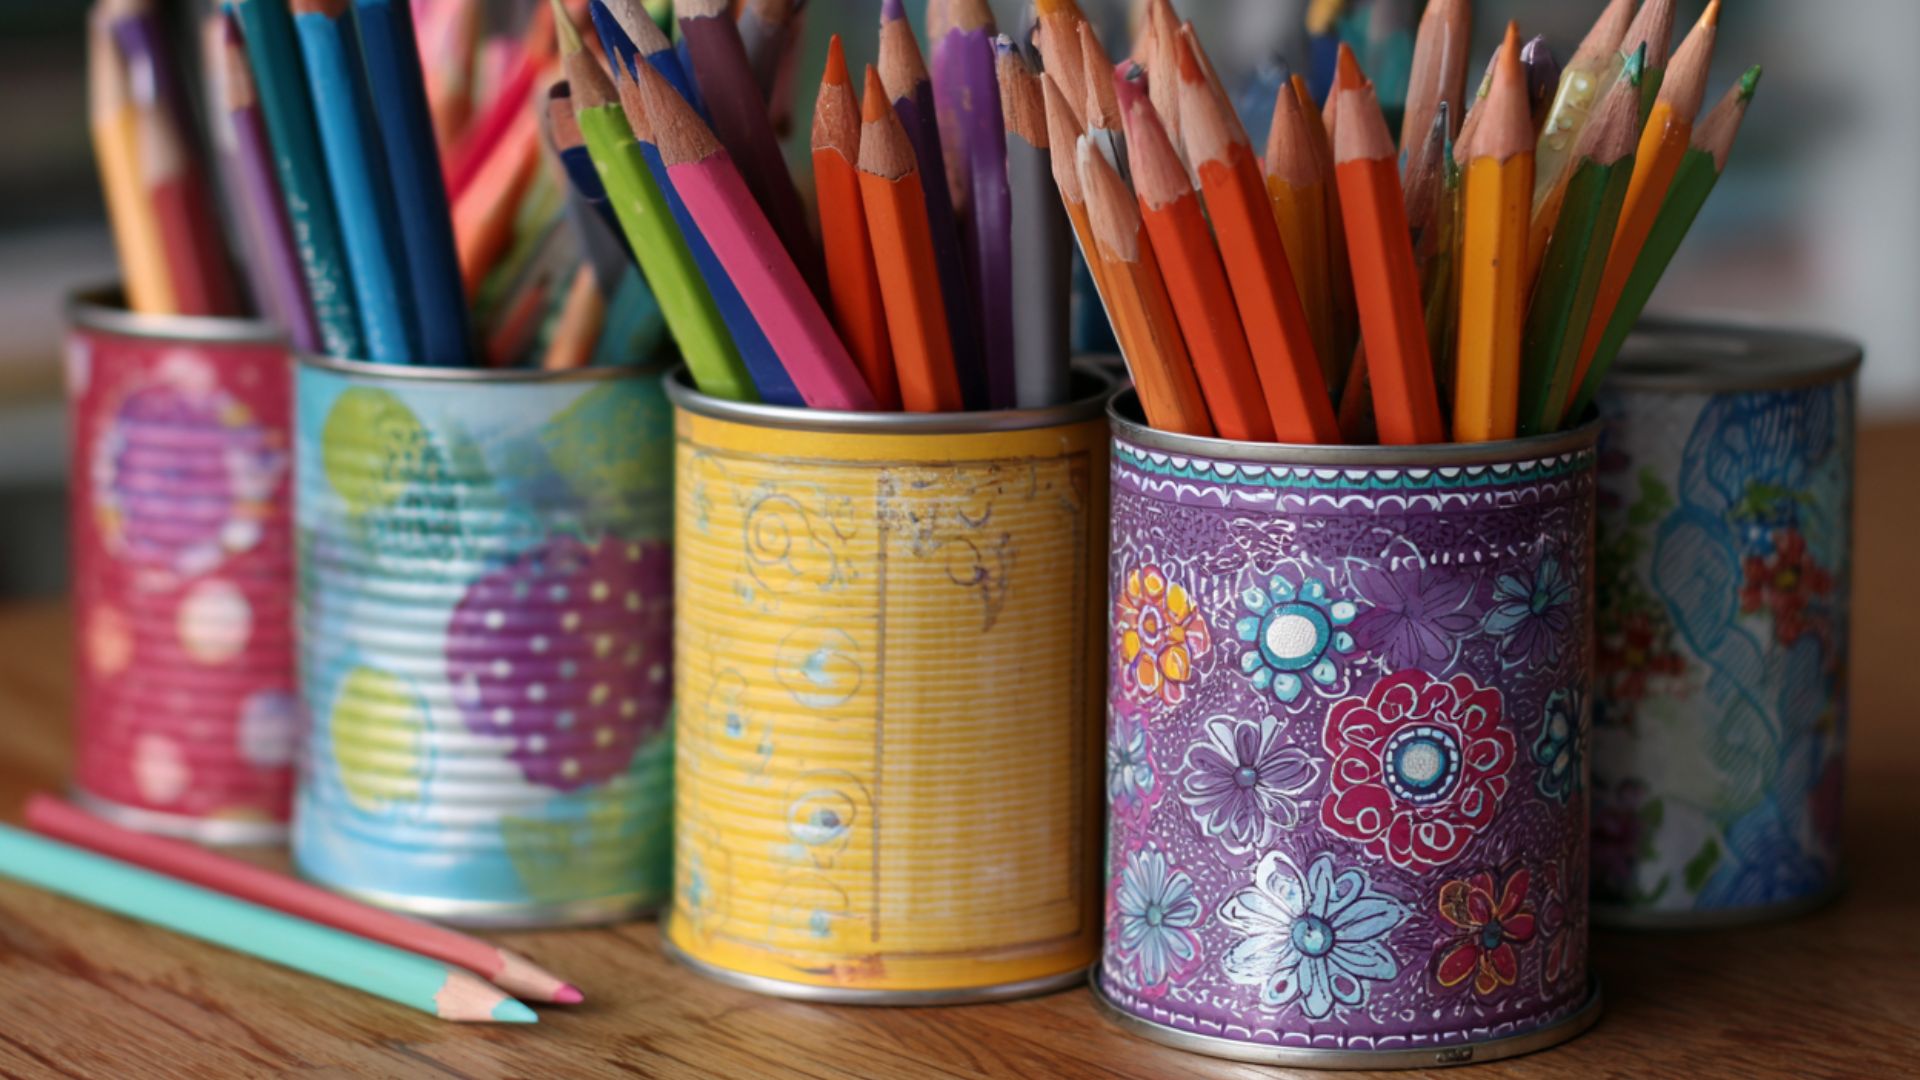
Transform empty cans into decorated desk organizers. This upcycling project teaches resourcefulness while creating functional items for homework or art supplies.
Supplies:
- Clean, empty tin cans
- Decorative paper or paint
- Glue or Mod Podge
- Ribbon or trim
- Stickers or embellishments
Steps:
- Remove labels and wash cans thoroughly
- Cover can with paper using glue or paint directly
- Add decorative ribbon around top edge
- Embellish with stickers or other decorations
- Fill with pencils, markers, or paintbrushes
15. Playdough Creations
Mix up homemade playdough for hours of open-ended creative play. This sensory activity strengthens hand muscles while encouraging imagination and storytelling.
Supplies:
- Two cups of flour
- Two cups of warm water
- One cup of salt
- Two tablespoons of vegetable oil
- Food coloring
- One tablespoon of cream of tartar
Steps:
- Mix all ingredients in a pot
- Cook over medium heat, stirring constantly
- Remove when the dough pulls away from the sides
- Knead when cool enough to handle
- Store in an airtight container between play sessions
16. Paper Chain Garlands

Create colorful decorations for parties or room decor. This simple craft teaches measuring, sequencing, and pattern creation.
Supplies:
- Construction paper in various colors
- Scissors
- Glue or tape
- A ruler for measuring
- Pencil
Steps:
- Cut paper into strips about one inch wide
- Form the first strip into a circle and glue the ends
- Thread the next strip through the first circle before gluing
- Continue adding links in the desired color pattern
- Hang the finished garland as decoration
17. Cupcake Liner Flowers
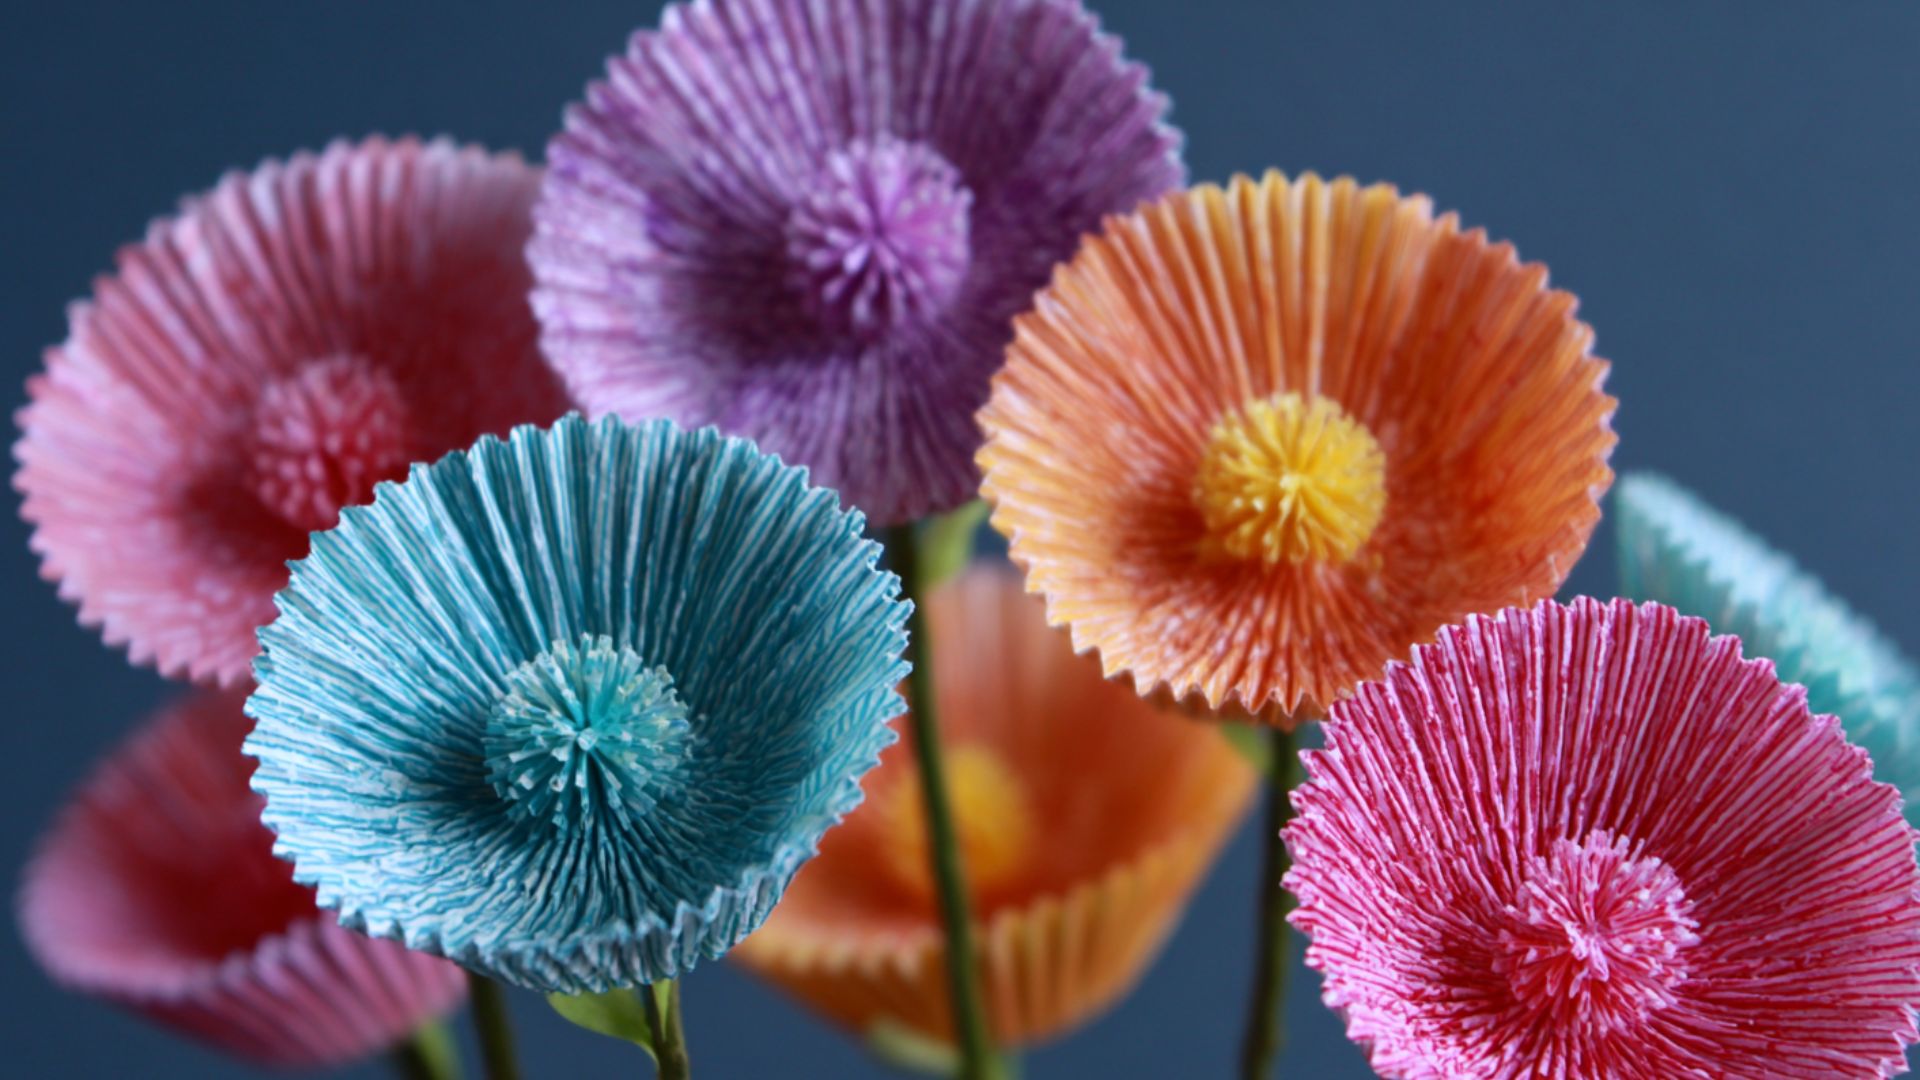
Make a bouquet that never wilts using colorful cupcake liners. This craft is perfect for Mother’s Day, teacher gifts, or brightening up any room.
Supplies:
- Cupcake liners in various colors
- Green pipe cleaners
- Buttons
- Glue
- Scissors
- Small vase or jar
Steps:
- Stack two or three cupcake liners together
- Poke a pipe cleaner through the center
- Glue the button on top to secure
- Bend the pipe cleaner end to prevent slipping
- Arrange multiple flowers in a vase
18. Marble Painting
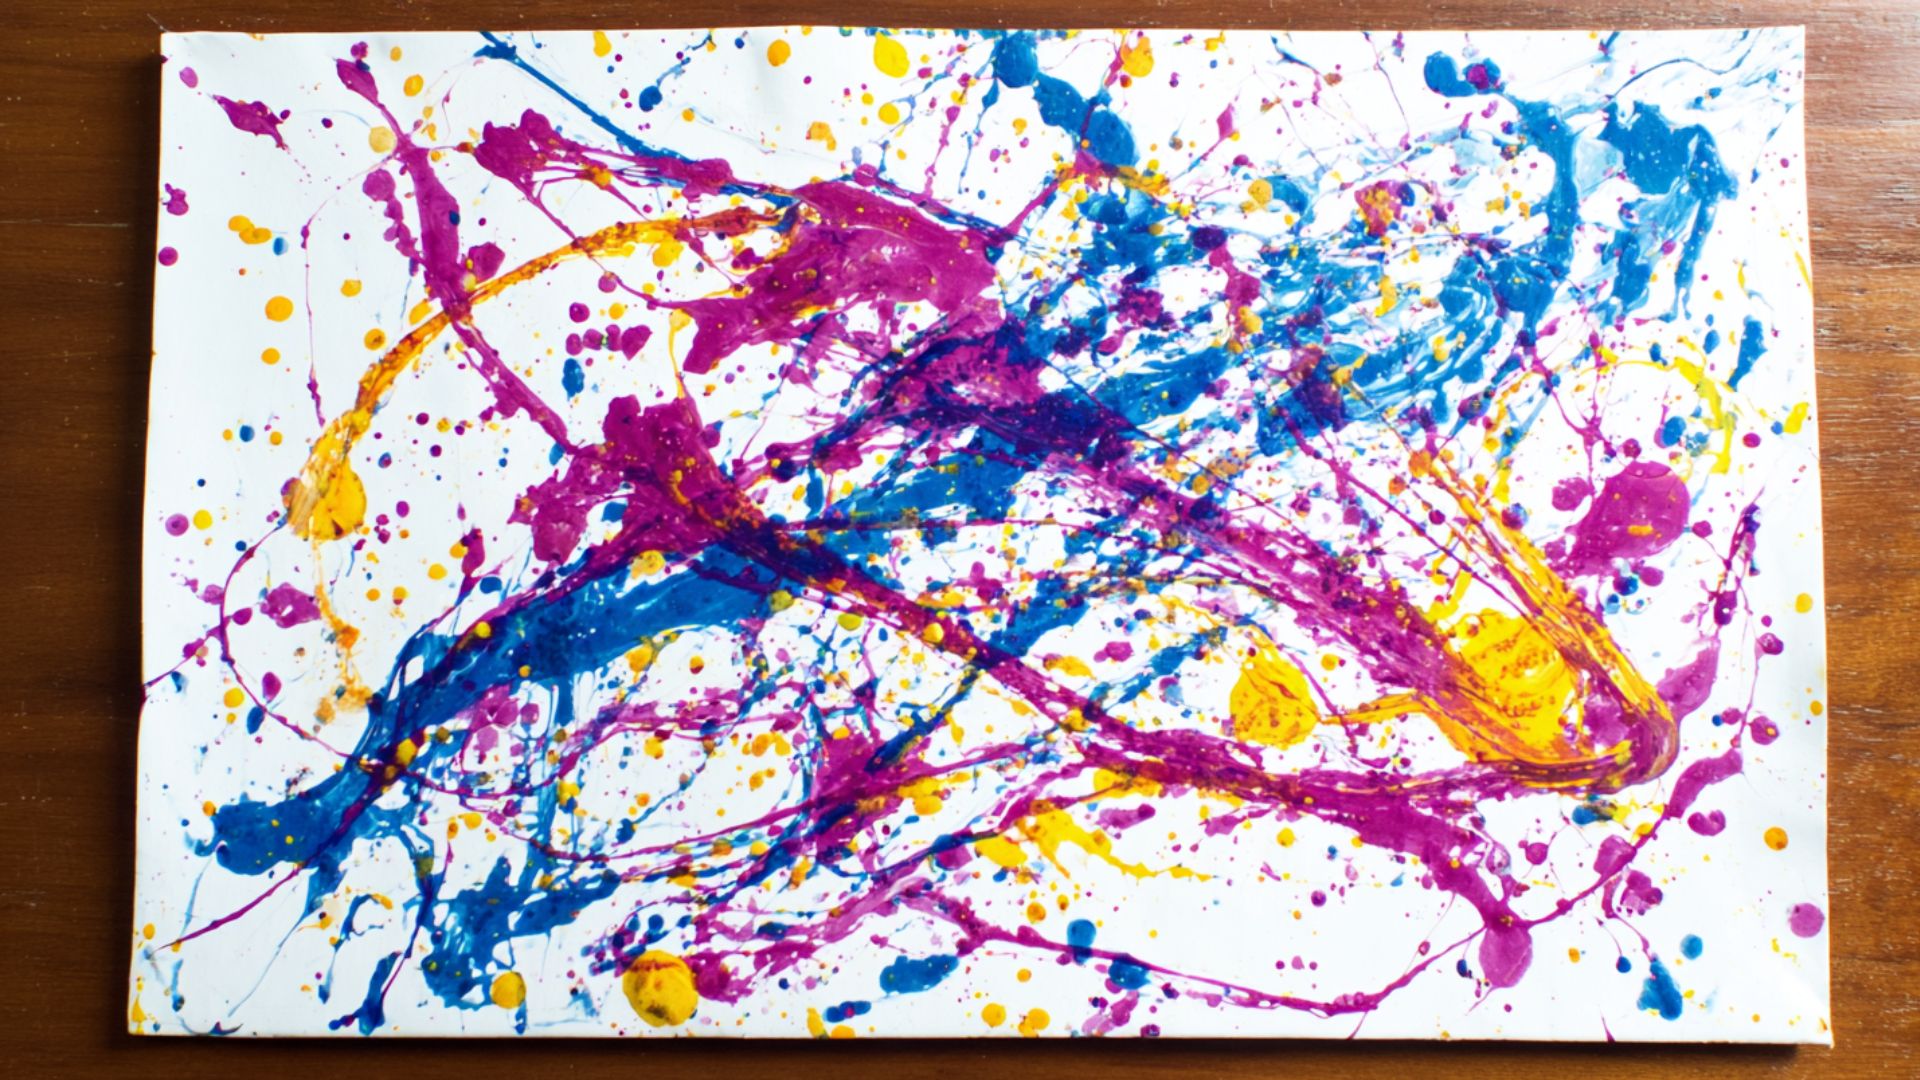
Create abstract art using marbles and paint. This action-based craft produces unpredictable results that fascinate kids while teaching cause and effect.
Supplies:
- Shallow box or baking pan
- Paper cut to fit the box
- Washable paint
- Marbles
- Spoons
- Apron or old clothes
Steps:
- Place paper in the bottom of the box
- Drop small paint dollops onto paper
- Add marbles to the box
- Tilt and shake the box to roll marbles through the paint
- Remove the paper carefully and let it dry
19. Yarn Wrapped Letters
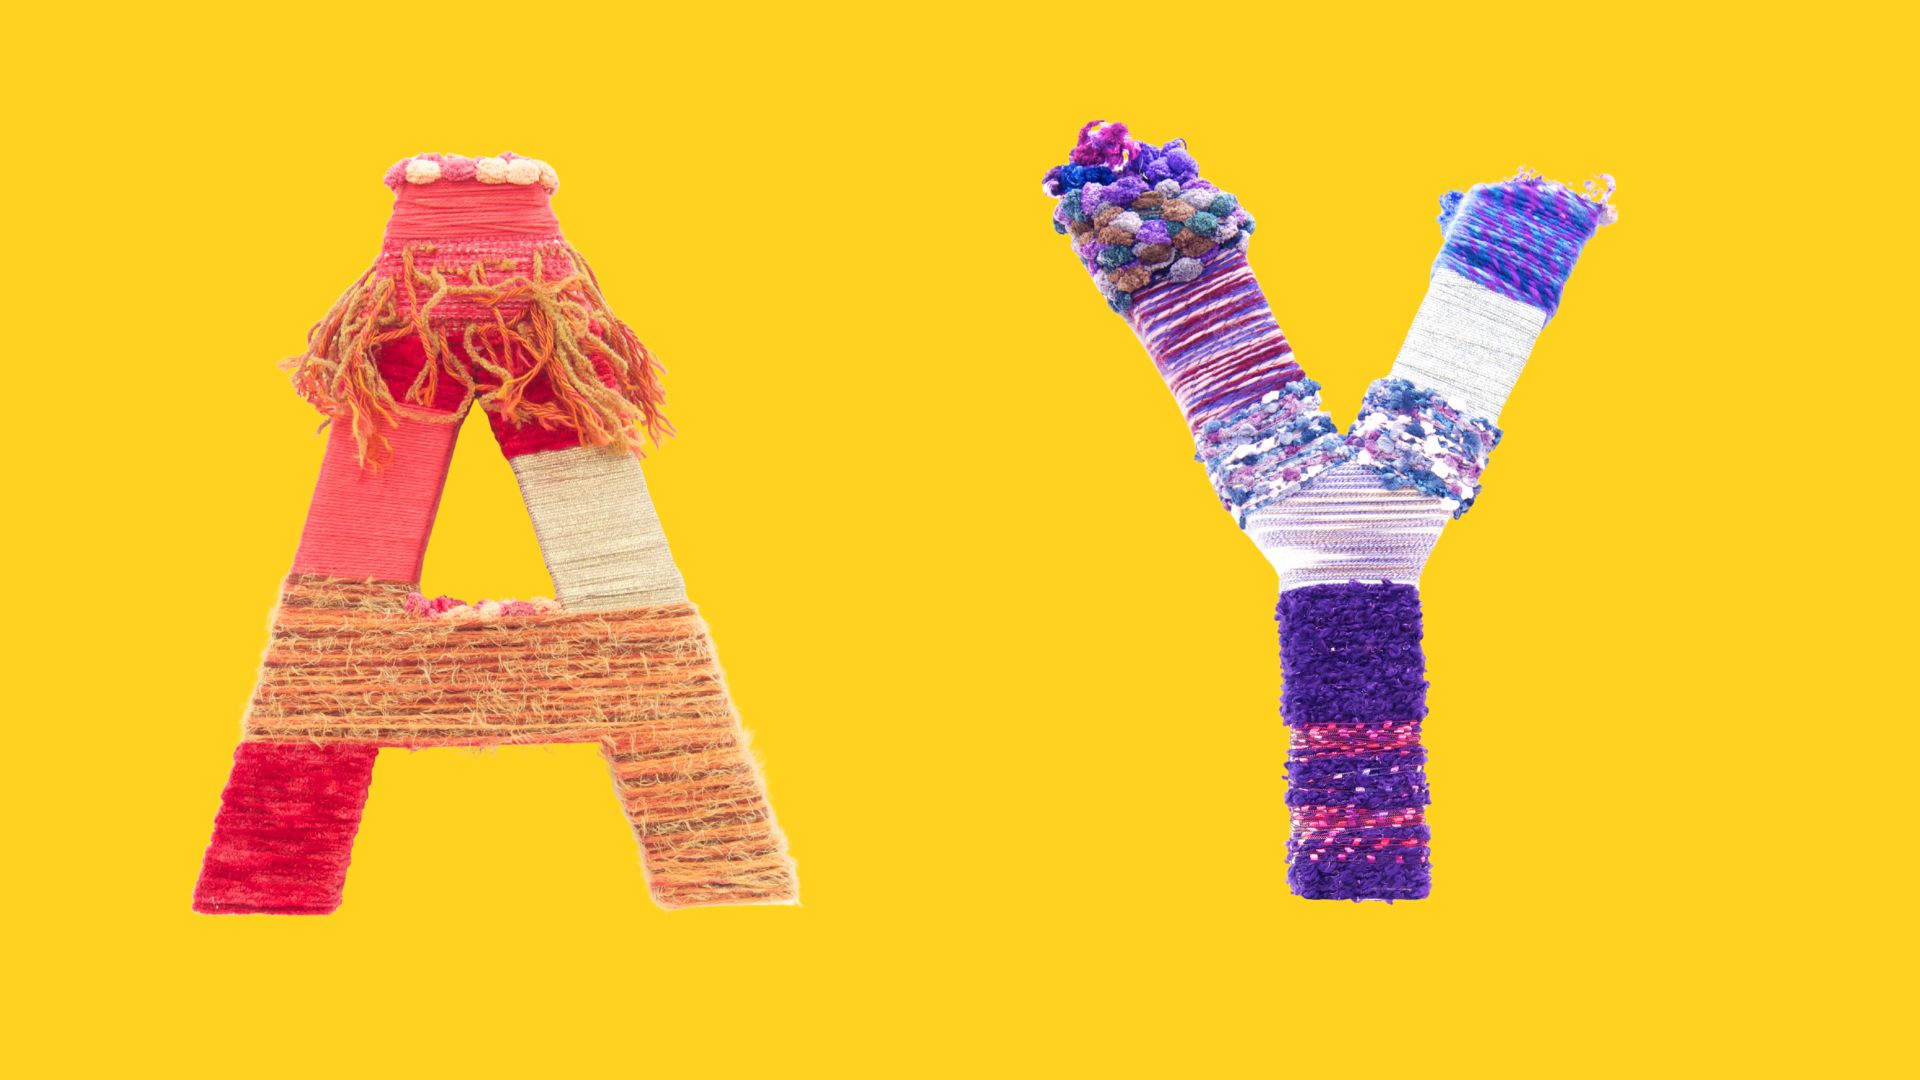
Personalize bedroom decor with colorful yarn-wrapped initials. This craft improves fine motor skills and teaches letter recognition.
Supplies:
- Cardboard letters from a craft store
- Yarn in favorite colors
- White glue
- Scissors
- Optional embellishments
Steps:
- Apply glue to a small section of the letter
- Begin wrapping yarn tightly around the letter
- Continue gluing and wrapping until the letter is covered
- Secure the end with extra glue
- Add decorations if desired
20. Plastic Bottle Planters
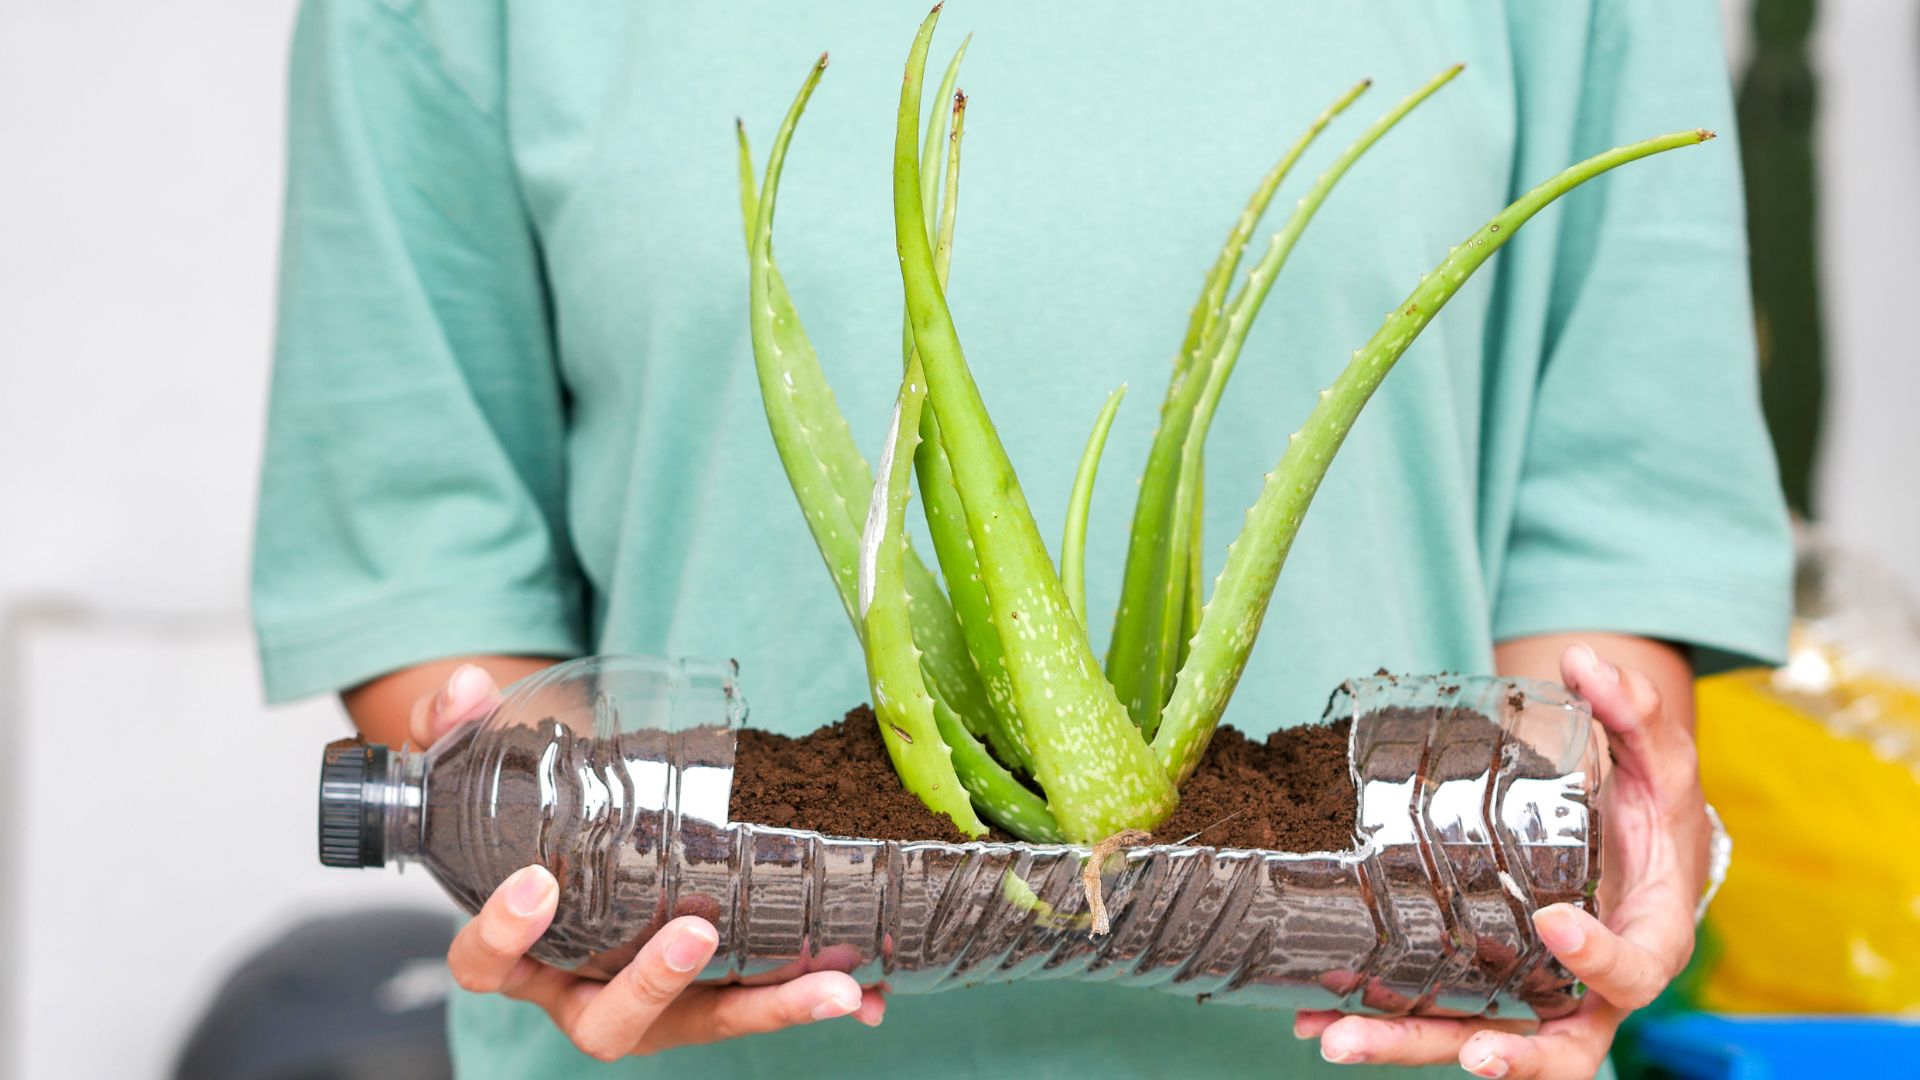
Give plastic bottles a second life as hanging planters. This eco-friendly craft teaches environmental responsibility while creating homes for small plants.
Supplies:
- Clean plastic bottles
- Scissors or craft knife
- Paint or markers
- String for hanging
- Potting soil and small plants
Steps:
- Cut the bottle in half horizontally
- Decorate outside with paint or markers
- Poke drainage holes in the bottom
- Add a string handle to hang
- Fill with soil and plant seeds or small plants
21. Paper Plate Masks
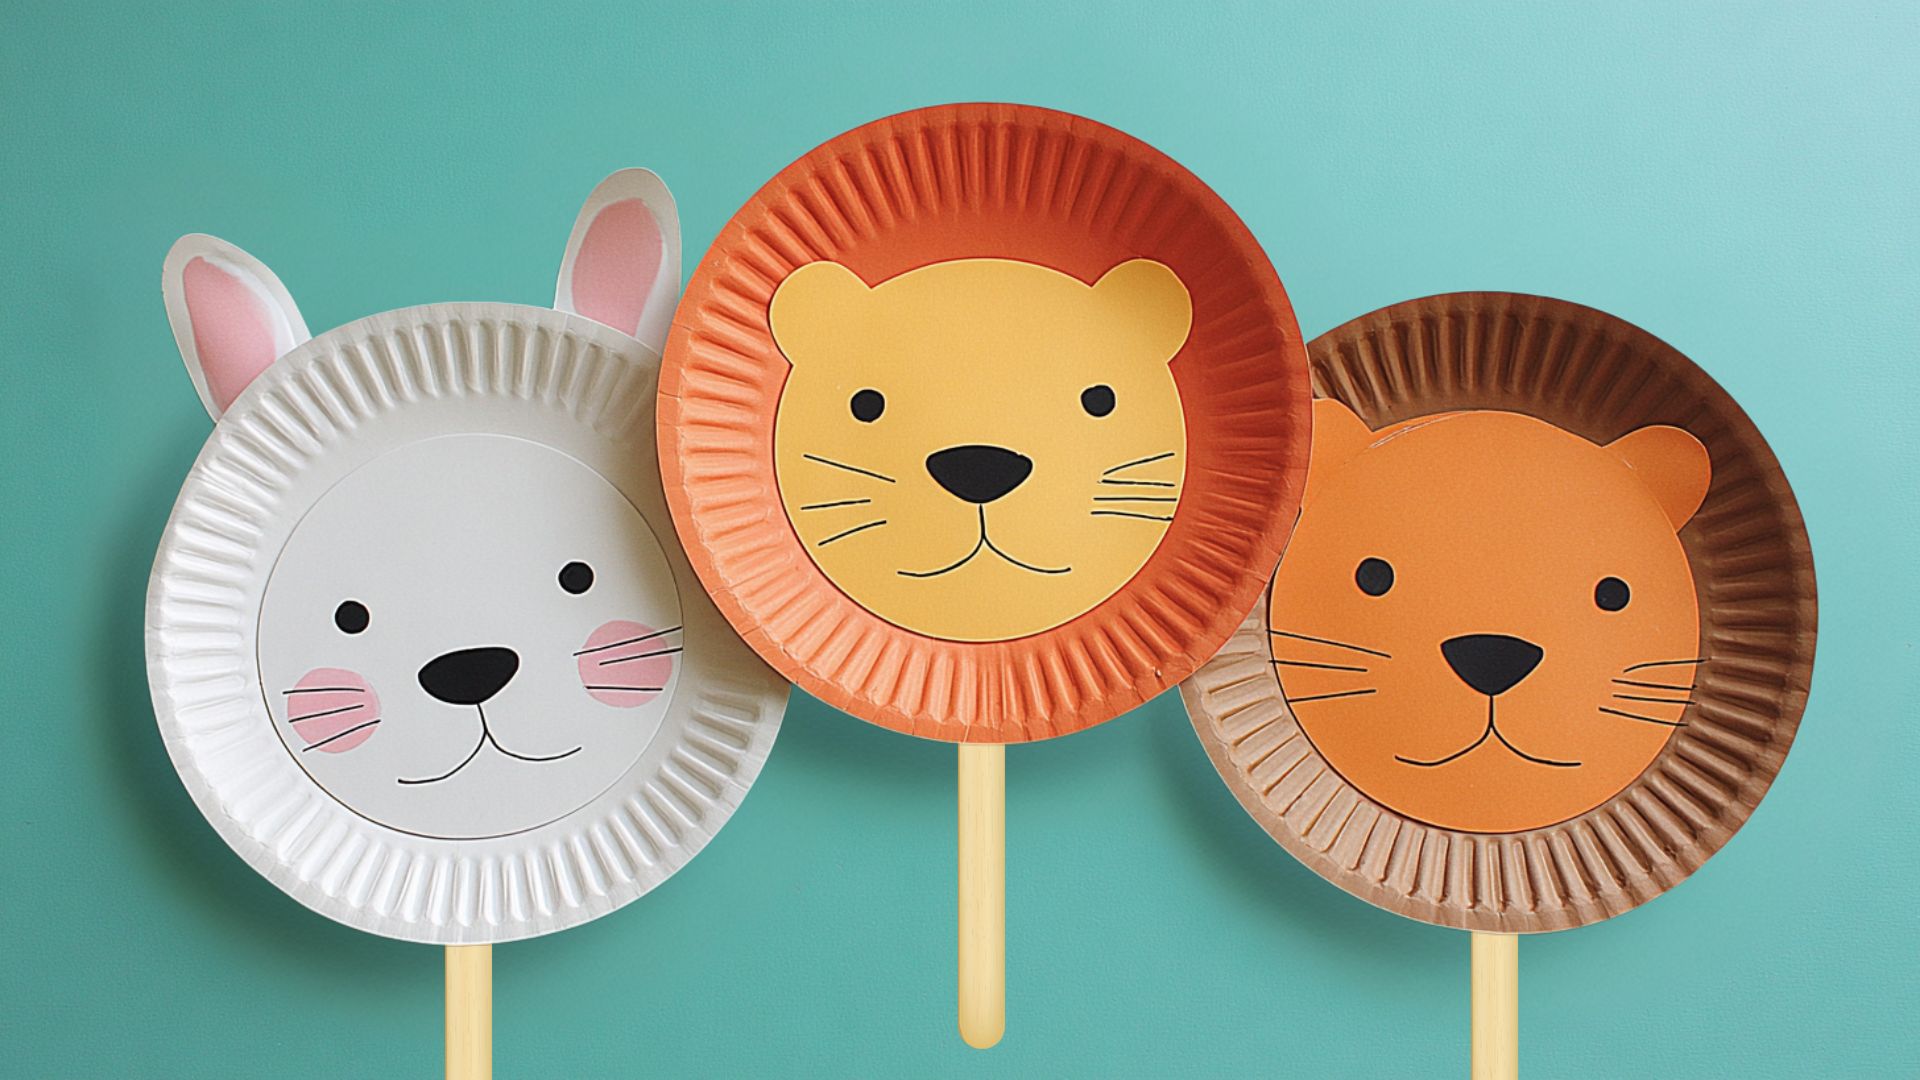
Design wearable masks for imaginative play and dress-up. This craft encourages creativity and storytelling while being simple enough for young children.
Supplies:
- Paper plates
- Paint or markers
- Construction paper
- Elastic string or craft stick
- Scissors
- Glue
Steps:
- Cut eye holes in a paper plate
- Paint or color plate as desired character
- Add construction paper features like ears or a nose
- Attach an elastic string to the sides or glue it to a craft stick
- Wear for pretend play adventures
22. Pom Pom Monsters
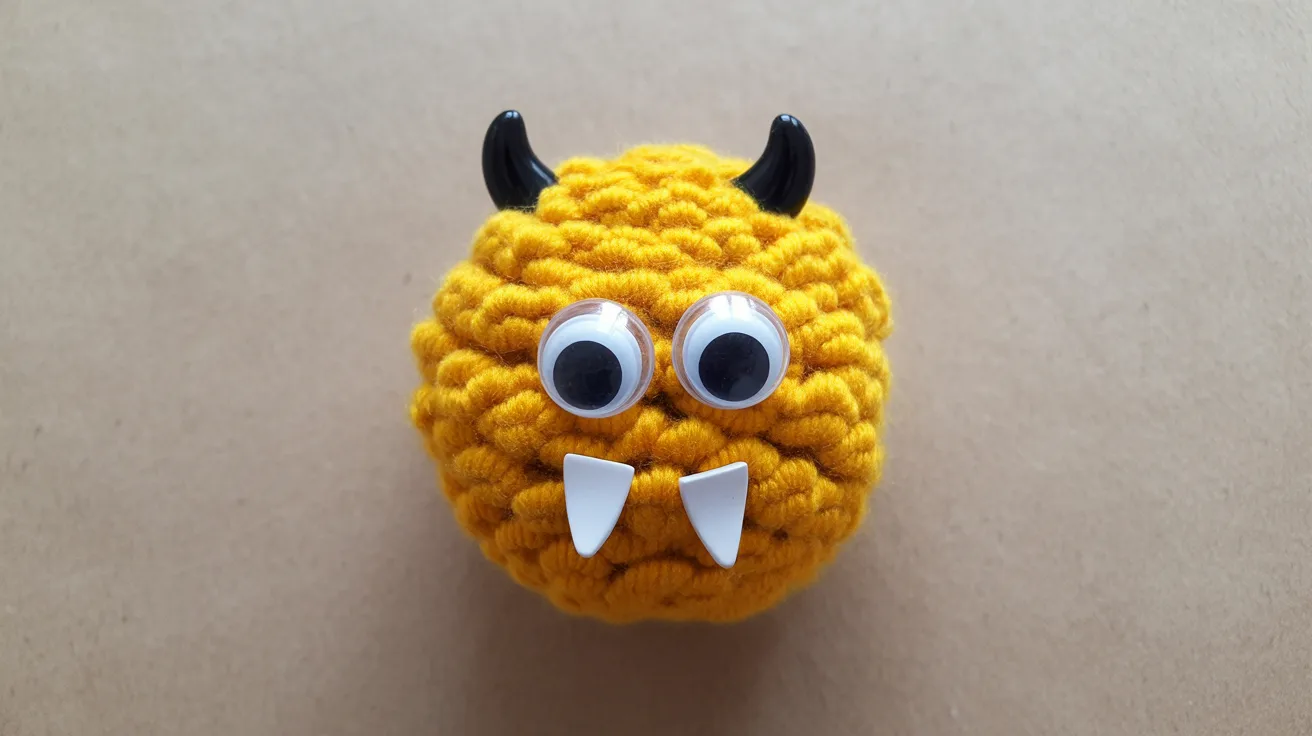
Create fuzzy, friendly monsters from craft pom poms. This no-mess craft allows for endless character variations and encourages imaginative storytelling.
Supplies:
- Large craft pom poms
- Googly eyes in various sizes
- Pipe cleaners
- Felt scraps
- Hot glue or craft glue
Steps:
- Choose a pom pom color for monster’s body
- Glue googly eyes onto the pom pom
- Cut and attach pipe cleaner arms and legs
- Add felt feet, teeth, or other features
- Create a whole monster family
23. Handprint Wreath
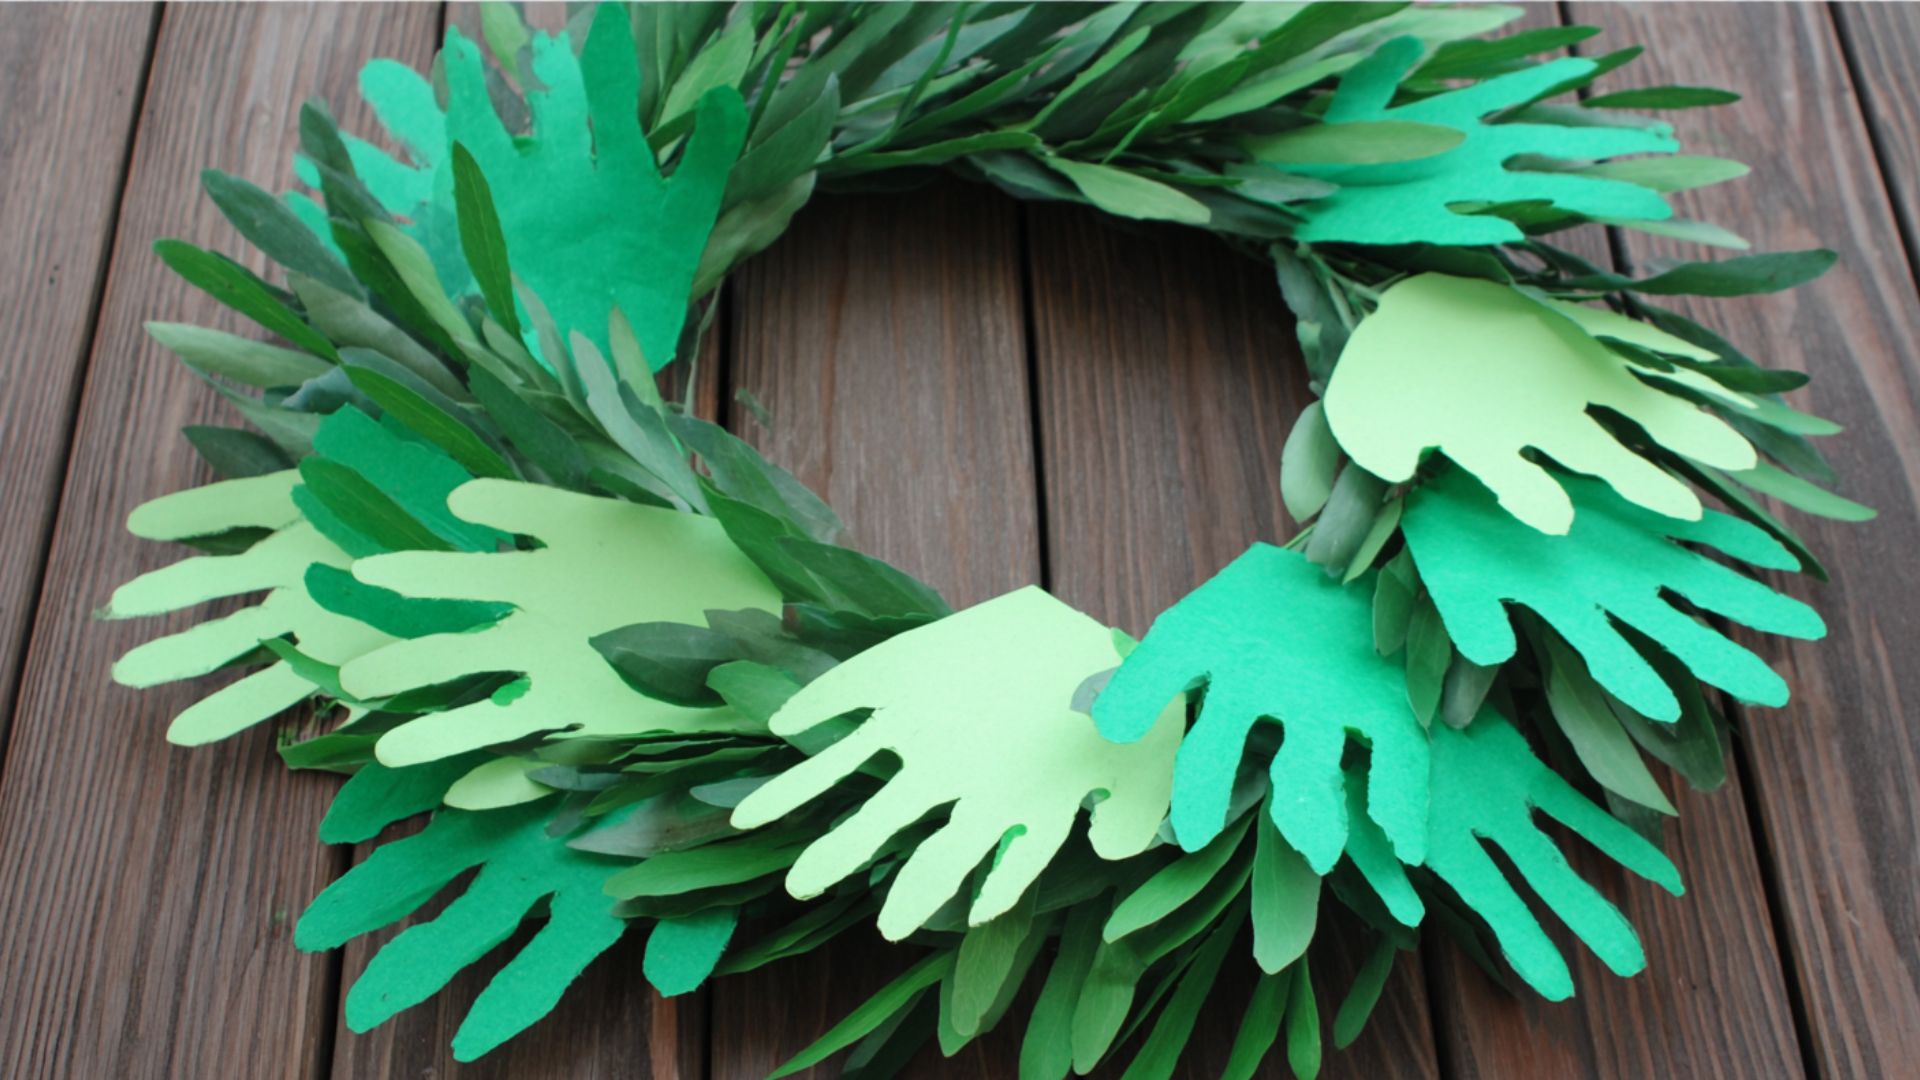
Design a seasonal wreath featuring handprints in fall colors or holiday themes. This keepsake craft makes a beautiful gift for grandparents.
Supplies:
- Paper plate with center cut out
- Construction paper
- Paint or markers
- Glue
- Scissors
- Ribbon for hanging
Steps:
- Trace child’s hand multiple times on colored paper
- Cut out all handprint shapes
- Glue handprints around the paper plate ring, overlapping slightly
- Add decorative elements for the chosen season
- Attach a ribbon loop for hanging
24. Washi Tape Art
Create colorful designs using decorative washi tape. This low-mess craft produces impressive results and requires no drying time.
Supplies:
- Washi tape in various colors and patterns
- Canvas or thick cardstock
- Scissors
- Ruler for straight lines
- Pencil for planning
Steps:
- Sketch design lightly on canvas
- Apply washi tape strips following the design
- Layer different colors and patterns
- Trim excess tape with scissors
- Display finished artwork immediately
25. Origami Animals
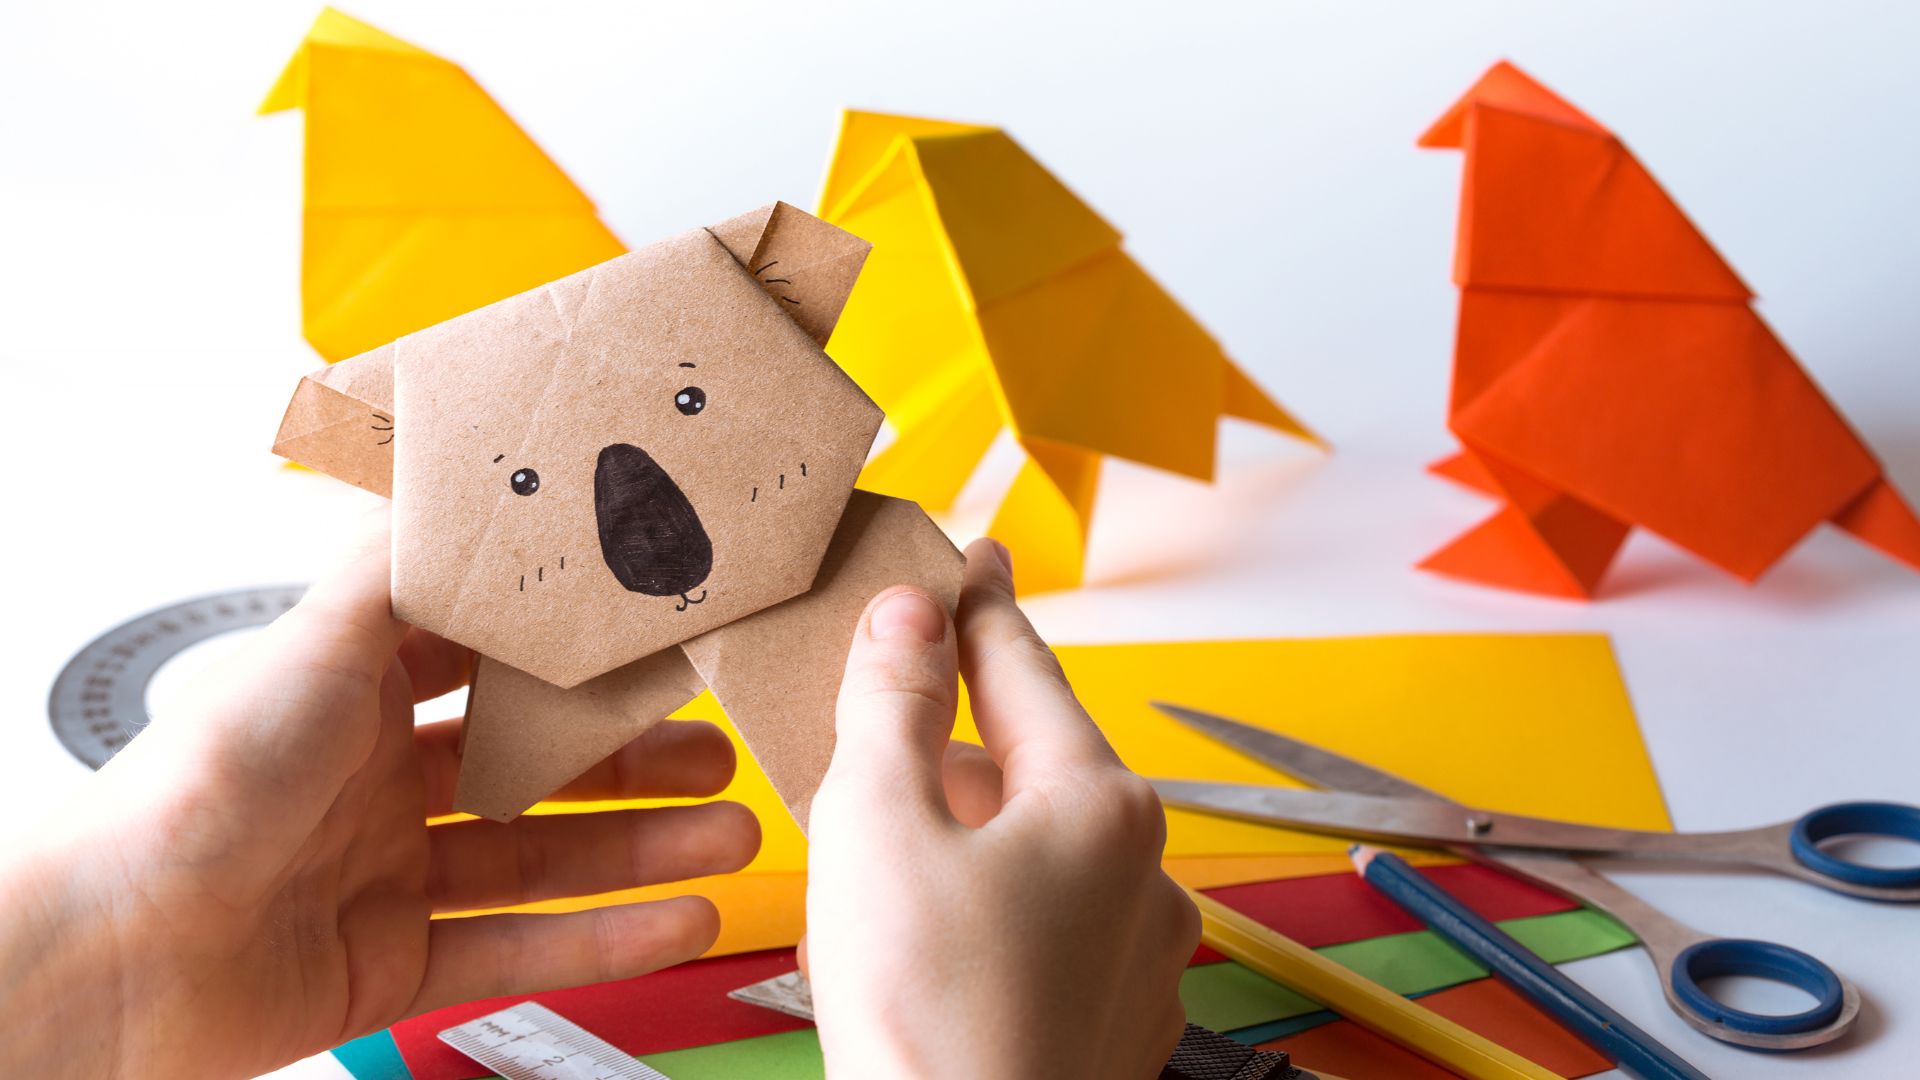
Fold paper into three-dimensional creatures using ancient origami techniques. This craft teaches following directions, patience, and spatial reasoning.
Supplies:
- Origami paper or colored squares
- Instruction guide or video tutorial
- Flat surface for folding
- Markers for adding details
- Optional googly eyes
Steps:
- Start with square paper, colored side down
- Follow the folding instructions step by step
- Crease folds firmly for crisp lines
- Complete final folds to reveal animal shape
- Add eyes and details with markers
26. Ice Cream Stick Bookmarks
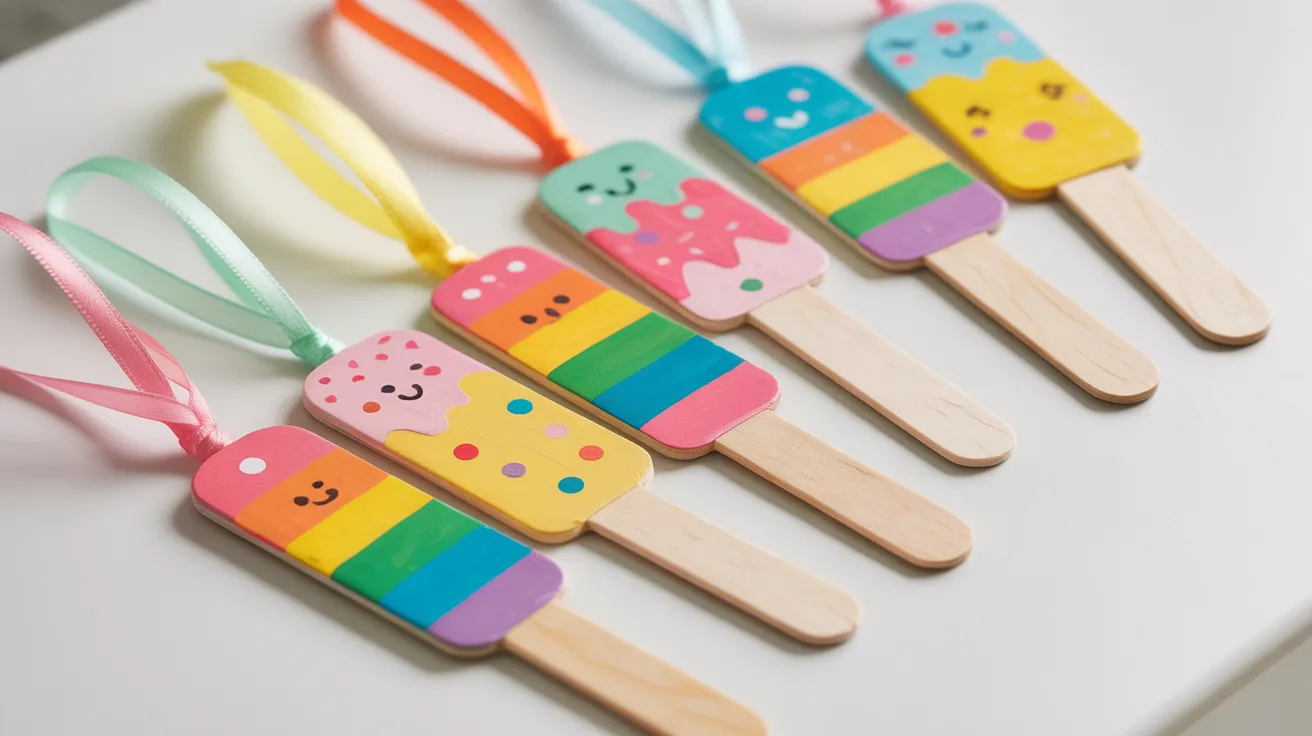
Craft colorful bookmarks to encourage reading. This quick project makes thoughtful gifts for teachers, friends, or library visitors.
Supplies:
- Large craft sticks
- Paint or markers
- Ribbon
- Glue
- Stickers or foam shapes
- Hole punch
Steps:
- Paint craft stick in desired color
- Let dry completely
- Decorate with stickers or foam shapes
- Punch a hole in the top of the stick
- Thread the ribbon through the hole and knot
27. Shaving Cream Marbled Paper
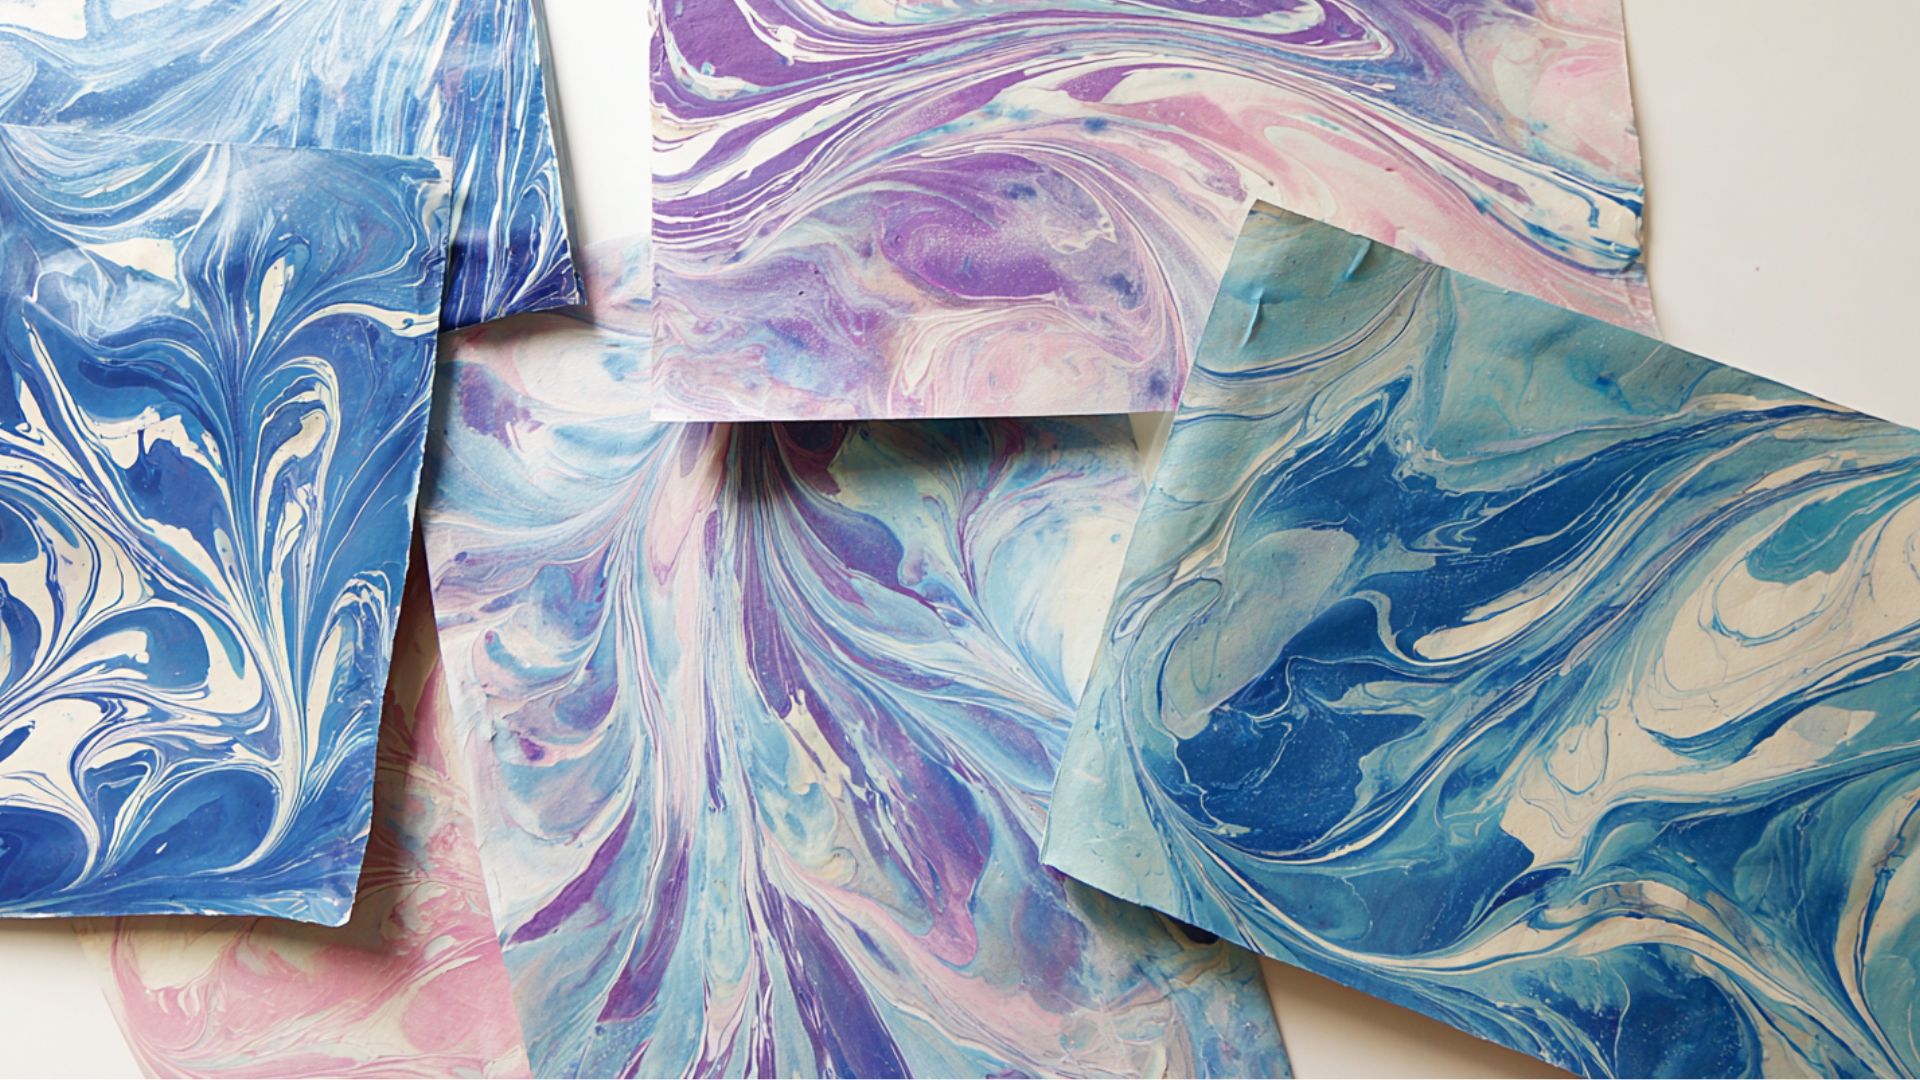
Create swirled, marbled designs using shaving cream and paint. This messy but magical craft produces unique papers perfect for wrapping gifts or making cards.
Supplies:
- Shaving cream
- Washable paint
- Baking pan
- Cardstock
- Ruler or credit card for scraping
- Paper towels
Steps:
- Spread shaving cream in the pan about one inch thick
- Drop paint colors onto the shaving cream surface
- Swirl colors with a toothpick to create a marble effect
- Press cardstock onto shaving cream and lift
- Scrape excess cream off with a ruler and let it dry
Conclusion
Crafting with kids creates more than just colorful projects scattered across the kitchen table. These moments build confidence, teach patience, and foster creativity that extends far beyond the craft itself.
Every painted masterpiece and glued creation represents time spent together, skills developed, and imaginations unleashed.
The memories made while cutting, coloring, and creating together become the stories families tell for years to come.
Ready to start crafting? Gather some basic supplies, pick a project that matches the current mood, and dive in without worrying about perfection.
The best crafts are the ones where everyone laughs, learns something new, and enjoys the process as much as the finished product.
Share these creations with family and friends, and watch how a simple afternoon of crafting spreads joy beyond the walls of home.