How to Tie a Baby Wrap: A Simple Step-by-Step Guide

Tying a baby wrap is a valuable skill for parents, offering a hands-free way to carry your baby securely and comfortably.
Learning how to tie a baby wrap correctly ensures that both you and your baby are safe, with proper support for your little one’s head, neck, and body.
While it may seem challenging at first, with some practice, it becomes second nature.
This step-by-step guide provides clear instructions on how to set up your wrap before placing your baby in it, ensuring a snug and supportive fit.
By following these steps, you can create a safe and comfortable carrying experience for both you and your baby. Once you get the hang of it, you’ll be able to move around easily with your baby securely positioned in the wrap.
How to Tie a Baby Wrap (Before You Place the Baby)
Before you pick up your little one, it’s important to set up the wrap the right way. These steps will help you tie the wrap safely and snugly, so your baby stays secure and you stay comfortable.
Take your time, once you get used to it, it’ll feel much easier.
Step 1: Find the Center of the Wrap

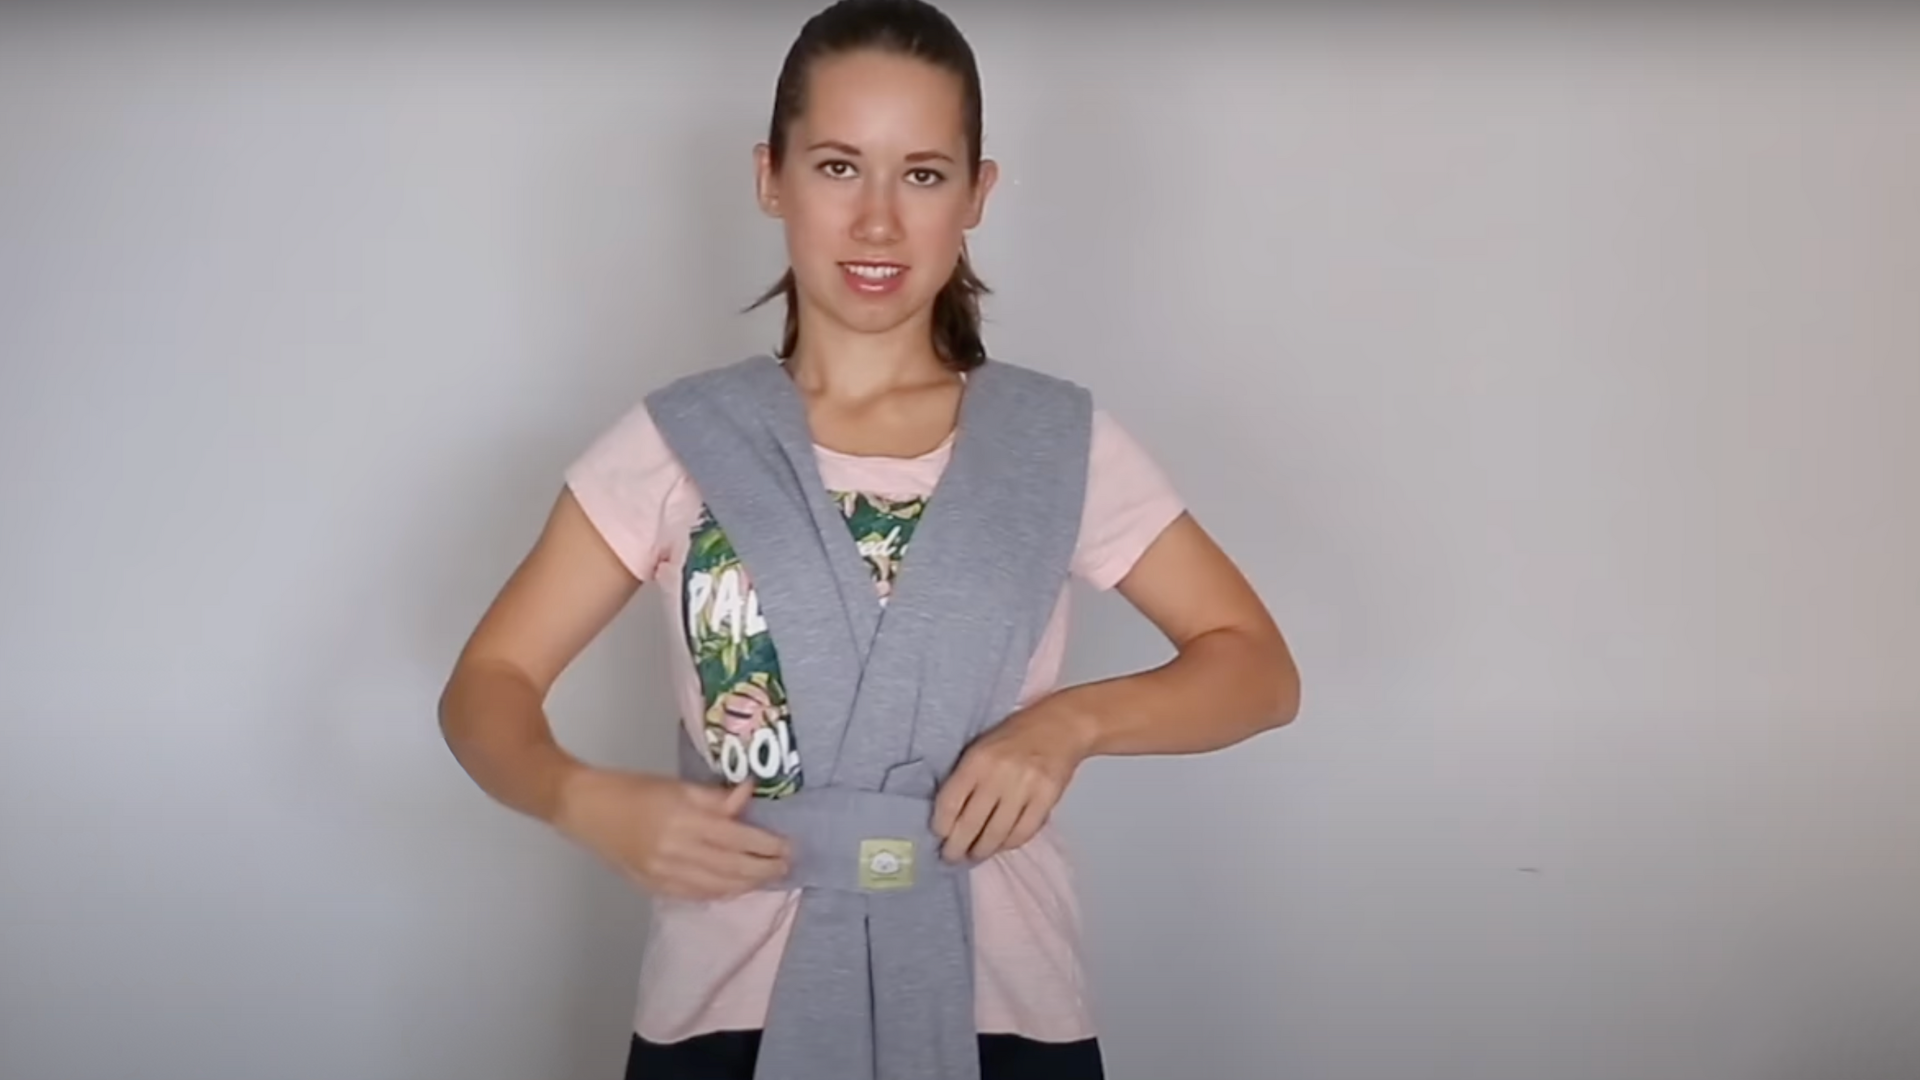
Take your baby wrap and find the part with the logo label; this is usually the middle of the fabric. Place this label right over your belly button.
Wrap each end of the fabric around your waist toward your back.
Beginner Tip:
Try to keep the fabric smooth and flat against your belly. If it bunches up, it might feel tight or uncomfortable later.
Step 2: Cross the Wrap Behind Your Back

Take the two ends behind your back. Cross them to form an “X” across your lower back. Then bring each end up and over your shoulders.
Now the fabric should hang down in front of you from each shoulder.
Beginner Tip:
As you bring the fabric over your shoulders, keep it wide and flat, like a seatbelt. This will make it more comfortable and provide better support later.
Important:
Make sure the open edge of the wrap is facing inward toward your body on both sides, not facing out.
Step 3: Tuck the Ends Through the Front

Take both shoulder straps and tuck them down behind the piece of fabric with the logo on your belly. Pull them all the way through so they come out below the logo area.
Beginner Tip:
Straighten the fabric as you go. This will make it easier when you start placing the baby in.
Step 4: Cross the Straps Again in Front

Cross the two straps again in front of your belly to make another “X.” Then wrap the ends around your waist and tie a double knot at the back.
If you still have some fabric left, you can bring the ends to the front and tie them there instead—whatever feels better for you.
Beginner Tip:
Make sure the wrap feels snug but not too tight. You should still be able to slide your fingers underneath the fabric.
| Now that your wrap is secure, adjust the fabric for comfort, and it’s time to safely place your baby in, ensuring they’re snug, supported, and in a comfortable position. Always check for a secure fit before moving around! |
Time to Put the Baby In
Now that your wrap is tied and ready, it’s time to place your baby safely inside. Go slowly and gently; babies often wiggle or fuss a little at first. That’s totally normal!
Step 1: Position Baby on Your Shoulder

Pick up your baby and gently rest it on one shoulder, like you would for a burp. Support its neck and bottom as you prepare to place it in the wrap.
Step 2: Slide Baby Into the Crossed Straps

Start with the strap closest to your body; slide one leg through and pull the fabric across your baby’s bottom and up to their shoulder.
Then, using the fabric on your opposite shoulder, do the same with the other strap. Both straps should now cross over your baby’s back and bottom.
Step 3: Secure Baby with the Front Pocket

Take the part of the wrap with the logo and guide both of your baby’s legs through it. Then pull the fabric up over their back and shoulders to keep them snug and supported.
Step 4: Check Baby’s Position and Comfort

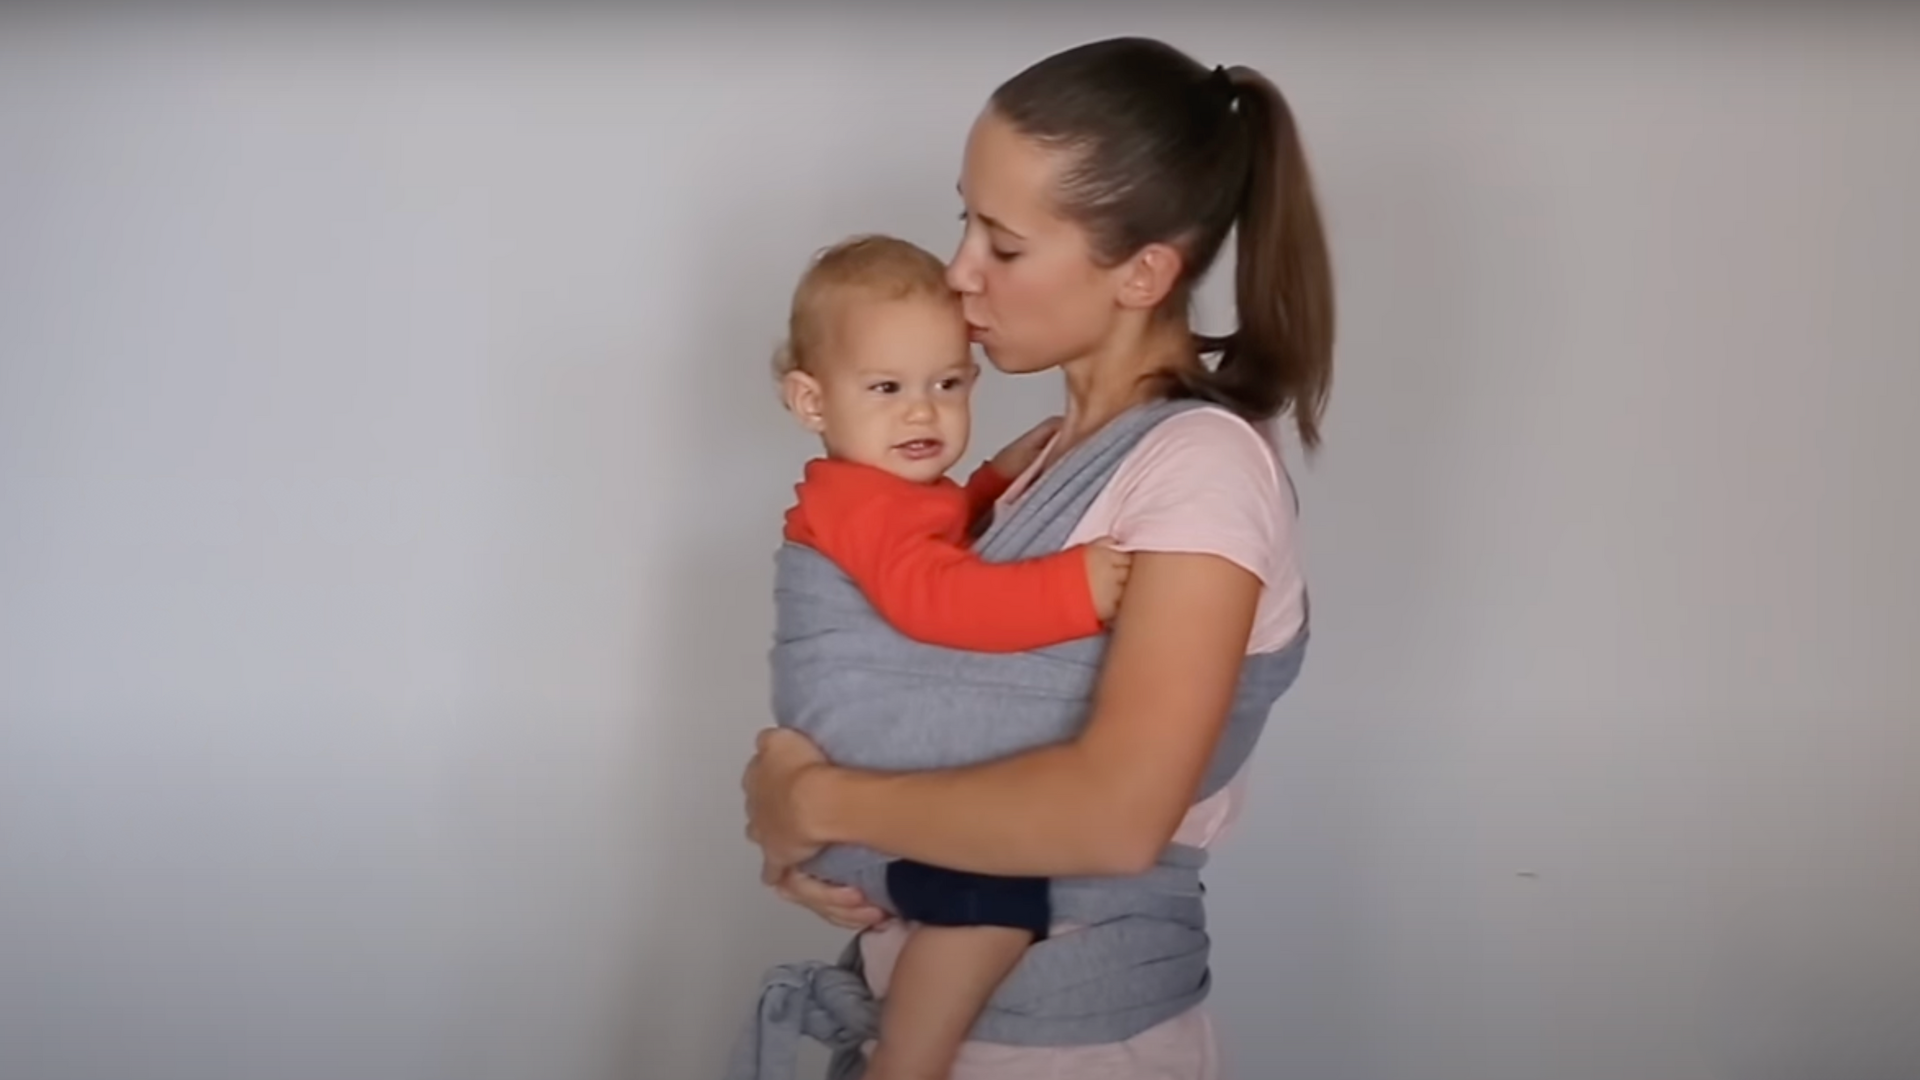
Make sure your baby’s face is visible and close enough to kiss. Their chin should be up, not pressed into their chest.
If needed, you can gently tuck one side of the wrap around their head for extra support or while breastfeeding.
|
Once your wrap is secure, take a moment to adjust the fabric for comfort. Now, it’s time to safely place your baby in the wrap, ensuring they are sitting snugly and securely against your chest. Make sure their head and neck are properly supported, and check that the wrap feels comfortable but firm. Always double-check the fit before moving around to ensure both you and your baby are safe and comfortable. |
Watch how it’s Done: Complete Video Tutorial
Watch this video by KeaBabies for a complete video tutorial.
Conclusion
Mastering the technique of tying a baby wrap is about comfort and ensuring your baby’s safety and well-being.
By following these steps, you’ll create a secure, supportive environment for your baby while enjoying the benefits of hands-free carrying.
Remember to take your time and adjust the fabric as needed to avoid discomfort. Over time, tying your baby wrap will become quicker and more intuitive, allowing you to carry your baby with ease.
Always double-check the fit and make sure your baby’s head and neck are properly supported.
With practice and care, you’ll be able to confidently use a baby wrap for everyday tasks while keeping your little one close and safe.


