35 Fun and Easy Christmas Crafts for Kids to Try
If you’re searching for Christmas crafts for kids that feel easy, fun, and realistic to pull off, this guide is made for you.
I know how busy the holiday season can get, and sometimes you just need simple ideas that don’t require fancy tools or a long setup. That’s exactly what you’ll find here.
You’ll get a mix of quick paper projects, cute ornaments, and more, all kid-friendly, gentle on your time, and easy for you to follow.
Think of this as your holiday craft toolbox; a place where you and your kids can slow down and enjoy a little calm in the middle of the chaos.
Let’s jump in and see which craft becomes your new favorite this season.
Why Christmas Crafts are Great for Kids
Christmas crafts give kids a simple way to be creative and enjoy the season. They help kids slow down, focus, and have fun with their hands.
These crafts also support learning in easy, natural ways. Kids get to explore new ideas while spending time in a relaxed setting with family or classmates.
Here are a few reasons they matter:
- They build fine motor skills through cutting, gluing, and decorating.
- They help kids express themselves and grow their confidence.
- They spark imagination and encourage problem-solving.
- They create meaningful moments during a busy season.
- They give parents and teachers an easy way to keep kids engaged.
Even simple crafts can bring joy, calm, and connection. That’s why they’re such a favorite part of the holiday season.
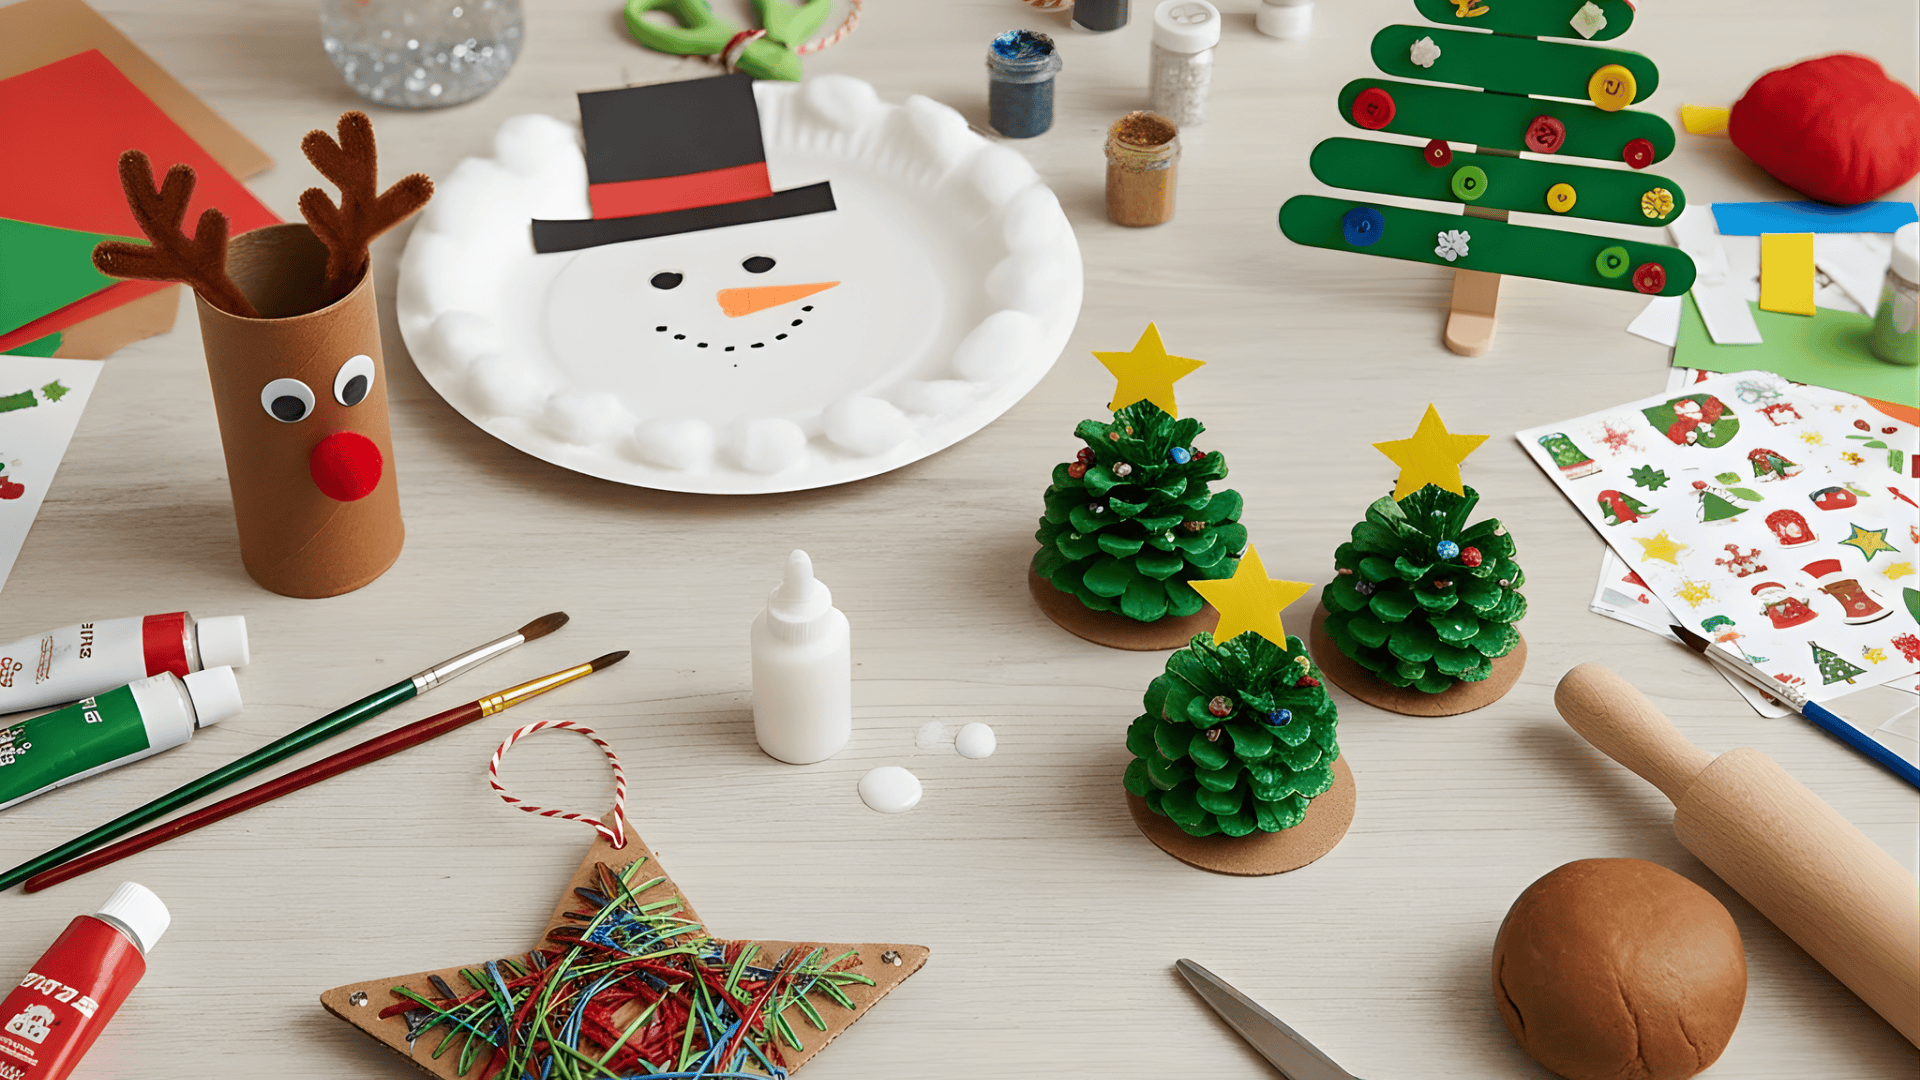
Top Ideas of Christmas Crafts for Kids
If you need quick and easy Christmas crafts for kids, this list will help you get started fast. Each idea uses simple supplies and clear steps, making them easy to use at home or in the classroom:
Fun and Easy Paper Christmas Crafts
Paper crafts are perfect for kids because they use simple supplies you already have at home. They are quick to set up, easy to clean, and help kids practice cutting, folding, and decorating.
1. Easy Paper Plate Christmas Tree
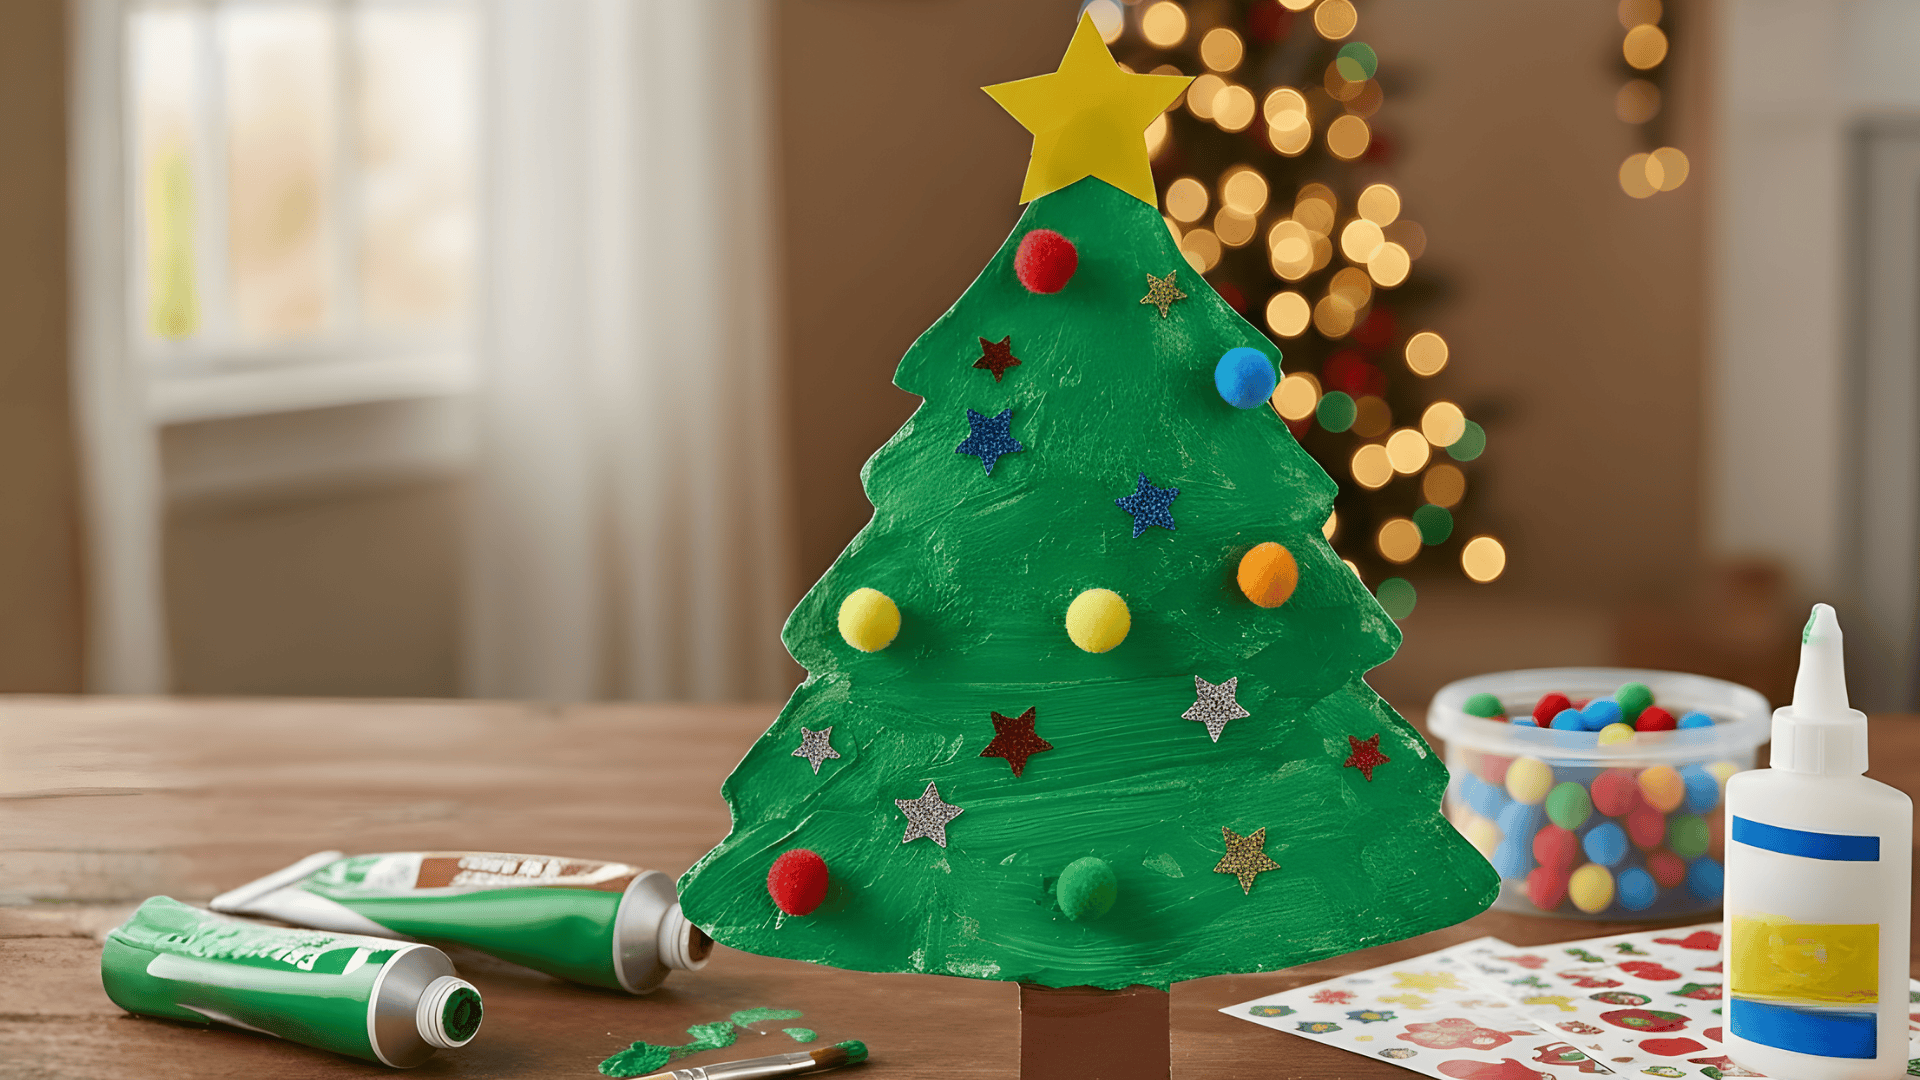
This paper plate tree is a great starter craft for kids of all ages. It teaches basic cutting and decorating skills, and kids can personalize the tree with anything they have on hand.
Materials You Need:
- Paper plate
- Green paint or marker
- Stickers or pom-poms
- Glue
- Scissors
Steps to Follow:
- Cut the paper plate into a triangle or a simple tree shape.
- Color or paint the plate green.
- Add stickers, pom-poms, or buttons as ornaments.
- Cut a small brown rectangle for the trunk and glue it on.
- Finish with a paper star at the top.
2. Simple Cut-Out Paper Snowflakes
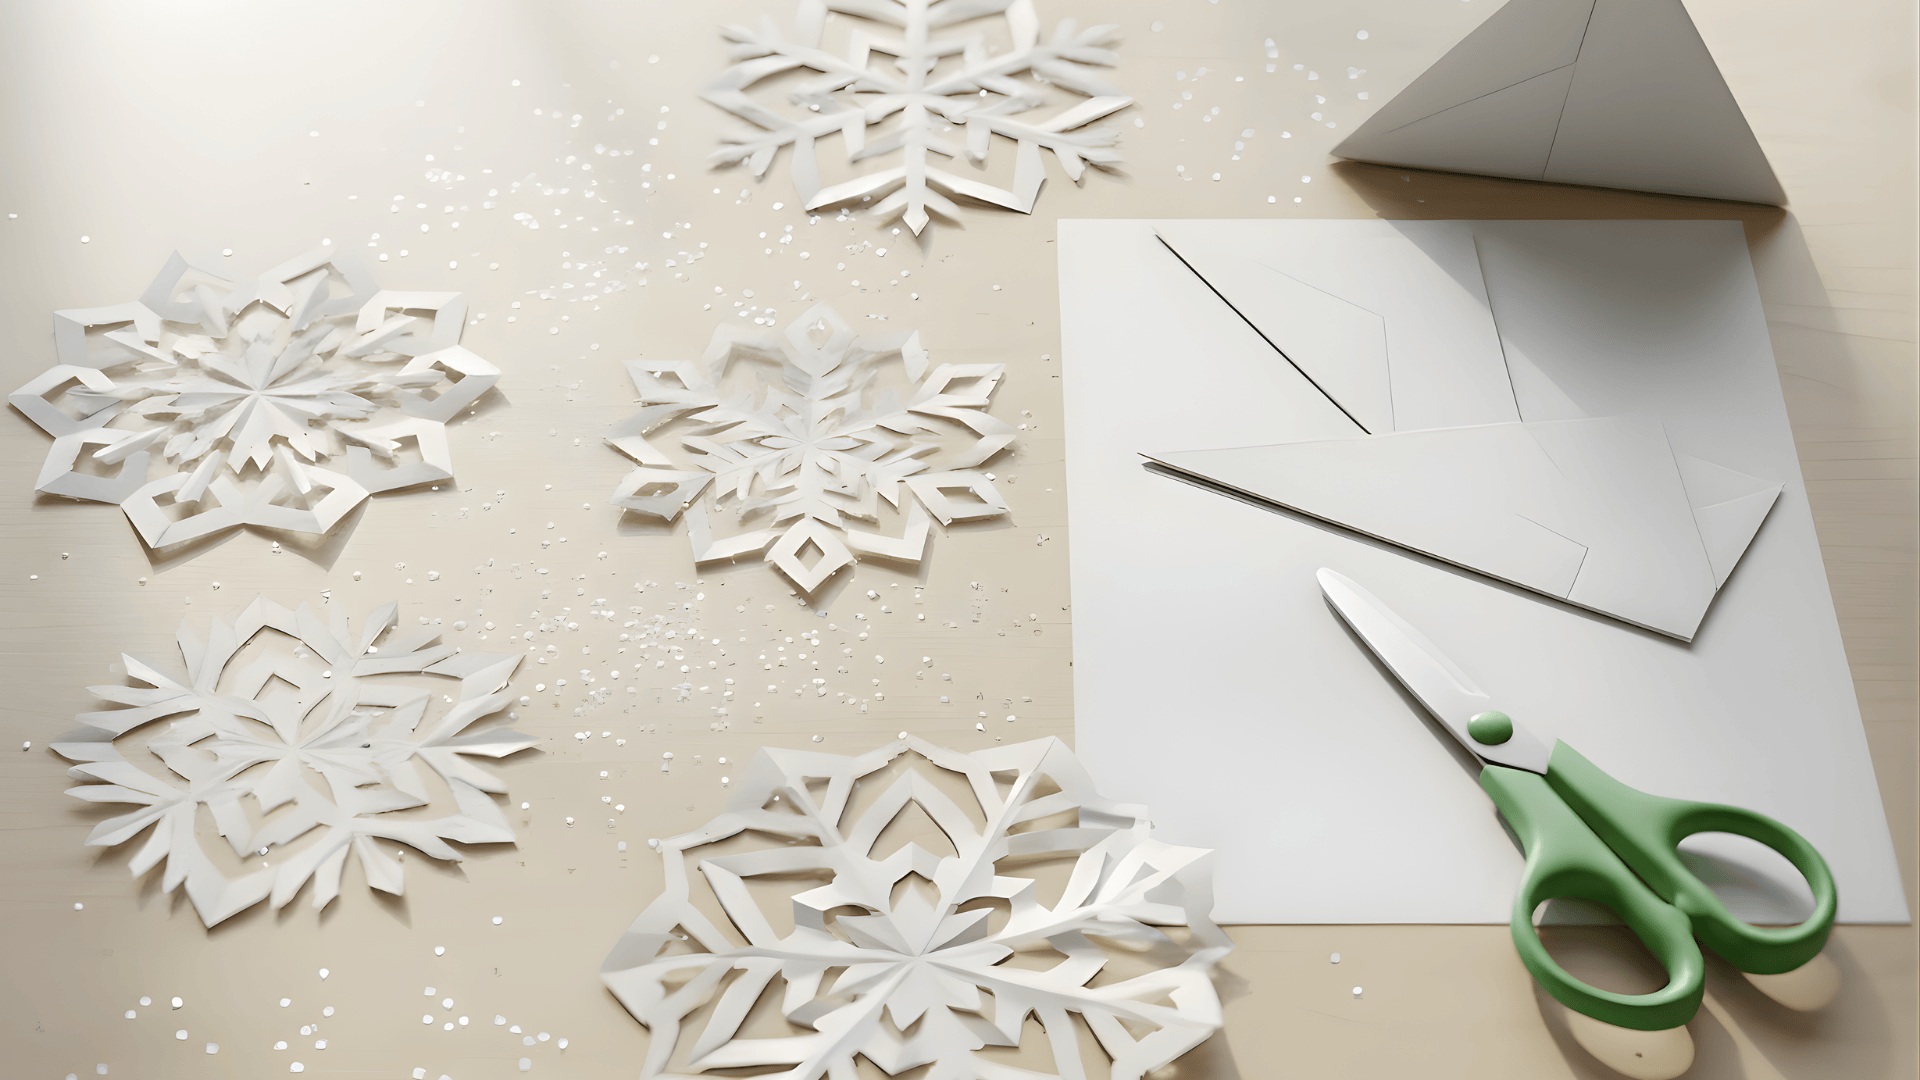
Paper snowflakes are a classic Christmas craft that helps kids learn folding and cutting. Each snowflake comes out differently, which makes the activity exciting and unpredictable.
Materials You Need:
- White paper
- Scissors
- Optional glitter or colors
Steps to Follow:
- Fold the paper into a small triangle.
- Cut small shapes along the folded edges.
- Open the paper slowly to reveal the pattern.
- Add glitter or color for extra sparkle.
3. 3D Star Made From Paper Bags

This craft creates a big, bold star that looks like store-bought décor but is very simple to make. Kids learn how shapes connect, and the finished star is perfect for hanging on walls or doors.
Materials You Need:
- 7–8 paper bags
- Glue
- Scissors
- String
Steps to Follow:
- Stack the paper bags neatly.
- Add glue in a “T” shape to each bag, then stick them together.
- Draw a pointed star outline on the top bag.
- Cut along the outline through the whole stack.
- Pull the bags open wide until the star forms.
- Tie a string on top to hang it.
4. Easy Origami Christmas Stars
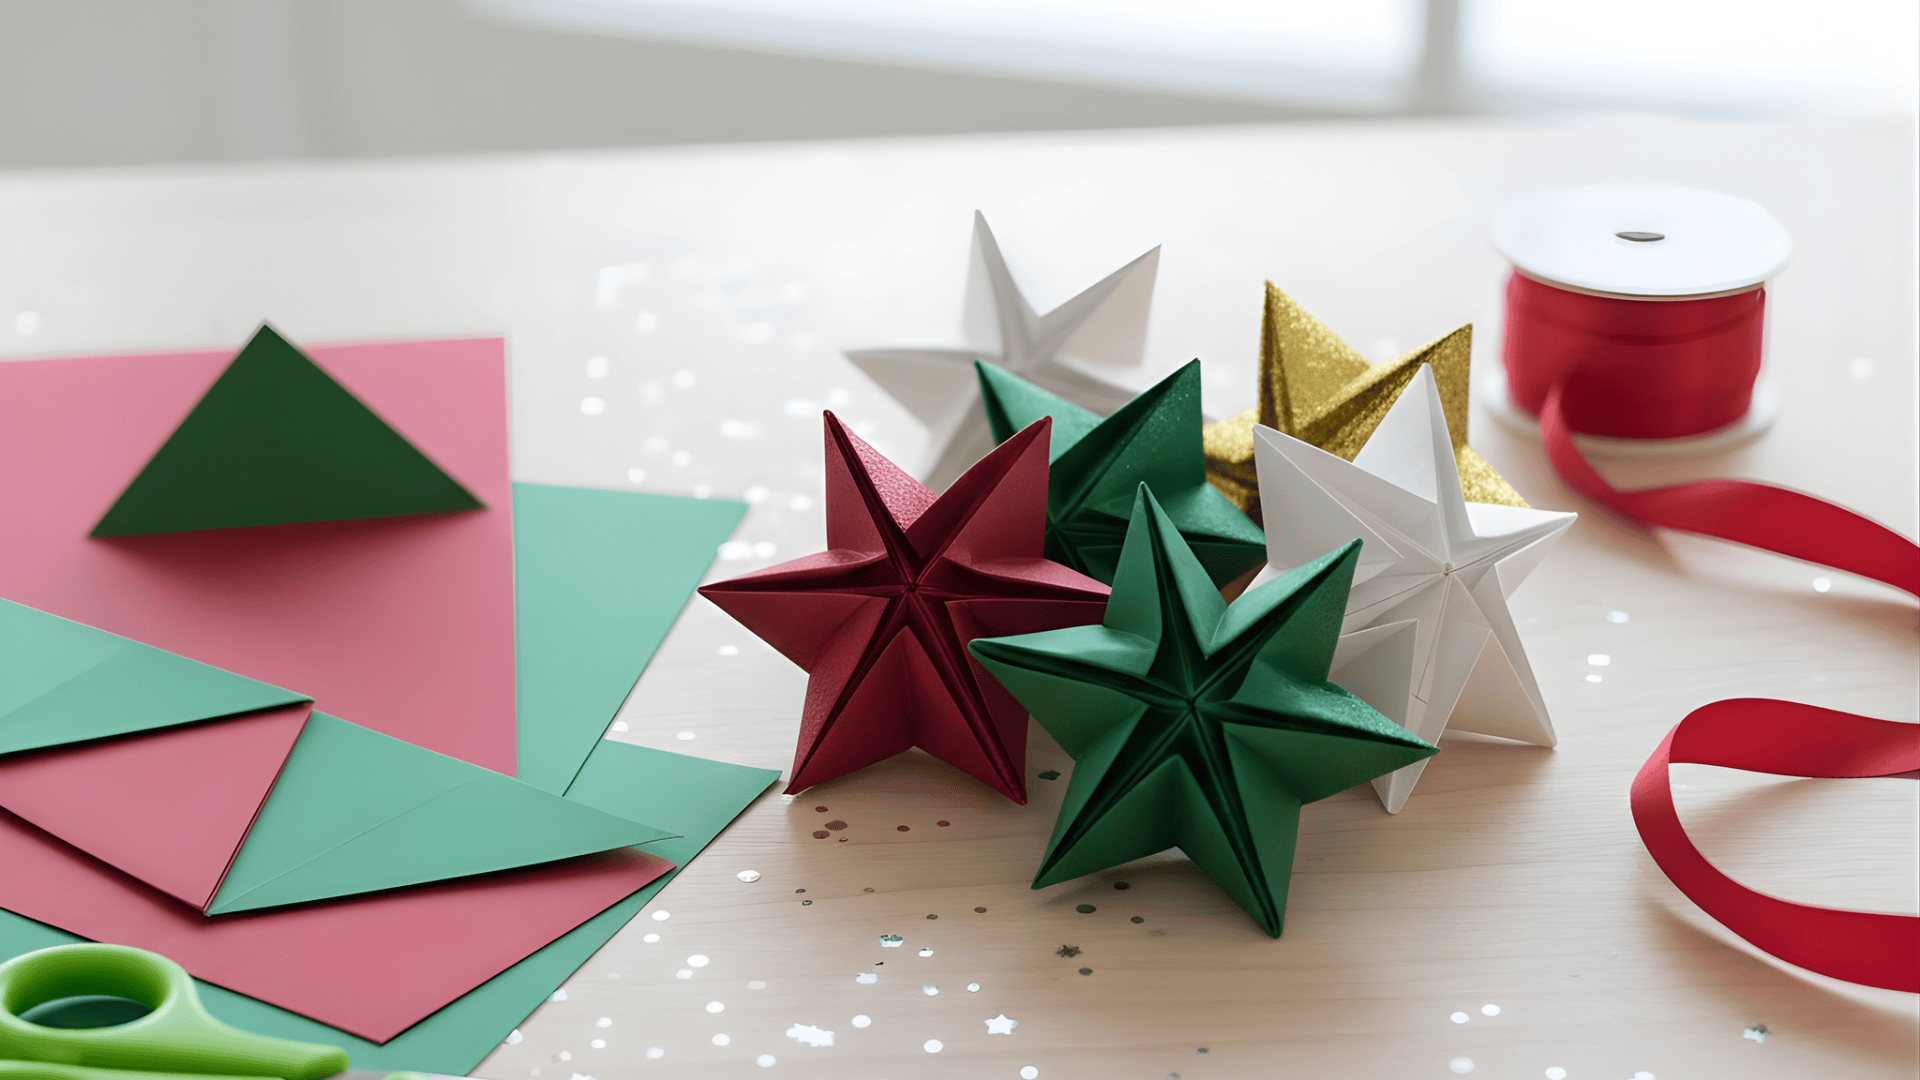
These origami stars help kids practice folding and patience. They look cute on trees, gift tags, or classroom bulletin boards and can be made in many colors.
Materials You Need:
- Square paper
- String or ribbon
- Glue (optional)
Steps to Follow:
- Fold the paper in half and then in half again.
- Fold each corner toward the center.
- Keep folding until the star shape appears.
- Press the folds to make the star firm.
- Add a string if you want to hang it.
5. Paper Chain Christmas Garland
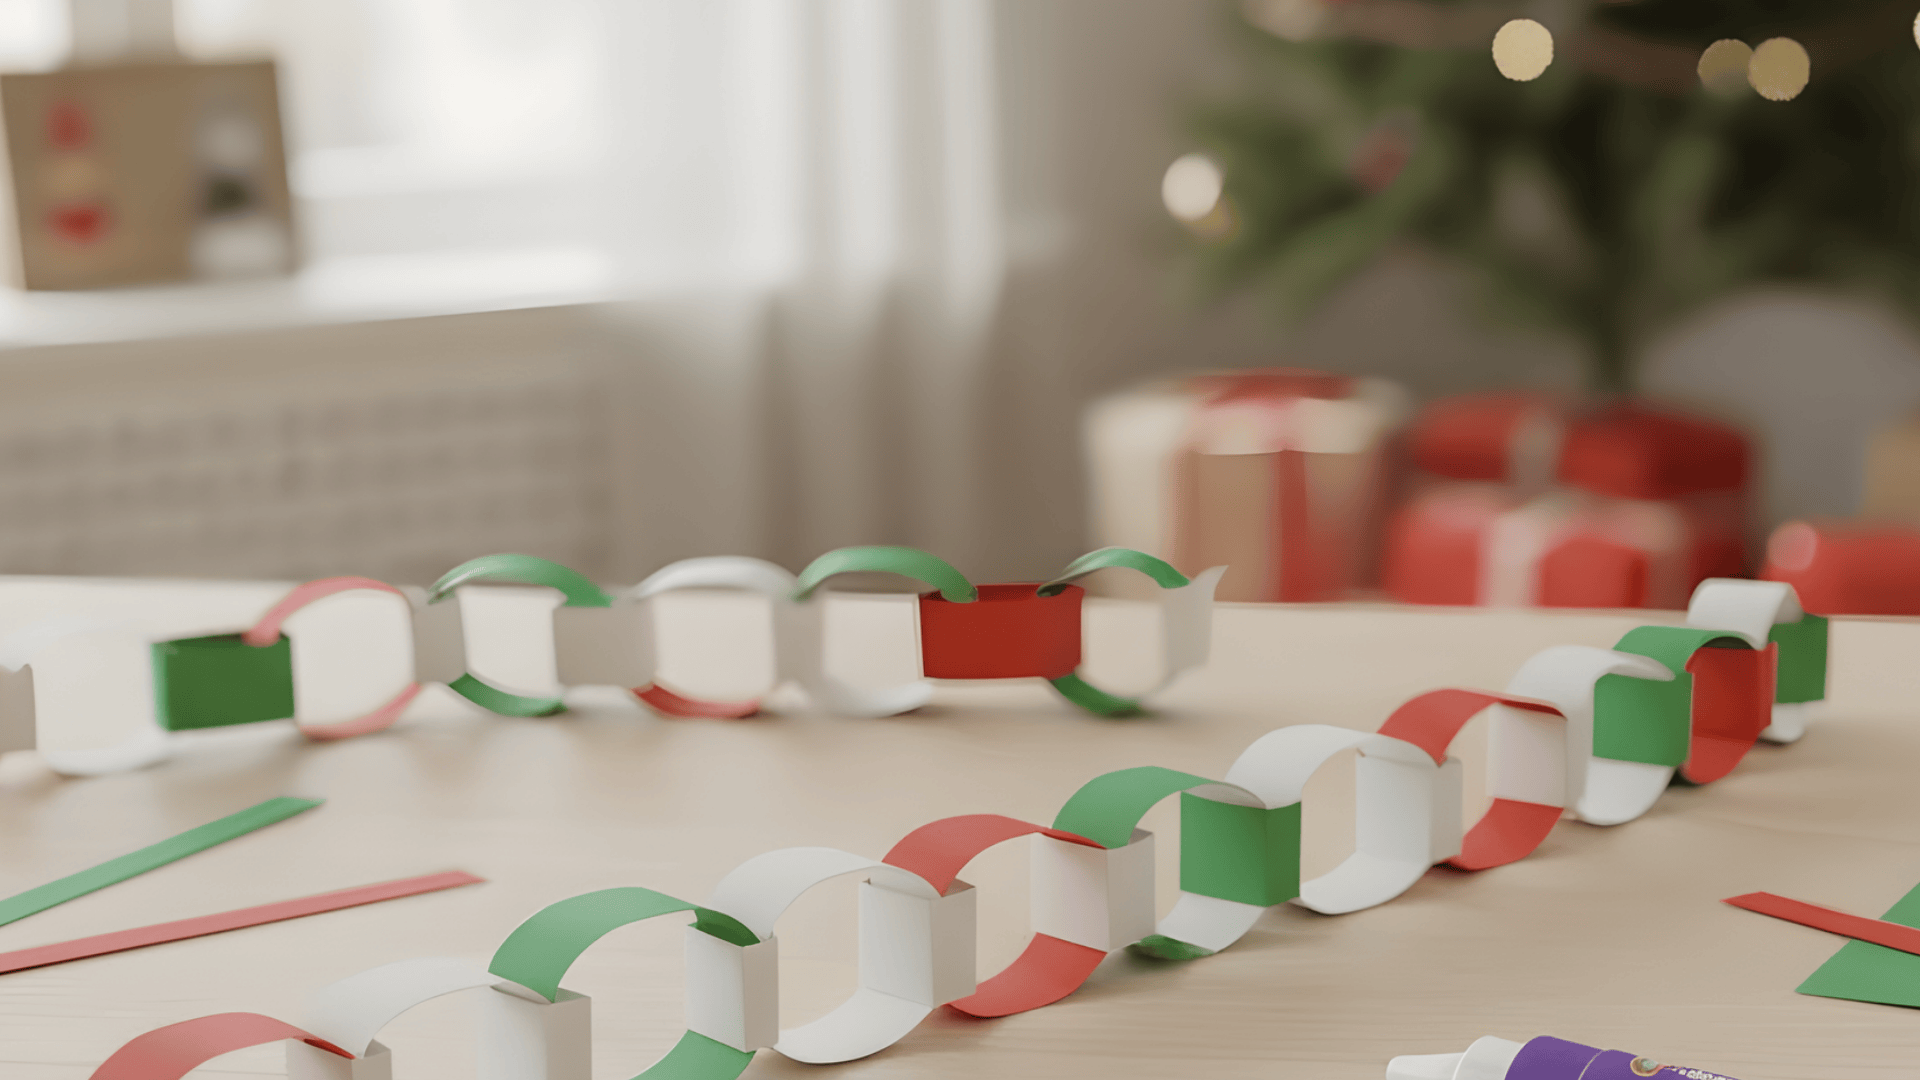
This garland is a classic craft that teaches kids pattern-making and simple linking skills. The longer it grows, the more excited the kids get, which makes it great for groups.
Materials You Need:
- Strips of colored paper
- Glue stick or tape
- Scissors
Steps to Follow:
- Cut paper into even strips.
- Make the first strip into a loop and glue the ends.
- Slide the next strip through the loop.
- Glue it to create a chain.
- Repeat until the garland is as long as you like.
6. Paper Plate Snow Globe Craft
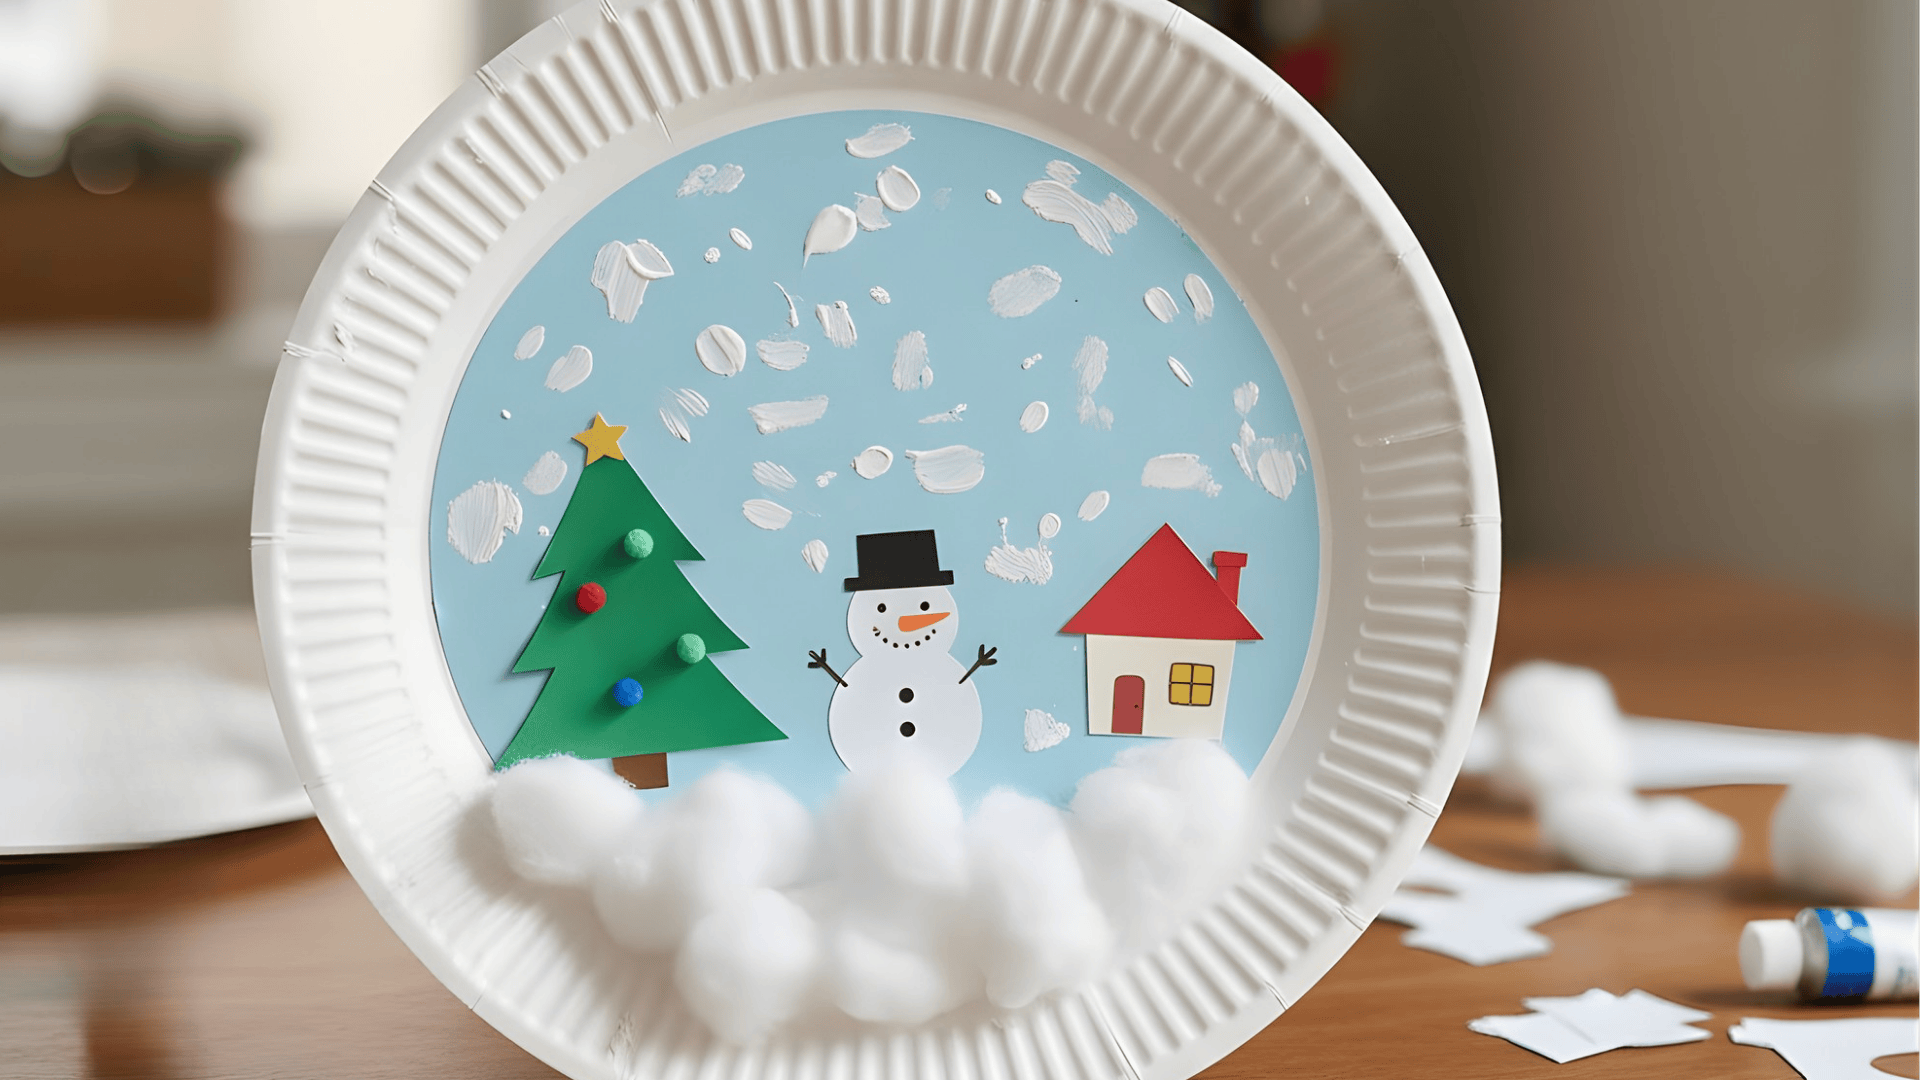
This snow globe lets kids build their own winter scene using simple materials. They enjoy choosing the characters inside, which makes the craft feel personal.
Materials You Need:
- Paper plate
- Blue paper
- Glue
- Cotton or paper snow
- White paint
Steps to Follow:
- Cut out the center of the paper plate.
- Glue blue paper behind the hole.
- Paint small white dots to show falling snow.
- Add cutouts like trees, houses, or snowmen.
- Glue cotton or paper snow at the bottom.
7. Easy Handmade Christmas Cards

Homemade cards are a sweet way for kids to share holiday cheer. They can draw, decorate, and write simple messages, which makes each card special.
Materials You Need:
- Folded cardstock
- Markers or crayons
- Stickers or washi tape
- Glue
- Small craft pieces
Steps to Follow:
- Fold the cardstock to make a card.
- Draw a simple Christmas picture on the front.
- Add stickers or tape to decorate the edges.
- Write a short message inside.
- Add small craft pieces for extra texture.
Simple DIY Christmas Ornament Crafts
These DIY ornaments are simple for kids to make and look lovely on the tree. They use easy materials and give kids a fun way to make keepsakes for the holiday.
8. Yarn-Wrapped Christmas Tree Ornament
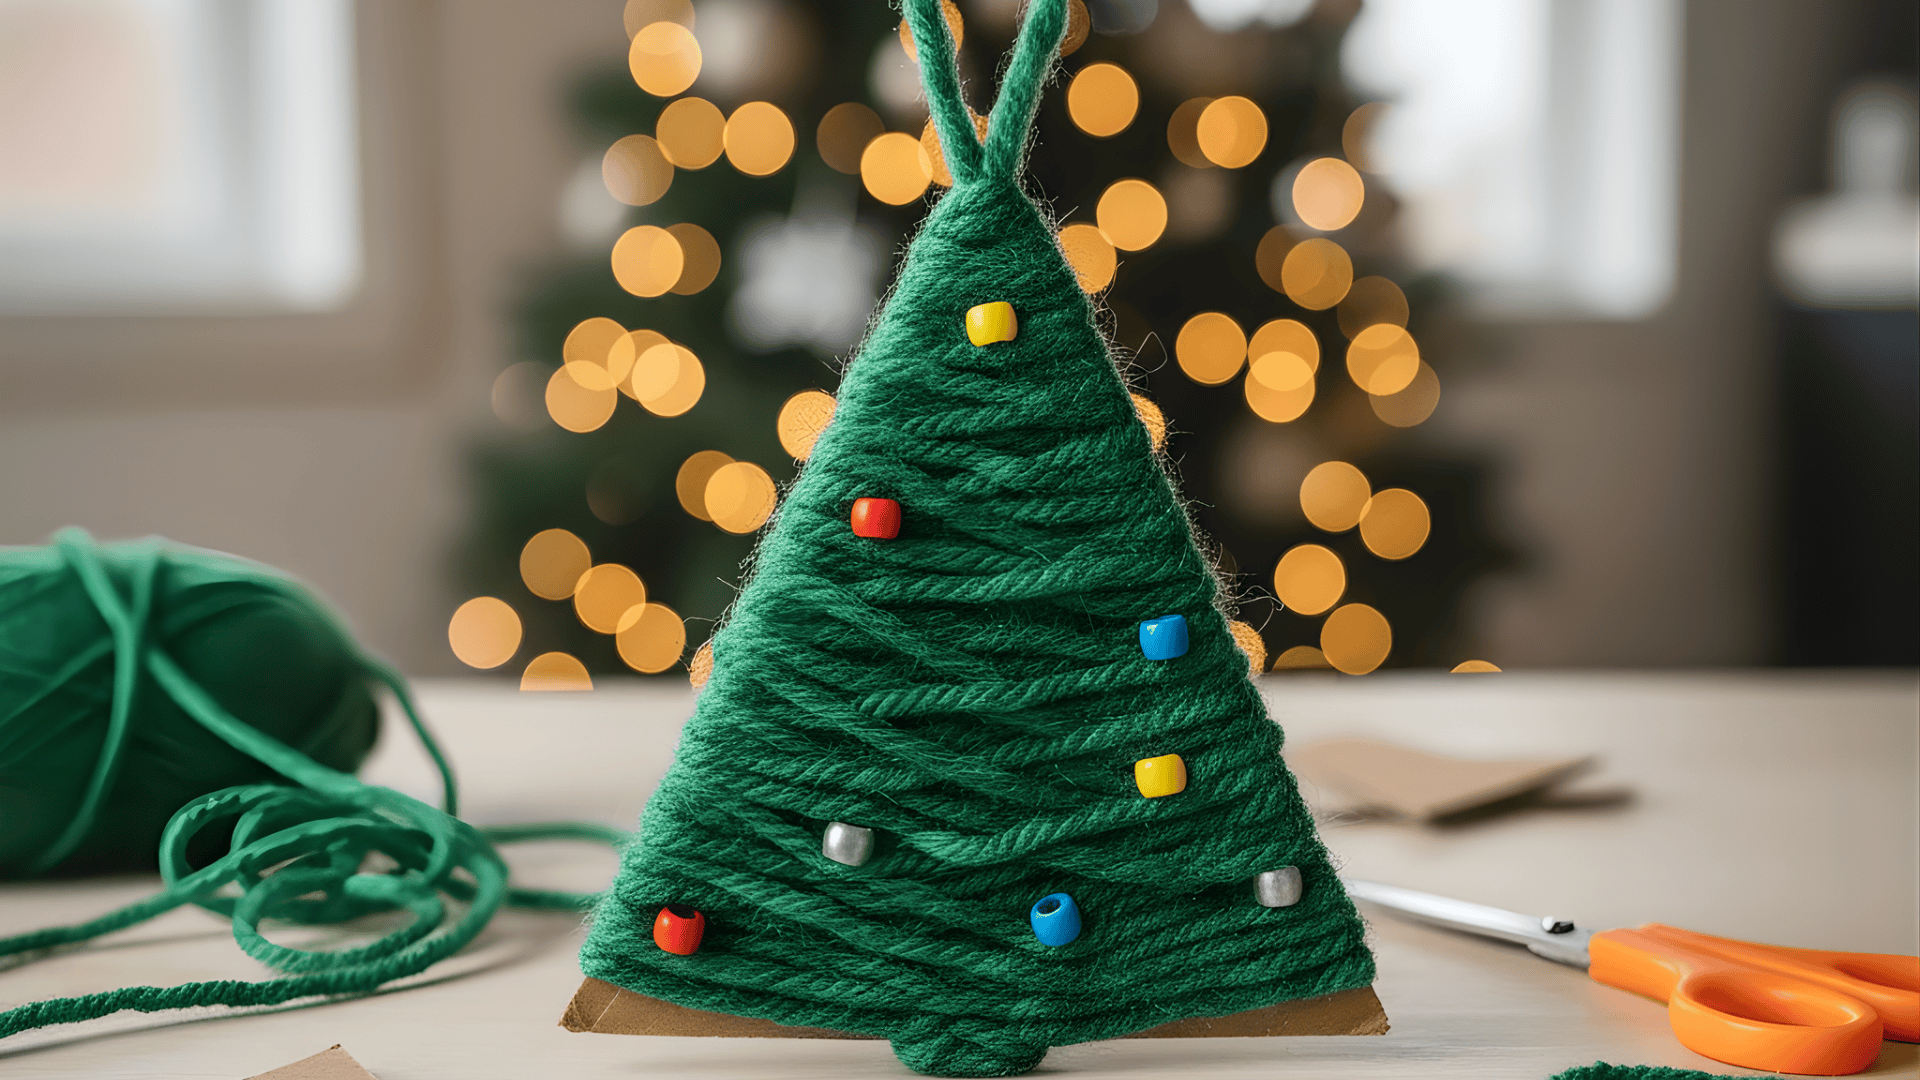
This yarn-wrapped tree is great for building fine motor skills. Kids enjoy wrapping the yarn and decorating the tree in their own style.
Materials You Need:
- Cardboard
- Green yarn
- Scissors
- Glue
- Small beads or stars
Steps to Follow:
- Cut the cardboard into a simple triangle tree shape.
- Glue or tape the end of the yarn to the back.
- Wrap the yarn around the entire shape.
- Add beads or small stars as ornaments.
- Tie a loop of yarn at the top for hanging.
9. Salt Dough Ornaments for Kids
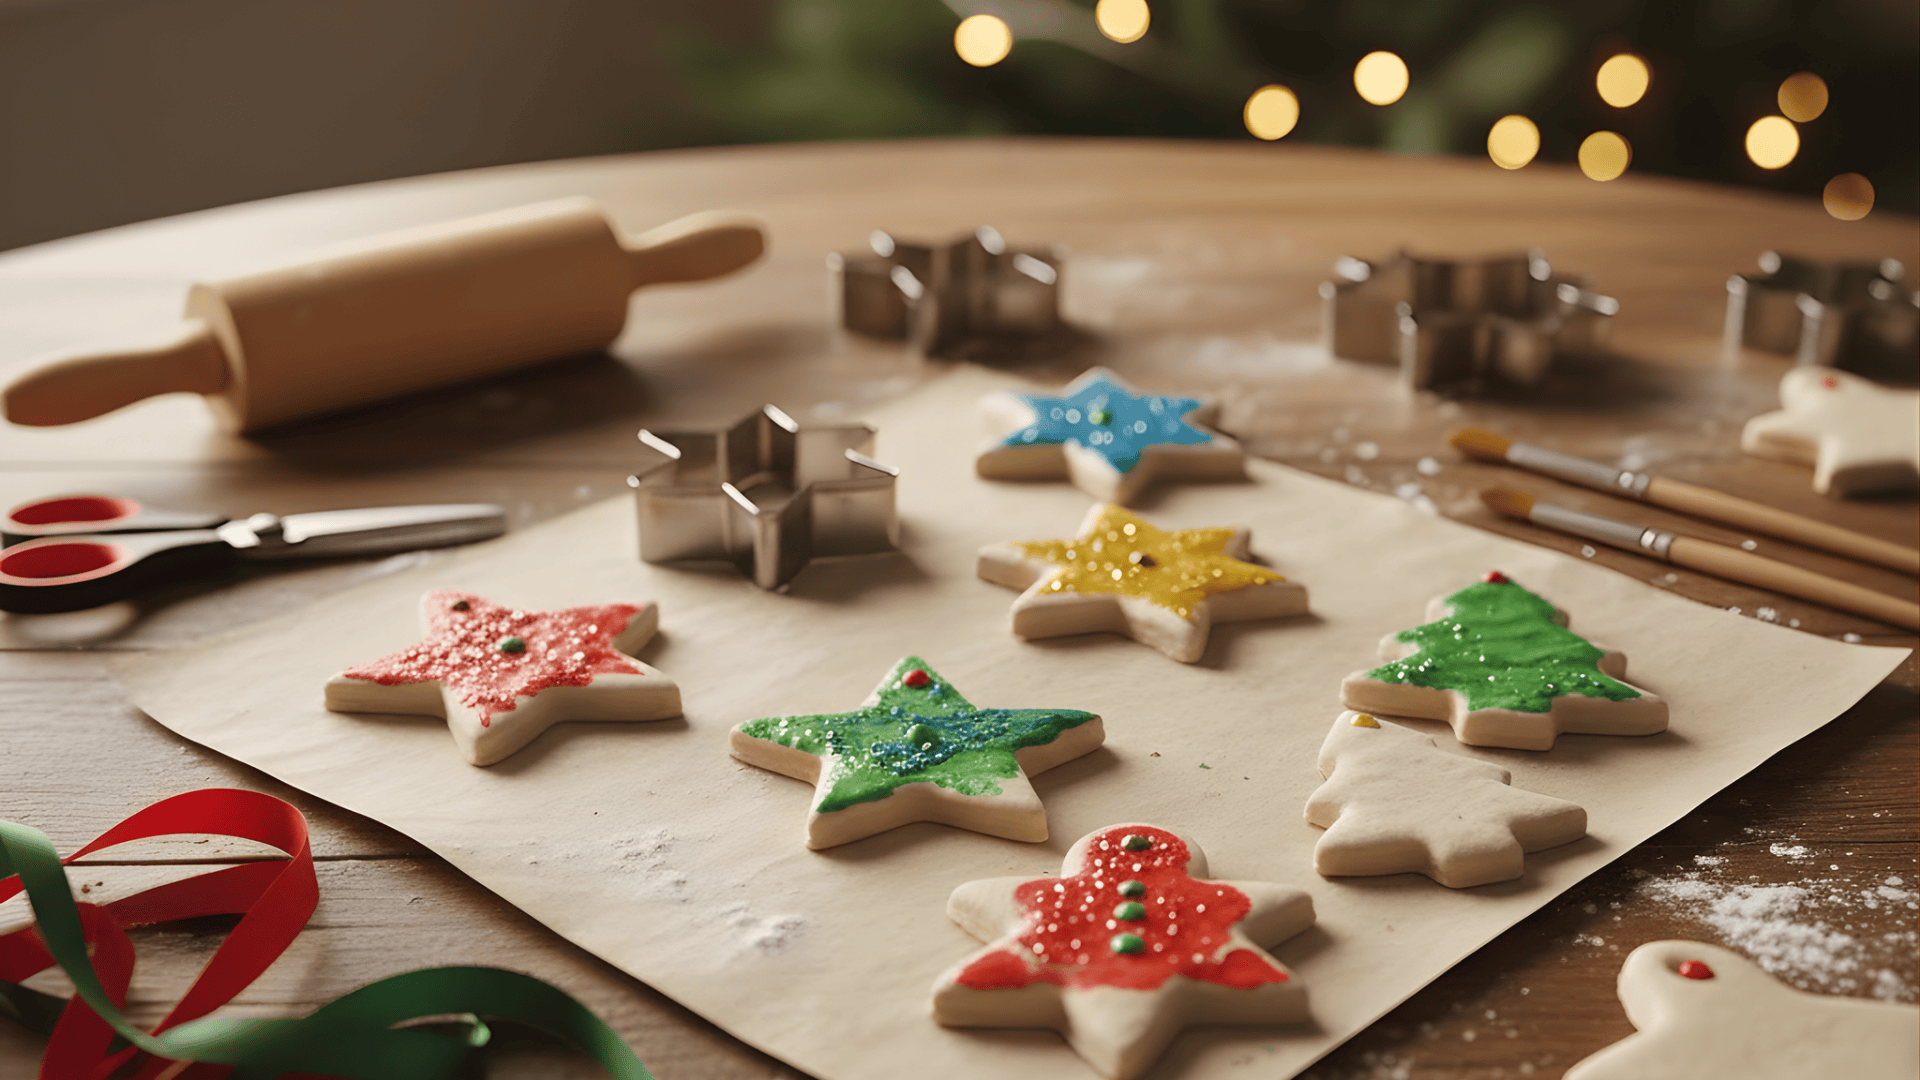
Salt dough ornaments are easy to shape and last for years. Kids love using cookie cutters and decorating each piece.
Materials You Need:
- 1 cup salt
- 2 cups flour
- 1 cup water
- Cookie cutters
- Ribbon
- Paint
Steps to Follow:
- Mix salt, flour, and water into a smooth dough.
- Roll it out and cut shapes with cookie cutters.
- Poke a small hole at the top for a ribbon.
- Bake at a low temperature until dry.
- Let them cool, then paint and decorate.
- Add ribbon to hang them.
10. Marble Christmas Ornaments
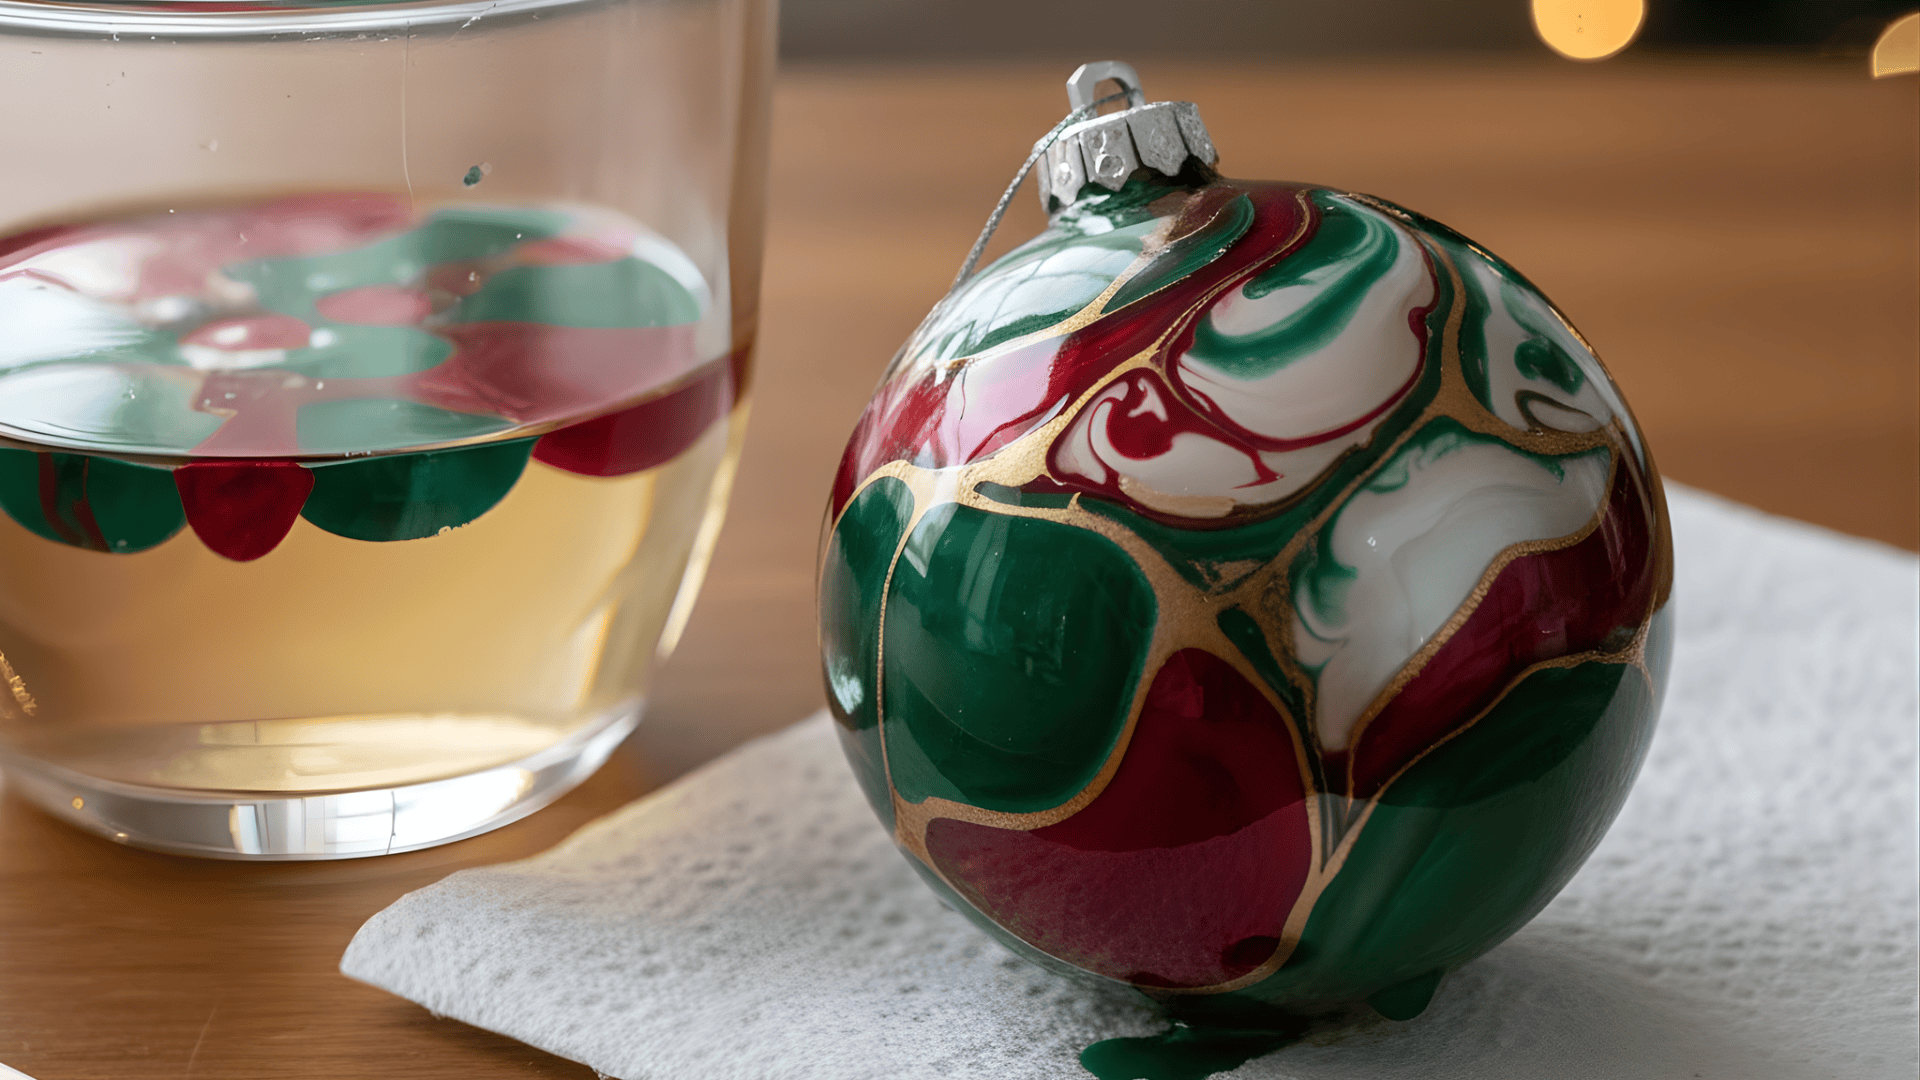
These ornaments look fancy but are very easy for kids to make. They enjoy watching the colors swirl and mix in the water.
Materials You Need:
- Clear plastic ornaments
- Nail polish
- Warm water
- Disposable container
- Paper towels
Steps to Follow:
- Fill a container with warm water.
- Add drops of nail polish to the water.
- Gently swirl the colors with a toothpick.
- Dip the ornament into the mixture.
- Let it dry on a paper towel.
- Add a ribbon or hook for hanging.
11. DIY Photo Frame Ornament
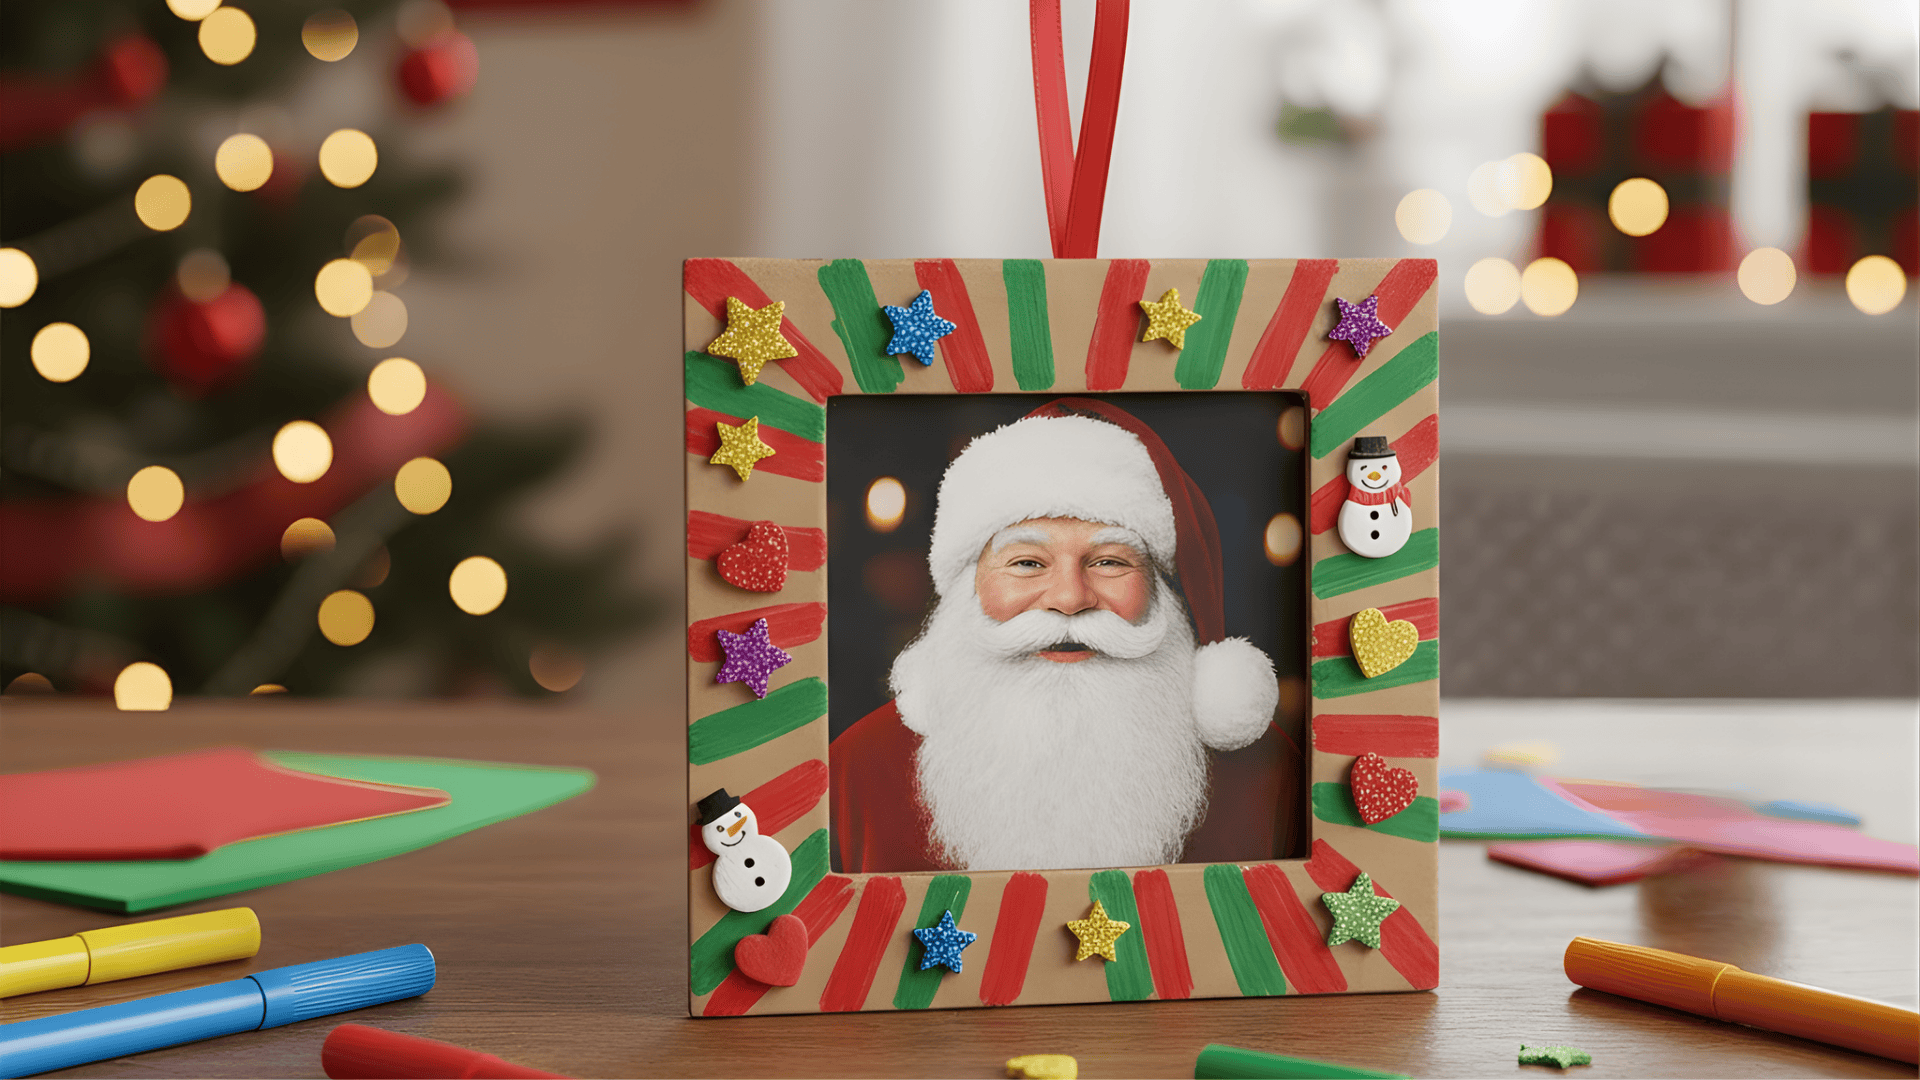
This photo ornament makes a sweet keepsake for the family. Kids can decorate the frame and choose a picture they love.
Materials You Need:
- Cardboard or craft foam
- Markers or paint
- Glue
- Ribbon
- Photo print
Steps to Follow:
- Cut a simple frame shape from cardboard.
- Decorate it with paint or markers.
- Glue the photo behind the frame.
- Add a ribbon loop on top.
- Let it dry before hanging.
12. Beaded Candy Cane Ornament
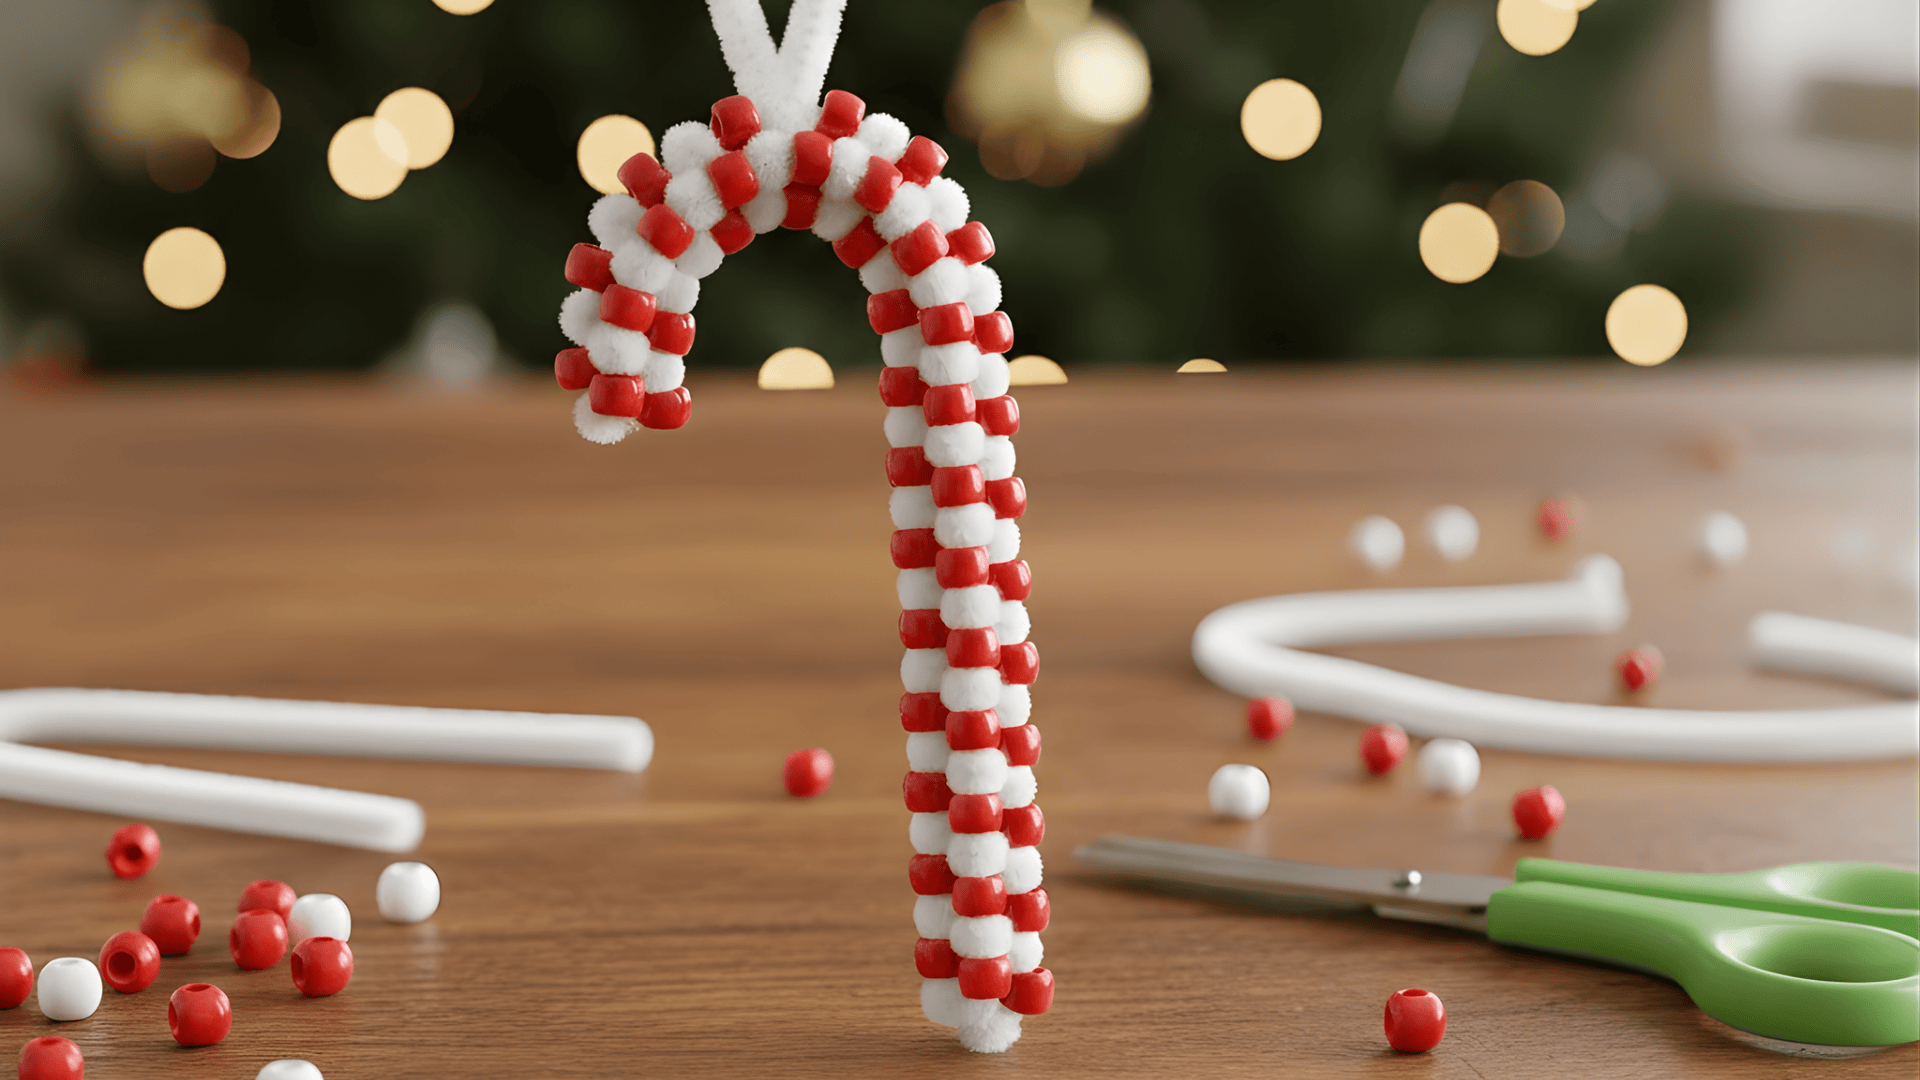
This quick craft helps kids learn simple patterns. It adds bright color to the tree and works well for groups.
Materials You Need:
- Red and white beads
- Pipe cleaner
- Scissors
Steps to Follow:
- Cut the pipe cleaner to the size you want.
- Slide beads on in a red–white pattern.
- Bend the top into a candy cane shape.
- Twist the ends to secure the beads.
- Hang it on the tree or use it on gifts.
13. Pipe Cleaner Mini Christmas Trees
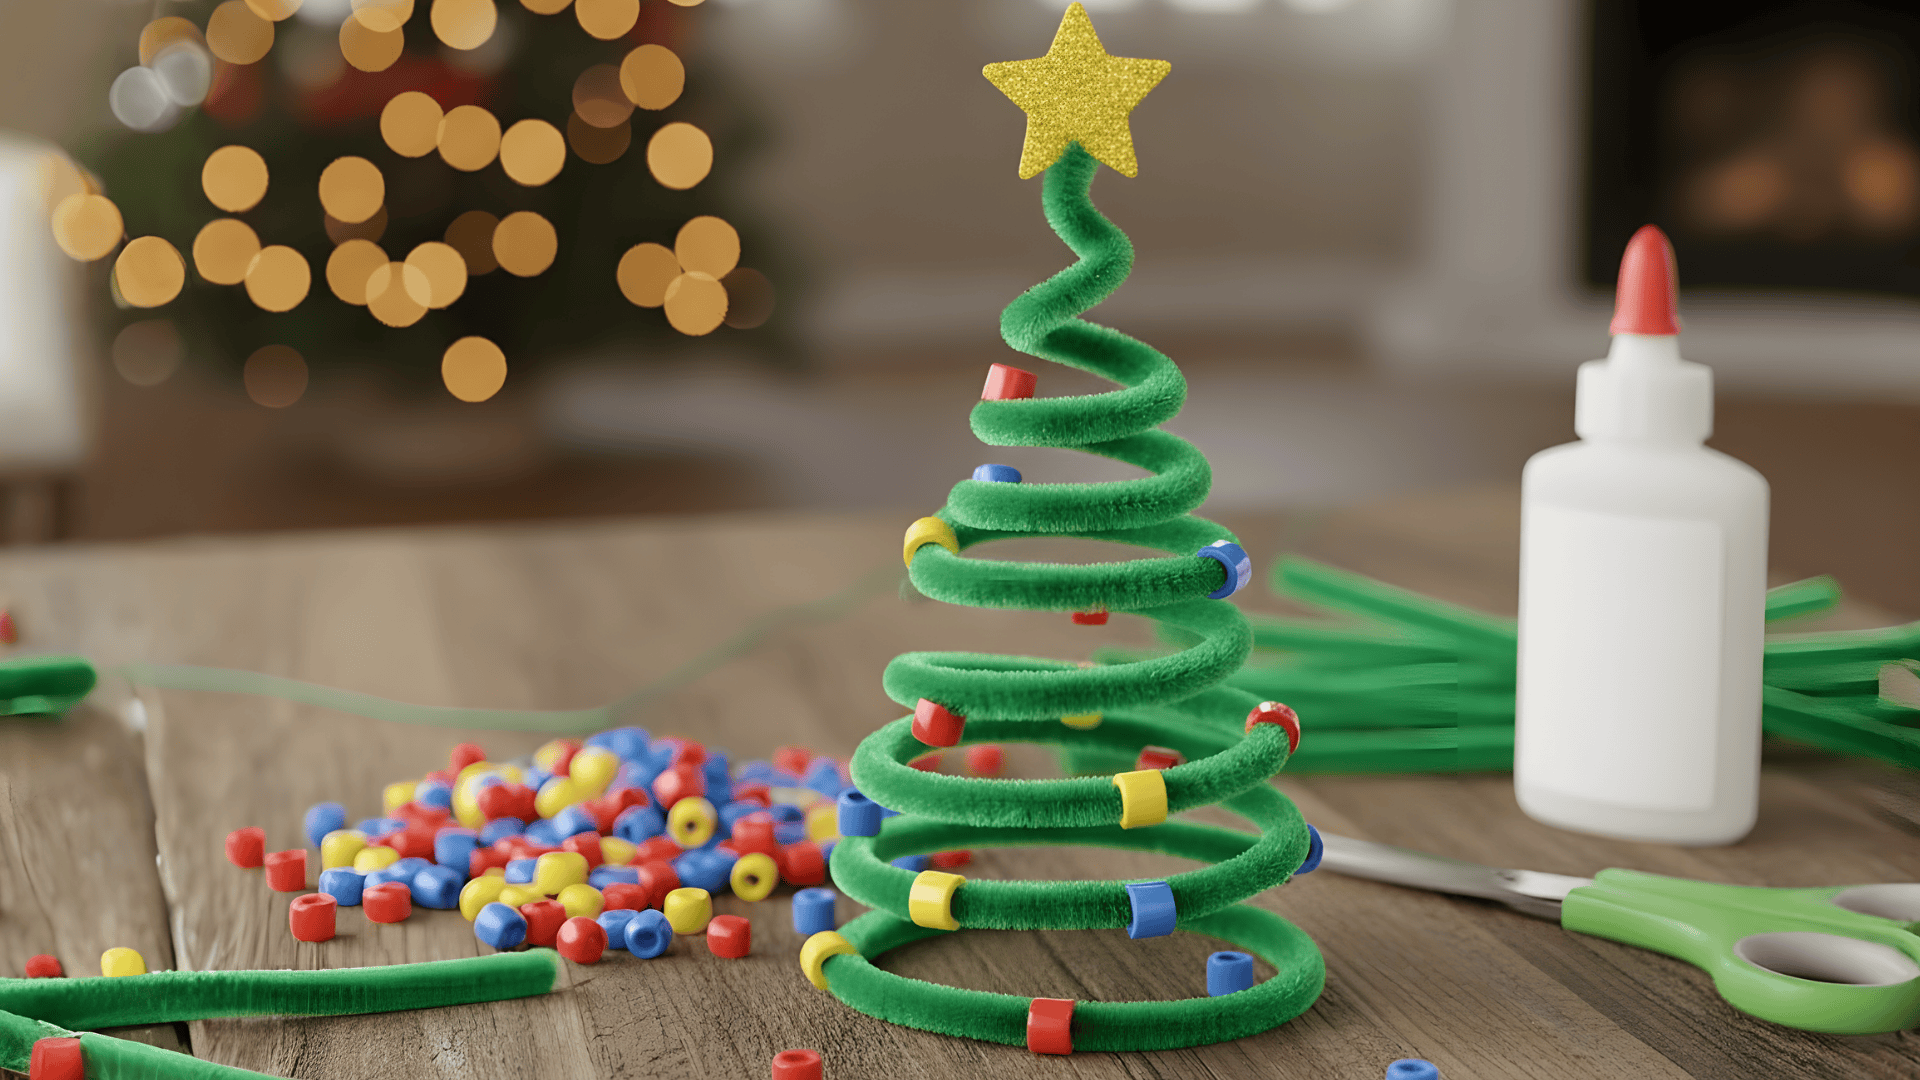
These tiny trees are cute, quick, and full of sparkle. Kids can add small beads to make them look like real decorated trees.
Materials You Need:
- Green pipe cleaners
- Beads or sequins
- Glue
- Small star sticker
Steps to Follow:
- Twist two pipe cleaners together for strength.
- Shape them into a cone or spiral tree.
- Add beads or sequins as decorations.
- Stick a small star on the top.
14. Easy Sew or Stitch Cardboard Ornaments
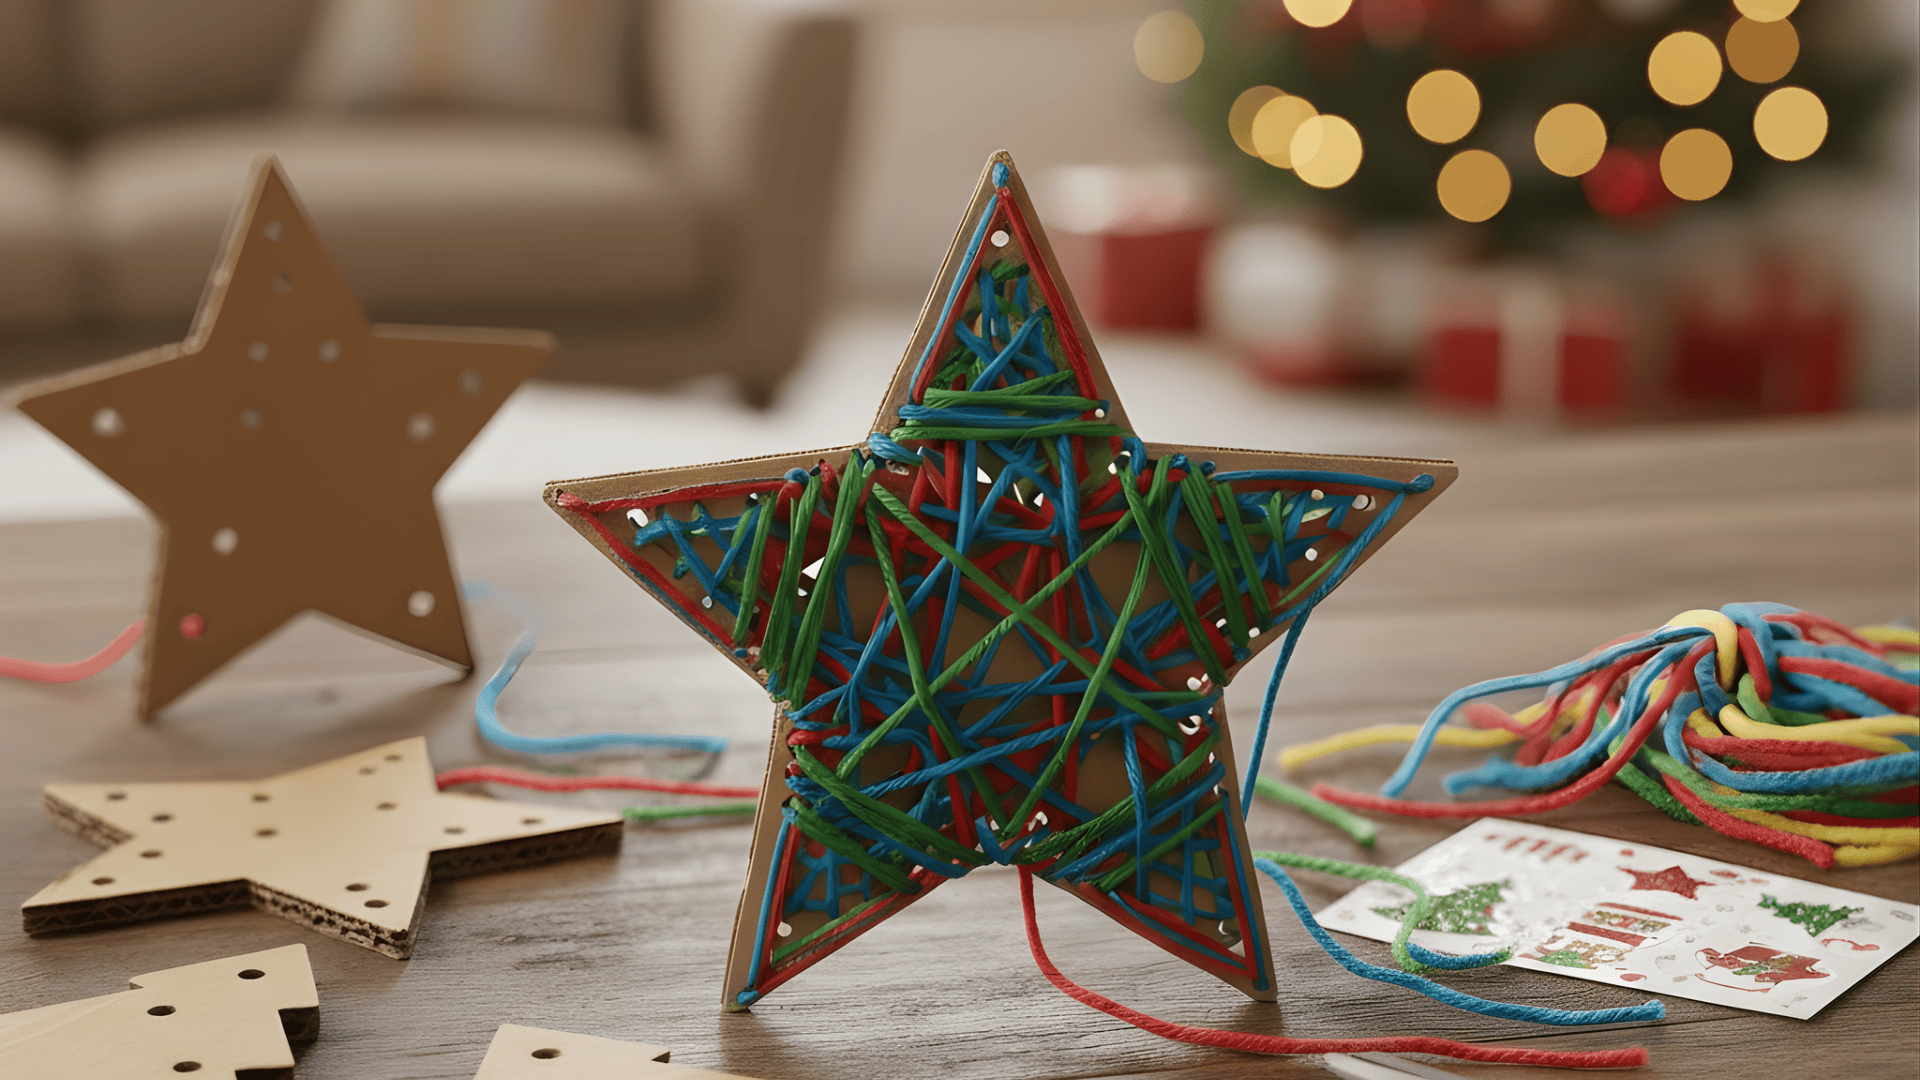
This stitching craft is perfect for beginners and teaches simple sewing skills. Cardboard shapes are strong and easy for small hands to use.
Materials You Need:
- Cardboard shapes
- Yarn or thick thread
- Plastic needle
- Stickers or markers
Steps to Follow:
- Punch small holes around the shape’s edges.
- Thread the plastic needle with yarn.
- Stitch through the holes in any pattern you like.
- Add stickers or drawings to decorate.
- Tie the yarn at the top to hang it.
Cute Santa, Reindeer, and Snowman Crafts
These character crafts are always a holiday favorite for kids. They’re fun, easy to understand, and help kids connect with familiar Christmas icons.
15. Cotton Ball Santa Face

This Santa craft is soft, simple, and perfect for younger kids. It teaches them how to glue, place shapes, and build a face using basic materials.
Materials You Need:
- Paper circle
- Cotton balls
- Red paper
- Googly eyes
- Glue
Steps to Follow:
- Cut a circle for Santa’s face.
- Glue cotton balls around the bottom for his beard.
- Add a red paper hat on top.
- Place googly eyes in the center.
- Add more cotton for the hat trim if you like.
16. Handprint Reindeer Craft

This reindeer craft uses your child’s handprint, making it feel personal and cute. Kids love seeing their hand shape turn into a funny reindeer with a bright nose.
Materials You Need:
- Brown paper
- Red pom-pom
- Googly eyes
- Glue
- Marker
Steps to Follow:
- Trace your child’s hand on brown paper.
- Cut out the handprint shape.
- Glue googly eyes near the top.
- Add a red pom-pom nose at the bottom.
- Draw a smile or small details.
17. Rudolph Ornament With a Pom-Pom Nose
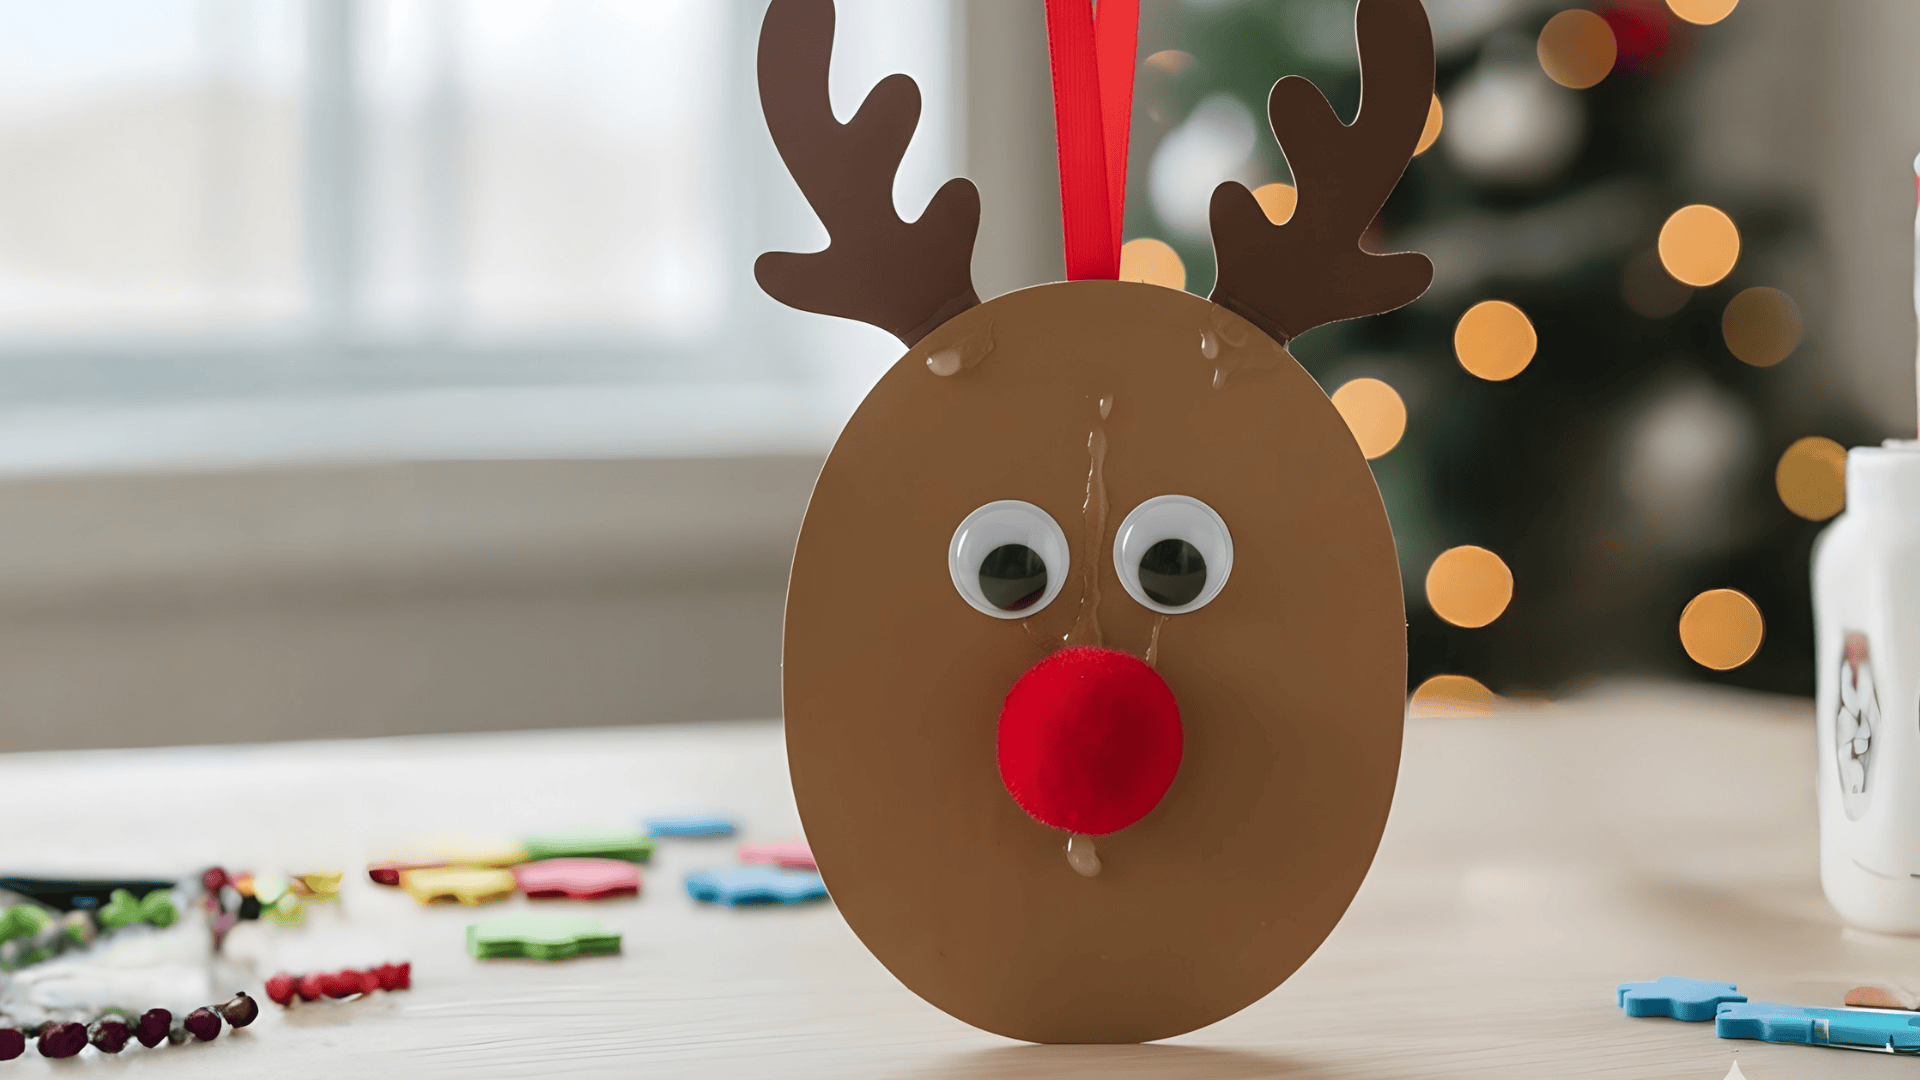
This ornament is simple and looks adorable on the tree. Kids enjoy giving Rudolph his bright red nose and decorating the face.
Materials You Need:
- Brown craft foam or cardboard
- Red pom-pom
- Googly eyes
- Ribbon
- Glue
Steps to Follow:
- Cut out a simple oval for Rudolph’s face.
- Glue googly eyes near the top.
- Add a red pom-pom nose in the center.
- Draw antlers or cut simple cardboard antlers.
- Add a ribbon loop on top for hanging.
18. Paper Plate Snowman
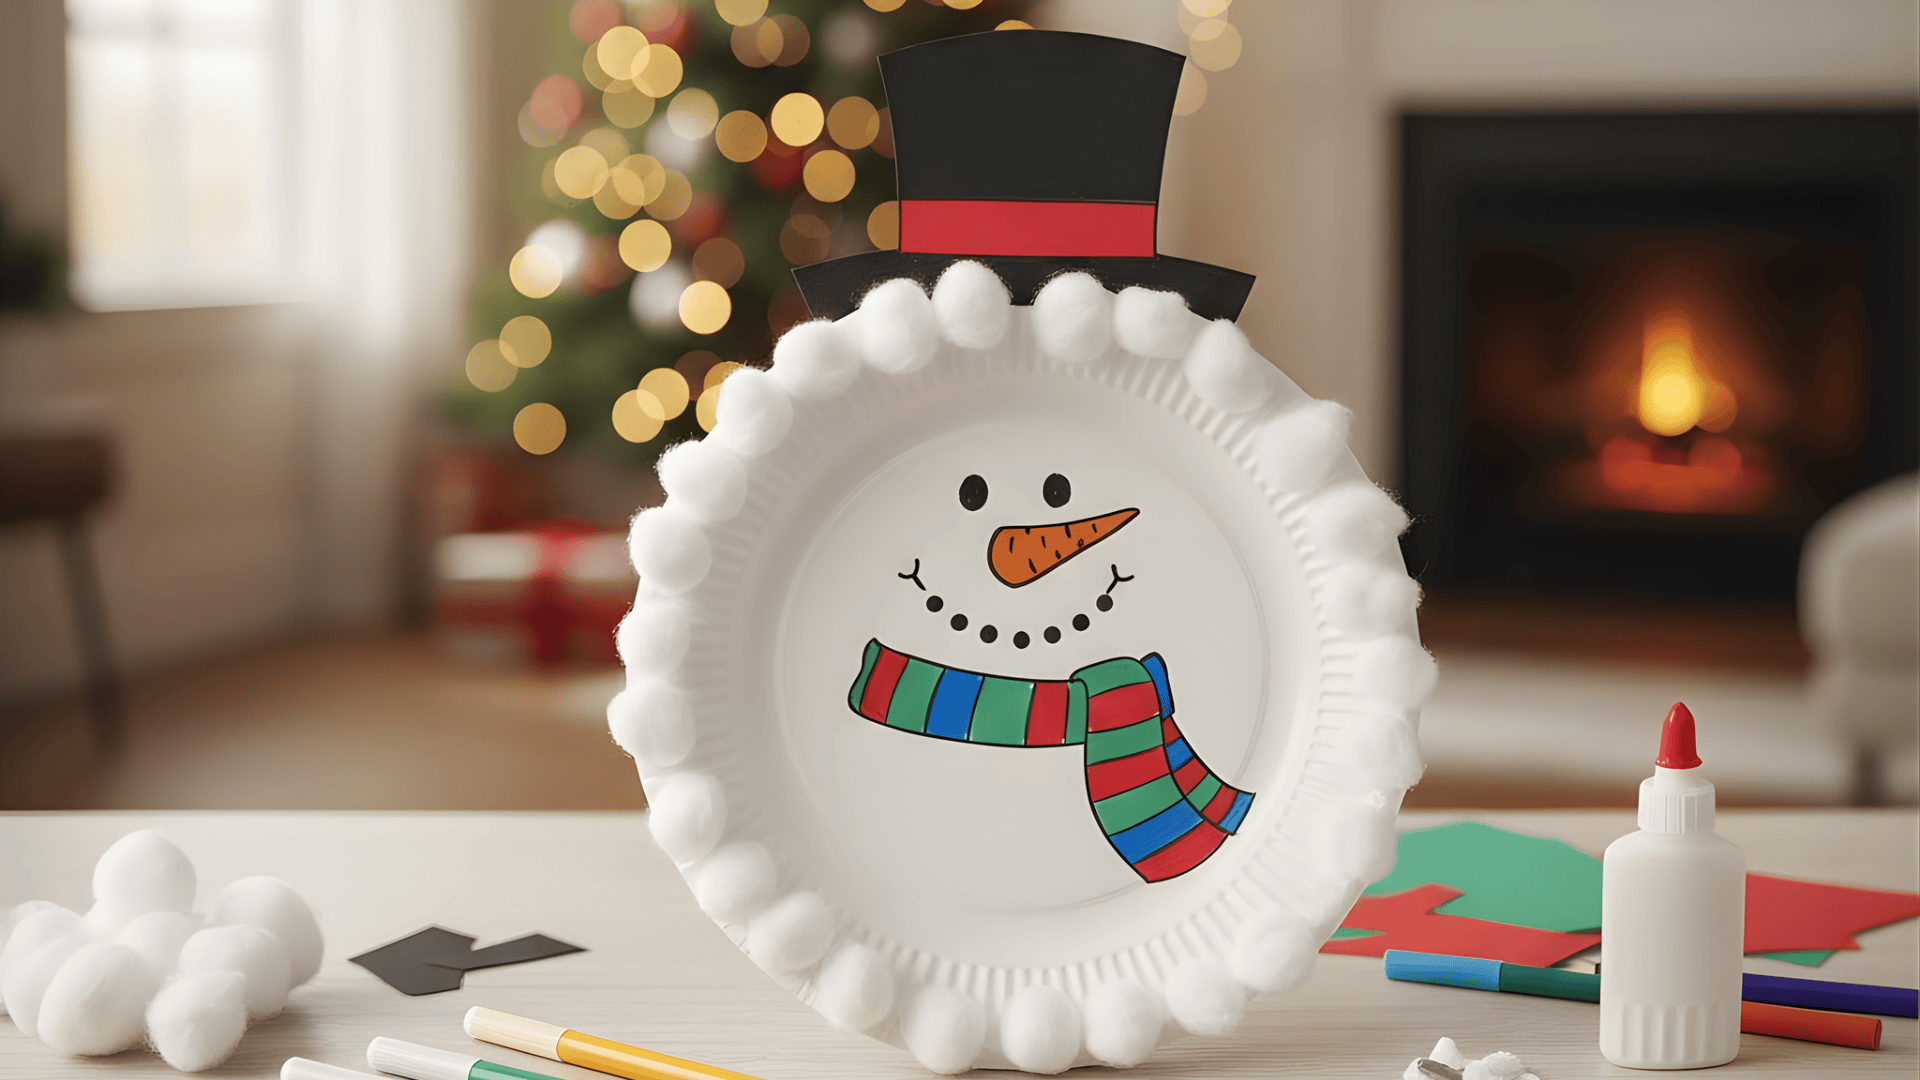
This snowman craft is quick to make and fun for decorating. Kids can choose different hats, scarves, and faces to make each snowman unique.
Materials You Need:
- Paper plate
- Colored paper
- Markers
- Glue
- Cotton balls (optional)
Steps to Follow:
- Use the paper plate as the snowman’s face.
- Cut a hat from colored paper.
- Draw eyes, a carrot nose, and a smile.
- Glue on the hat and draw or paste a coloured scarf.
- Add cotton balls around the edge for extra “snow.”
19. Toilet Roll Santa, Elf, or Reindeer
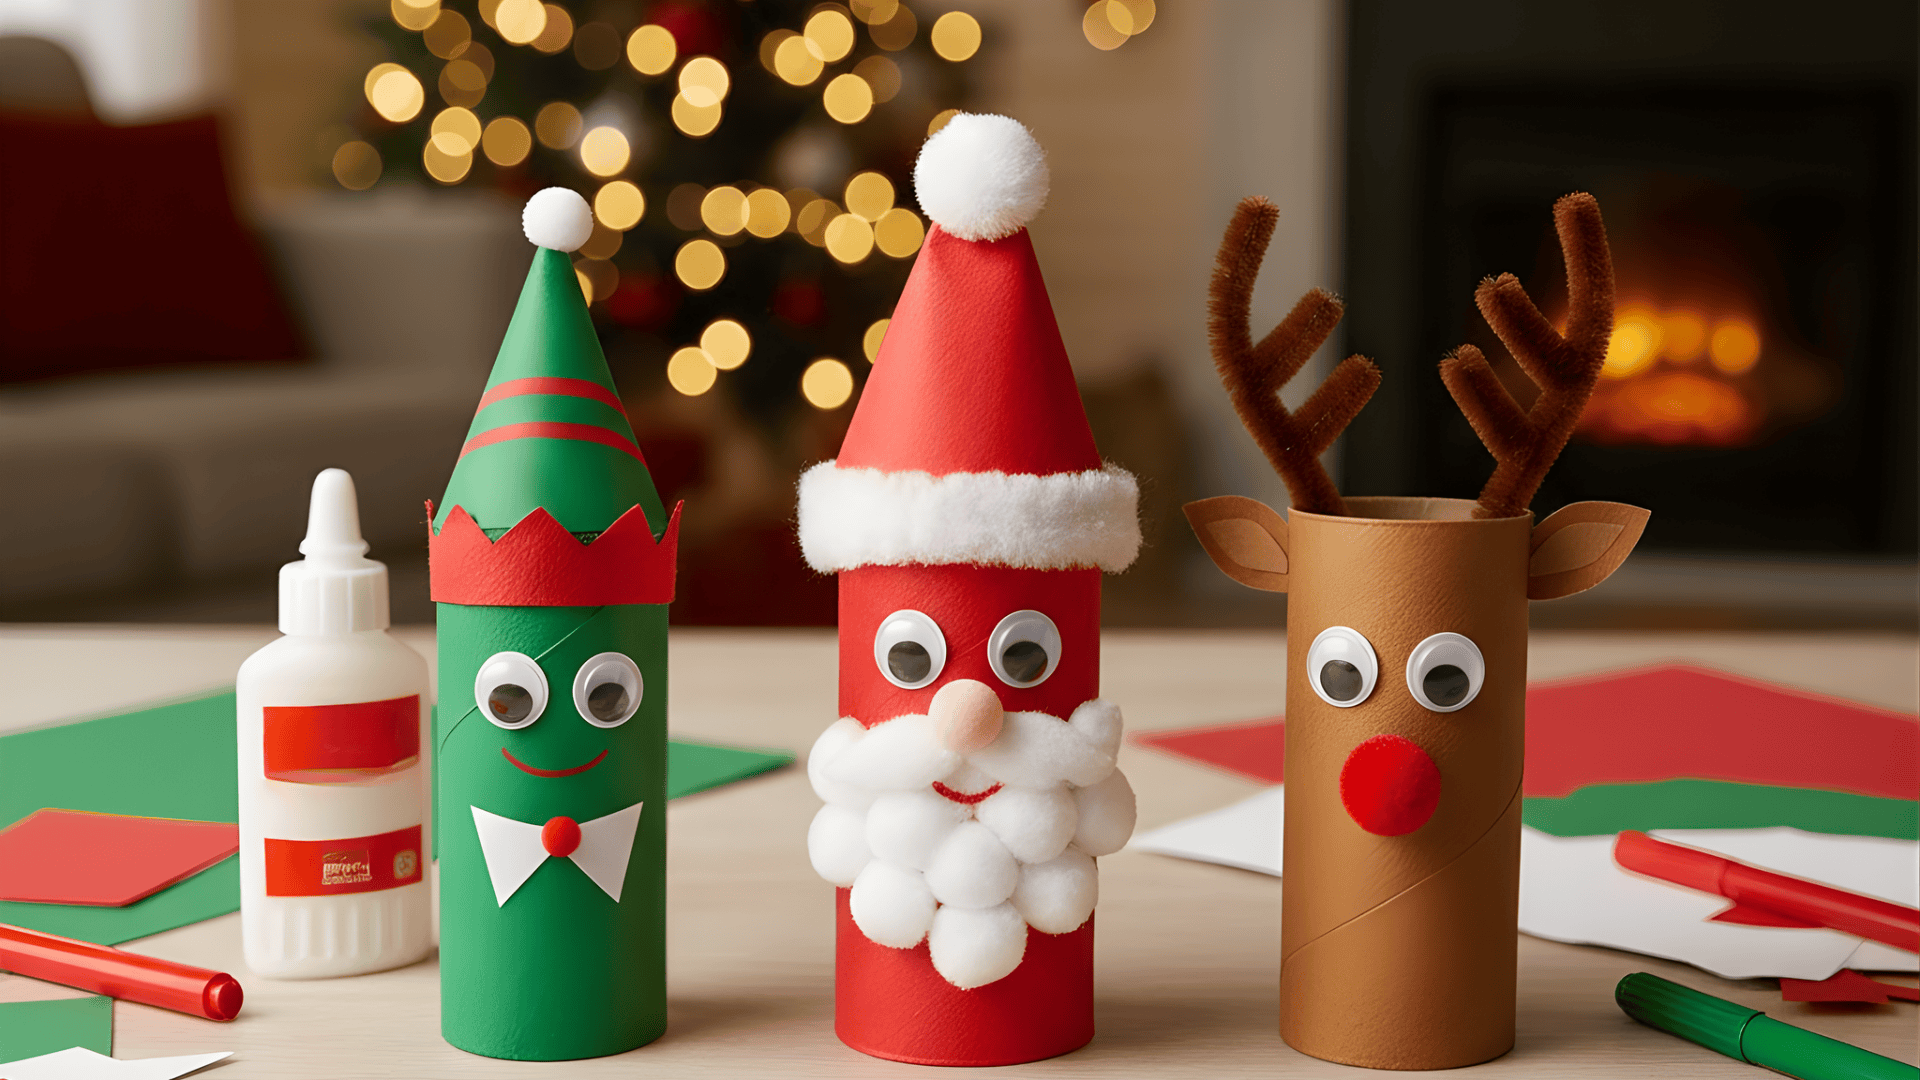
These toilet roll characters are great for pretend play. Kids can choose which character to make and decorate each one differently.
Materials You Need:
- Toilet paper rolls
- Colored paper
- Glue
- Markers
- Small craft accessories
Steps to Follow:
- Wrap the toilet roll with colored paper.
- Add details like hats, belts, noses, or eyes.
- Cut small ears or antlers if needed.
- Draw extra details with markers.
- Let kids make a full set for a mini holiday display.
20. Bottle Cap Snowman Ornament
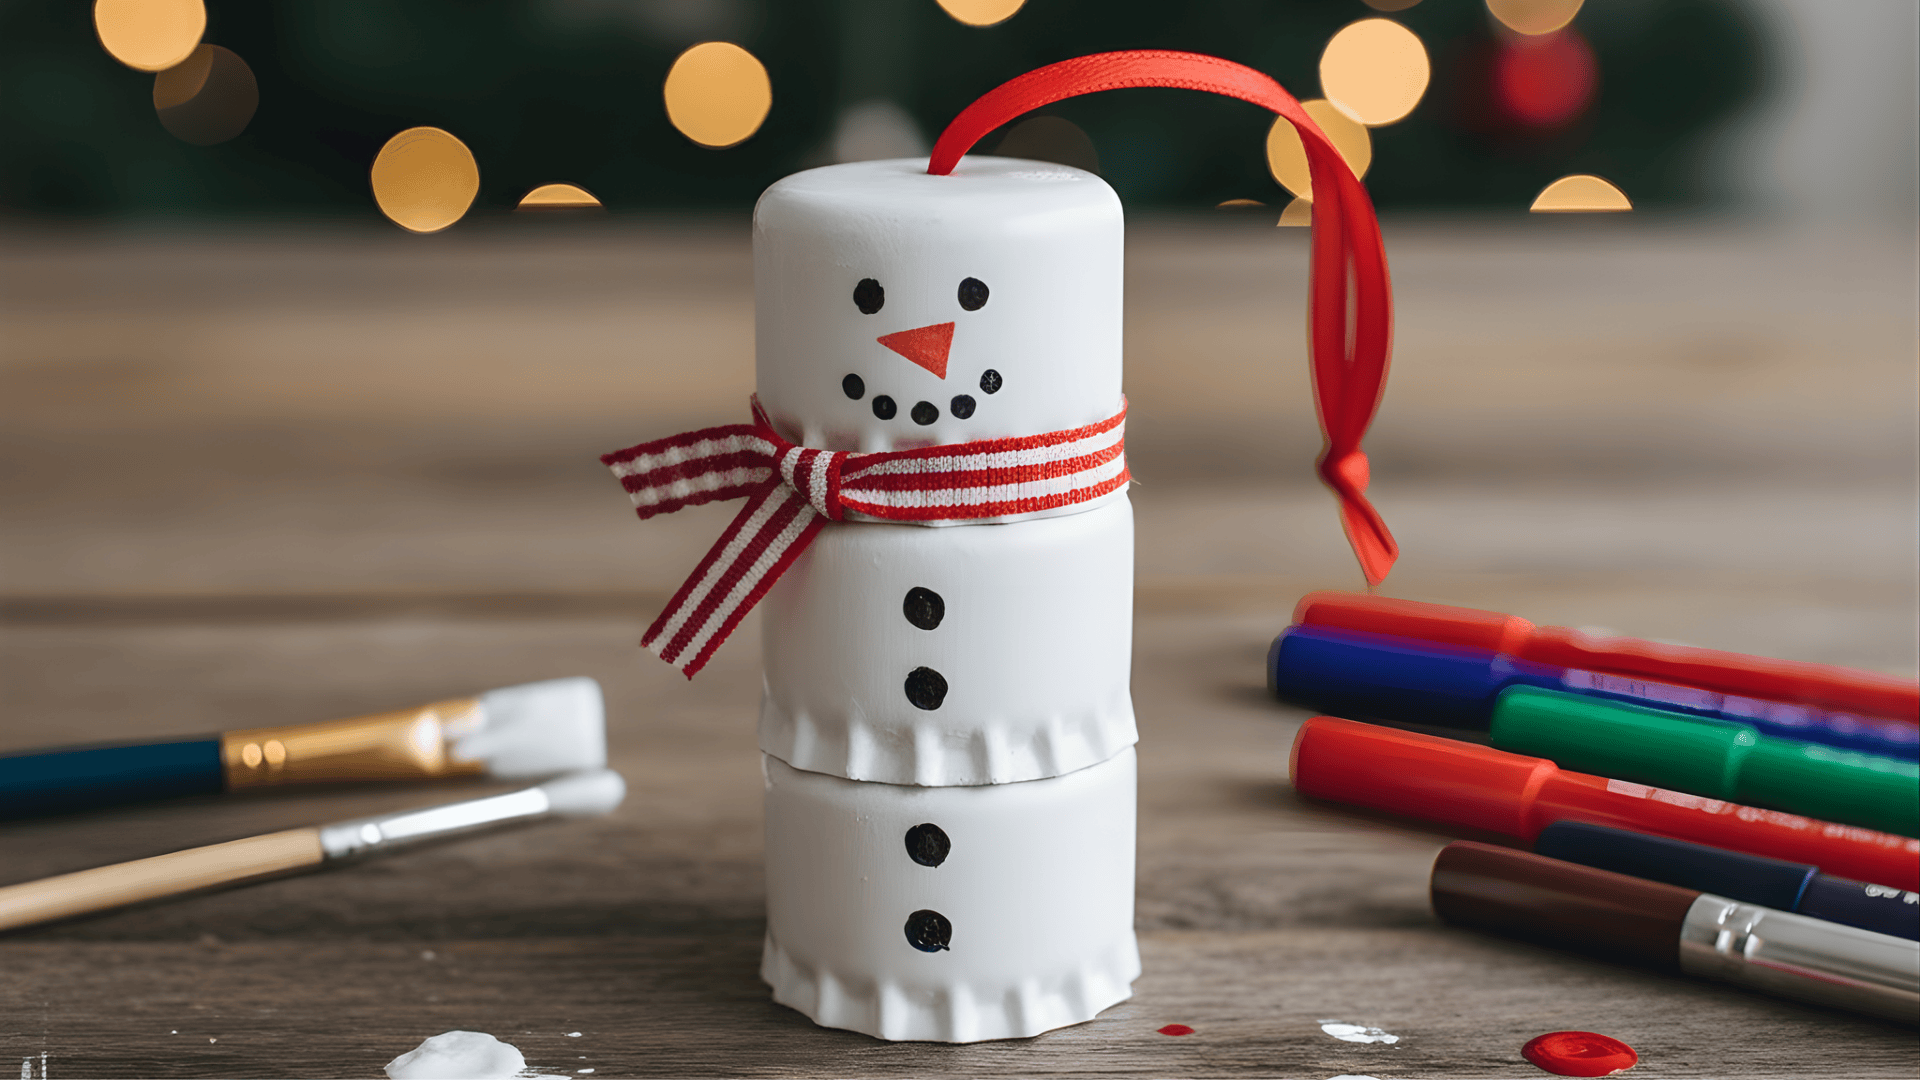
This tiny snowman is made from recycled bottle caps, making it fun and eco-friendly. Kids enjoy painting each cap and stacking them into a cute snowman shape.
Materials You Need:
- 2–3 bottle caps
- White paint
- Ribbon
- Markers
- Glue
Steps to Follow:
- Paint the inside of each bottle cap white.
- Glue them in a vertical line to form a snowman.
- Draw buttons, eyes, and a carrot nose.
- Add a small ribbon as a scarf.
- Glue a loop of ribbon at the top to hang it.
Creative Sensory Christmas Crafts
These sensory crafts are great for kids who love hands-on play. They let kids learn textures while also enjoying simple Christmas themes.
21. Gingerbread Playdough Activity
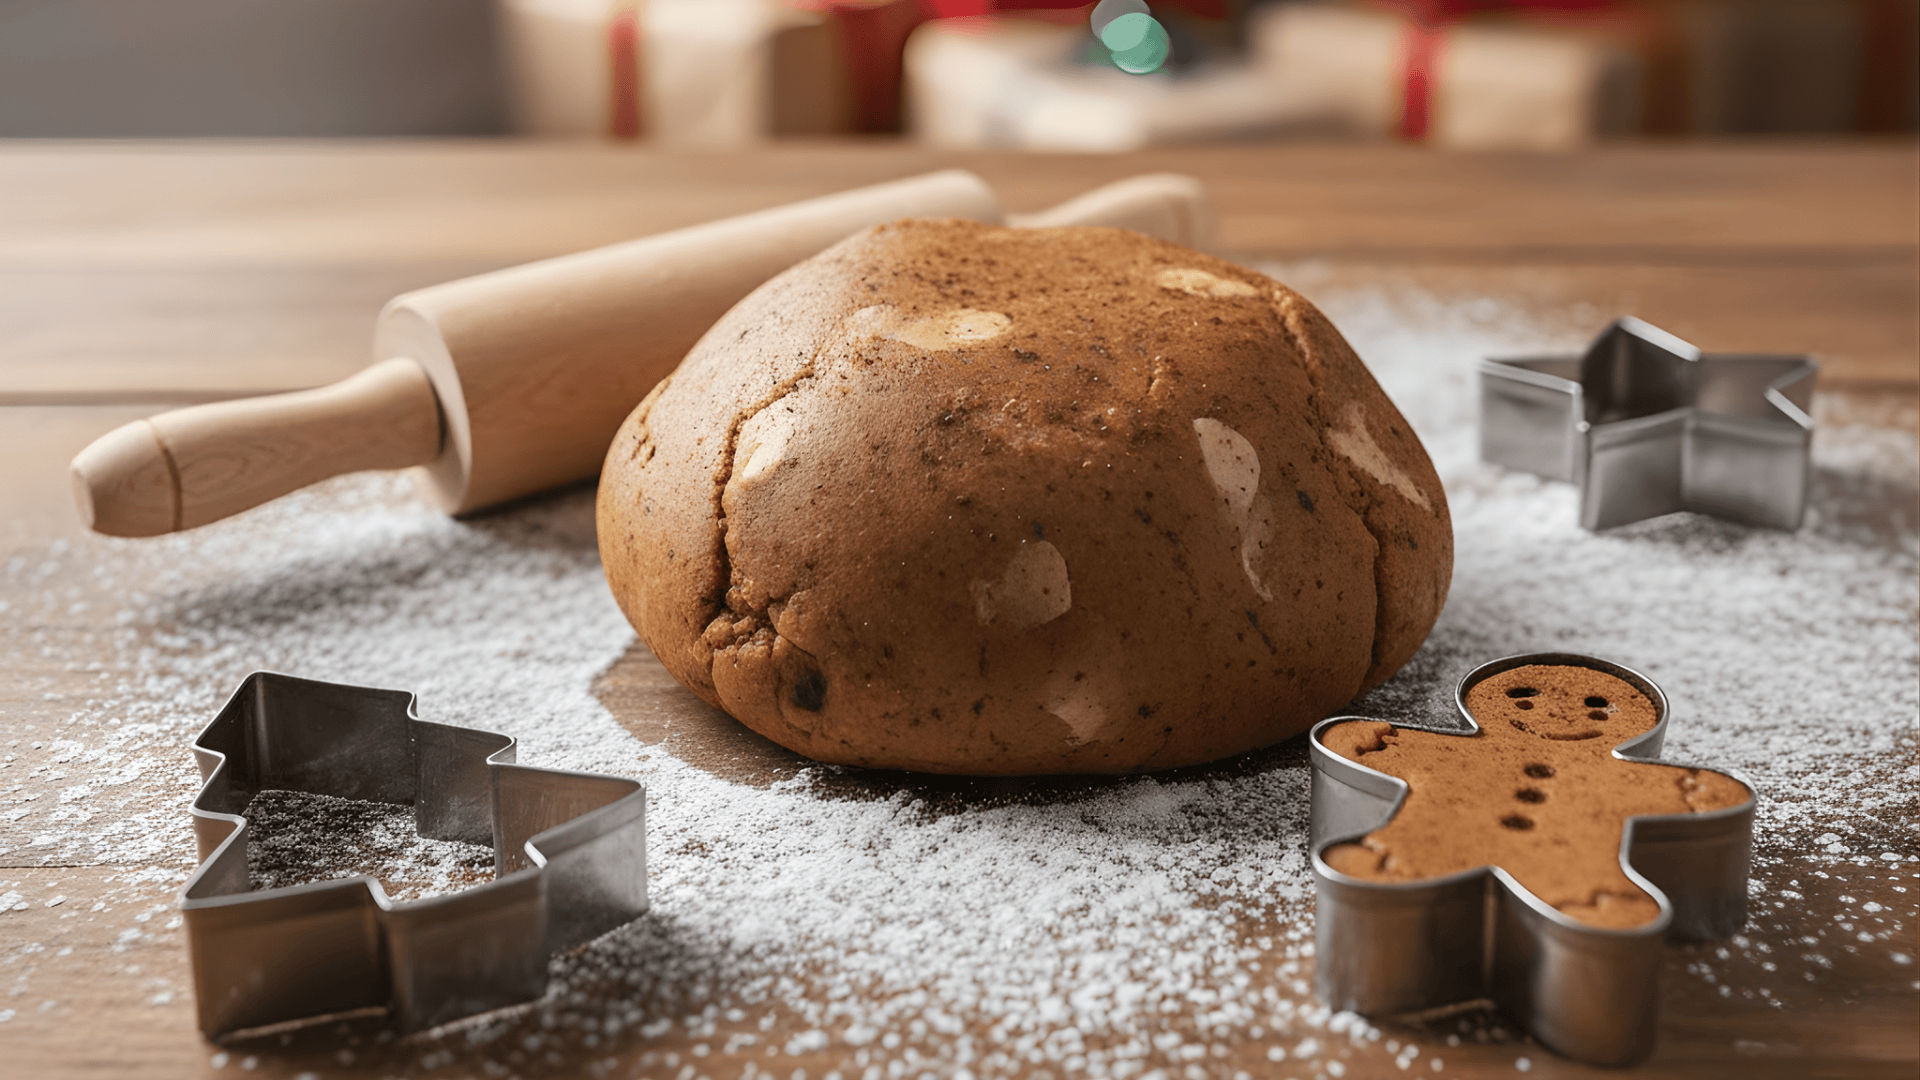
This gingerbread playdough smells warm and cozy, making it perfect for holiday play. Kids can shape trees, stars, people, or anything they imagine using cookie cutters.
Materials You Need:
- Flour
- Salt
- Water
- Cinnamon or ginger spice
- Cookie cutters
Steps to Follow:
- Mix flour, salt, water, and spices to make playdough.
- Knead it until it’s soft and smooth.
- Roll the dough out with a small rolling pin.
- Use cookie cutters to make Christmas shapes.
- Store the dough in an airtight container when done.
22. DIY Fake Snow for Kids
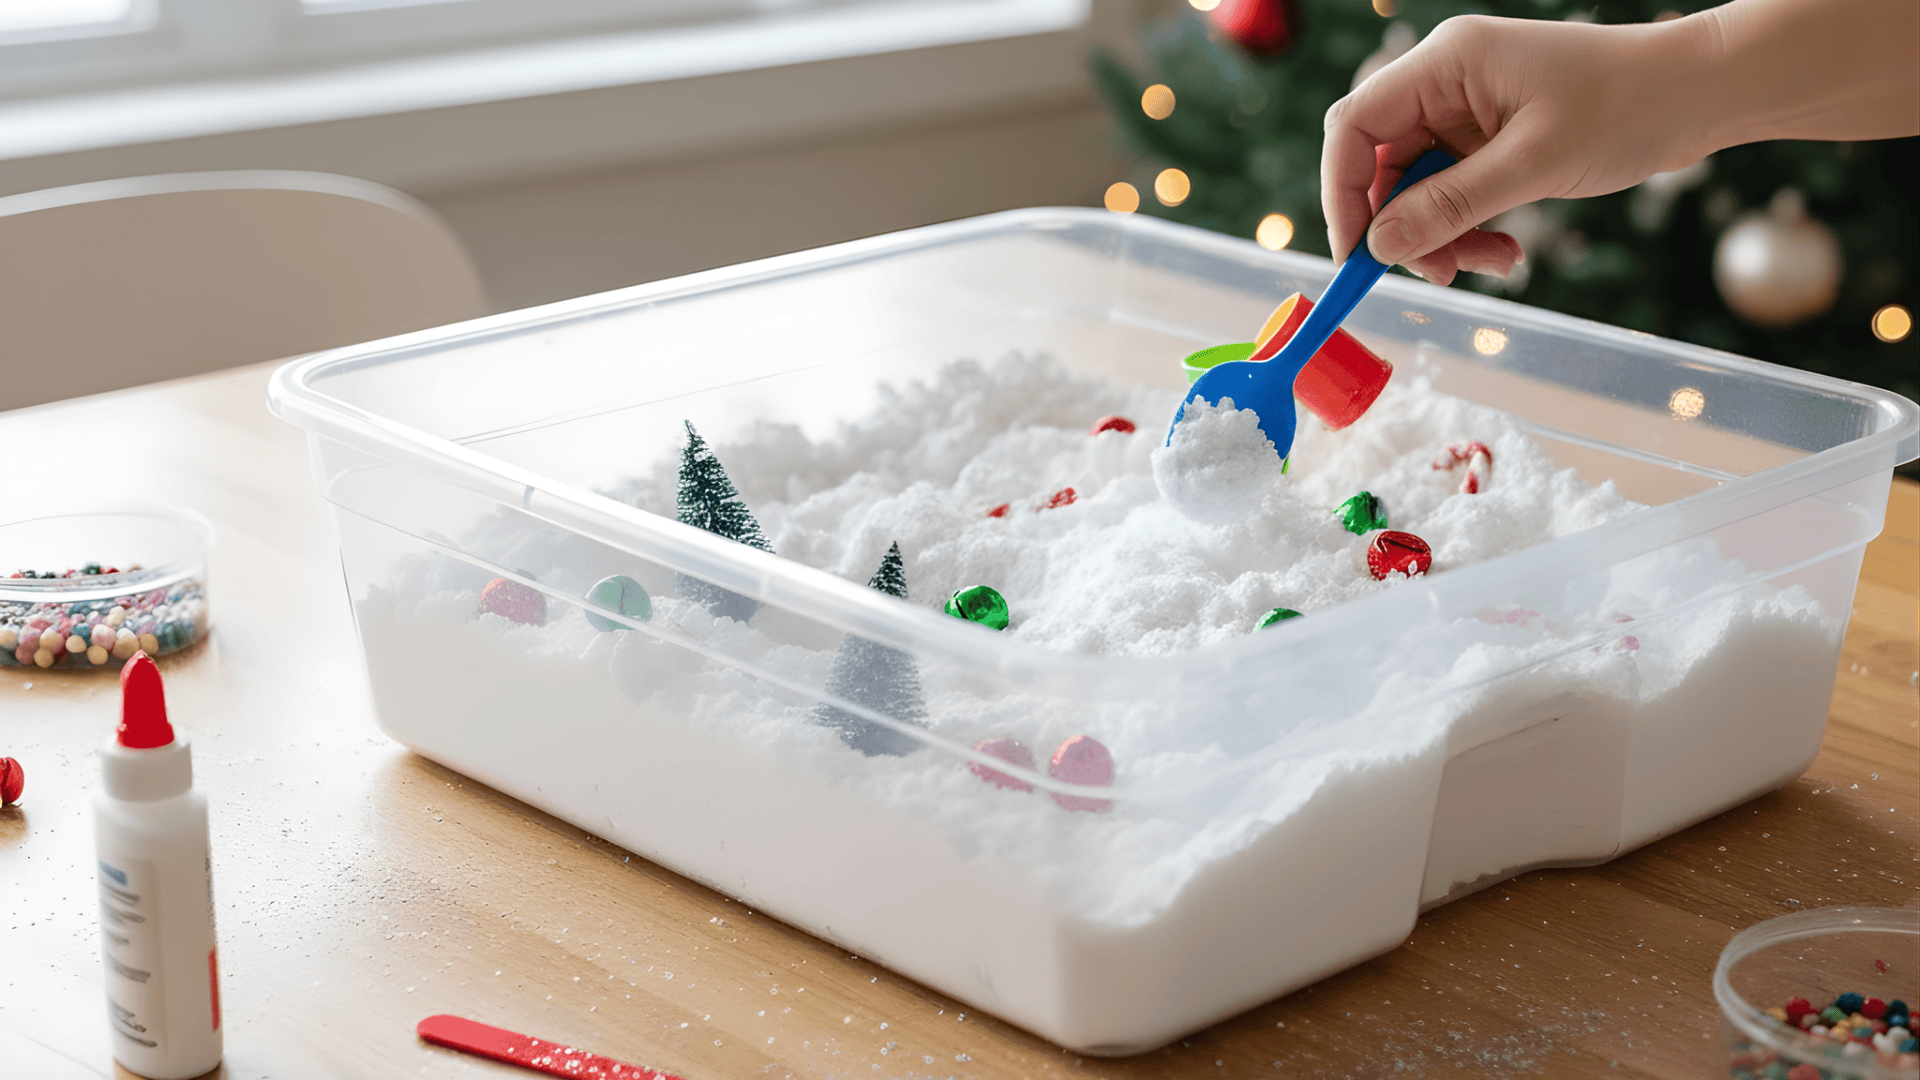
Fake snow is a fun sensory activity that feels soft and fluffy. Kids love scooping, pouring, and building tiny snow scenes.
Materials You Need:
- Baking soda
- Shaving cream
- Small bin
- Spoons or cups
Steps to Follow:
- Pour baking soda into a small bin.
- Add shaving cream slowly.
- Mix until it becomes soft and snowy.
- Add more cream or soda to adjust the texture.
- Let kids build snowballs or tiny snow scenes.
23. Christmas Glitter Slime

Glitter slime is stretchy, sparkly, and perfect for holiday fun. Kids enjoy pulling it, squeezing it, and watching the glitter move inside.
Materials You Need:
- Clear glue
- Baking soda
- Contact solution
- Glitter
- Bowl and spoon
Steps to Follow:
- Pour glue into a mixing bowl.
- Add glitter and stir well.
- Mix in a small amount of baking soda.
- Add contact solution slowly.
- Stir until the slime forms and pulls away from the sides of the bowl.
- Knead the slime until it’s stretchy.
24. Foam Sticker Christmas Scenes

This is a mess-free craft that’s great for younger kids. They can build winter scenes using stickers, shapes, and simple backgrounds.
Materials You Need:
- Foam Christmas stickers
- Construction paper
- Markers
- Glue (optional)
Steps to Follow:
- Give kids a sheet of paper as the background.
- Let them pick the foam stickers they like.
- Place trees, snowmen, and stars to build a scene.
- Add drawings or small details with markers.
- Glue pieces down if needed for extra hold.
Easy Recycled Christmas Crafts
These recycled crafts use items you already have at home. They help kids get creative while also learning how to reuse simple materials.
25. Easy Cardboard Christmas Ornaments
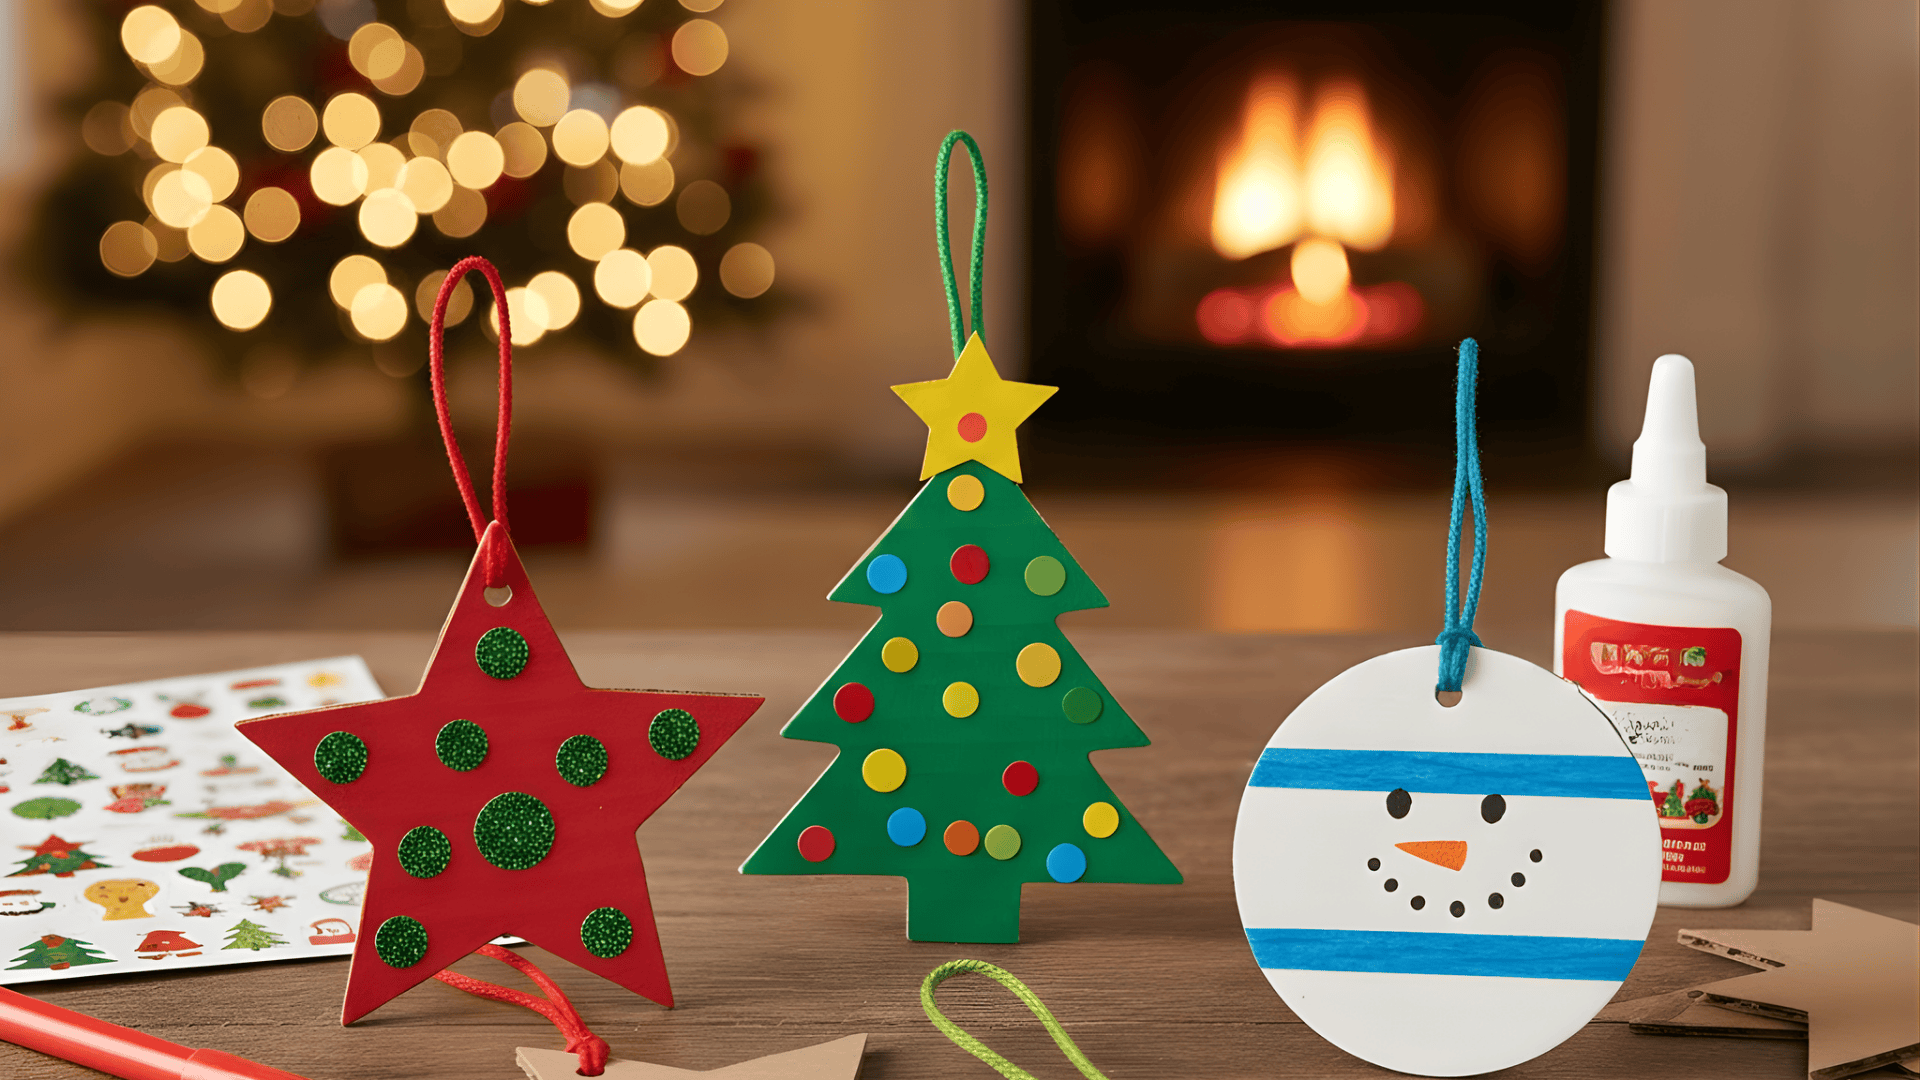
These cardboard ornaments are great because they’re sturdy and easy to decorate. Kids can paint, wrap, or add stickers to create simple Christmas shapes.
Materials You Need:
- Cardboard
- Scissors
- Markers or paint
- Glue
- String or yarn
Steps to Follow:
- Cut cardboard into shapes like stars, trees, or circles.
- Color or paint each shape.
- Add stickers or small decorations.
- Punch a hole at the top.
- Tie a string to hang the ornament.
26. DIY Jar Snow Globe
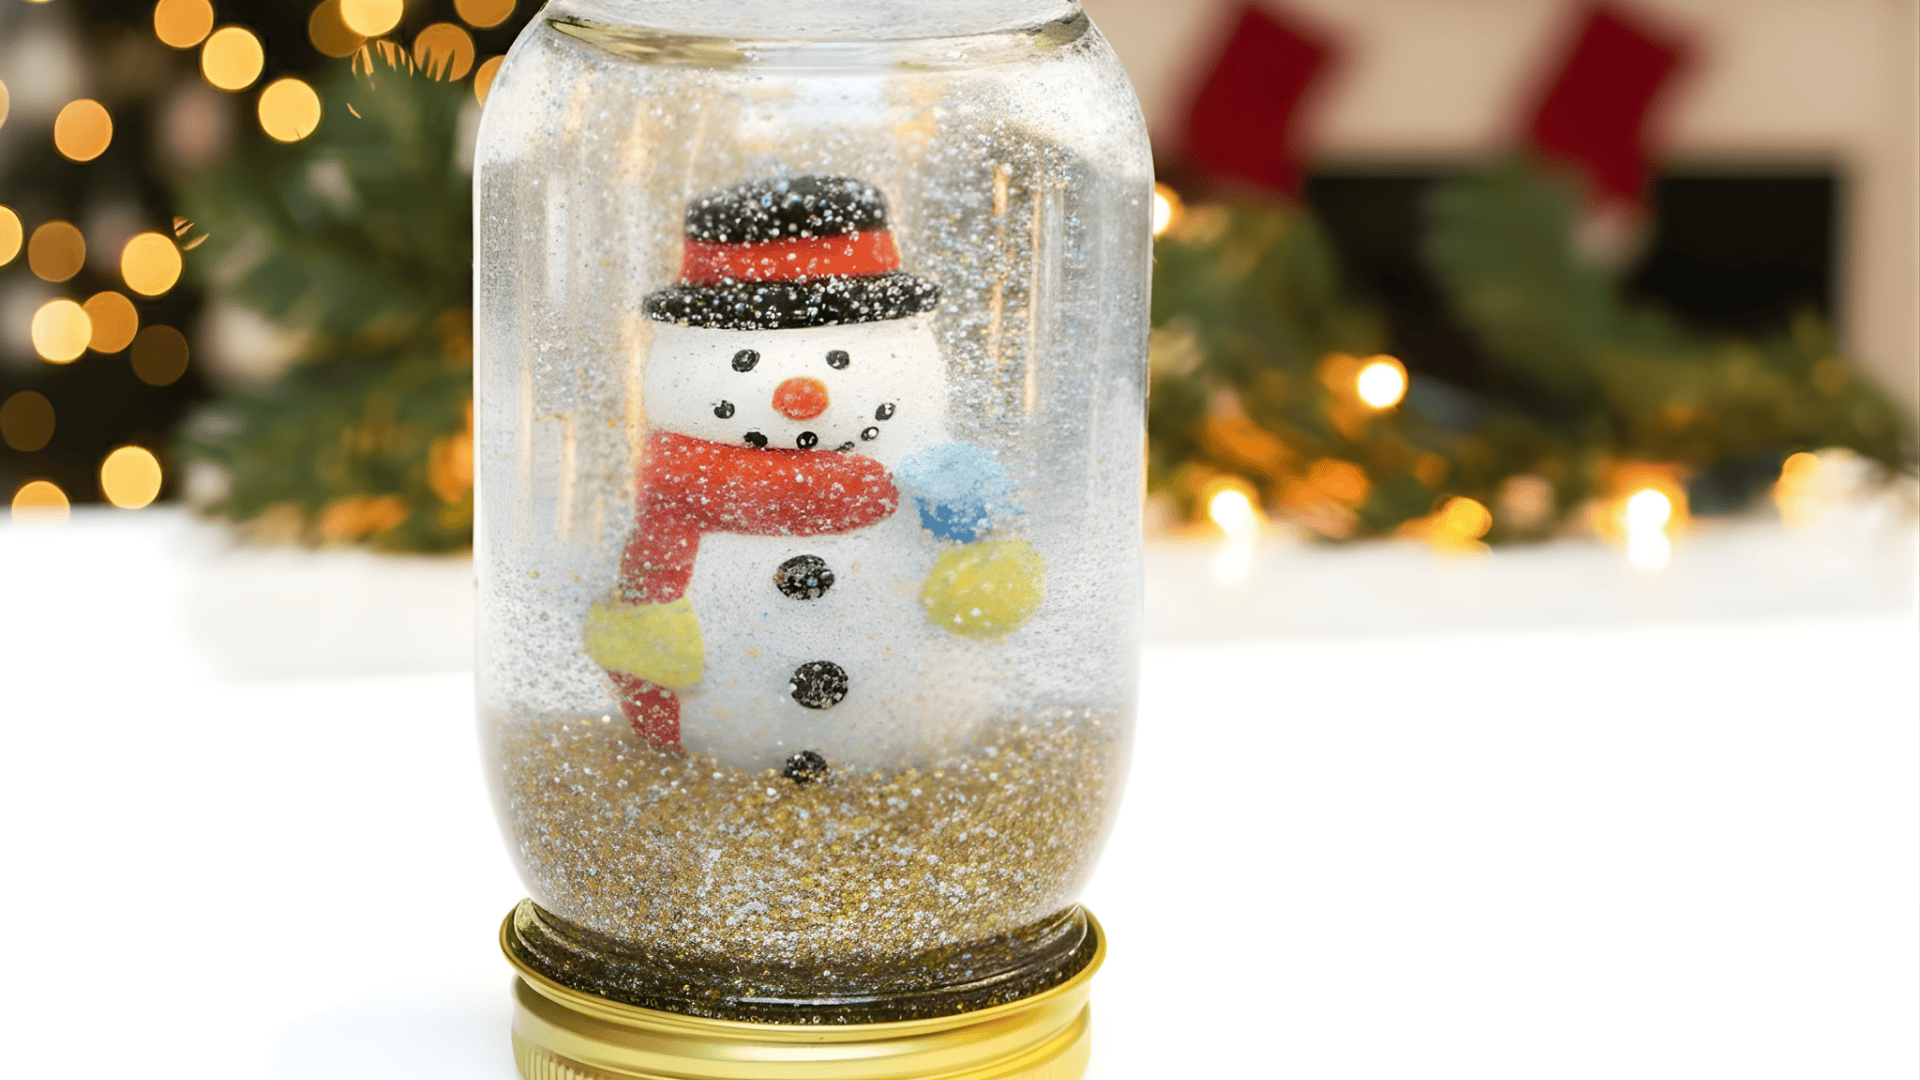
This snow globe uses a recycled jar and looks magical when kids shake it. They enjoy choosing tiny decorations and watching the “snow” swirl inside.
Materials You Need:
- Small jar with lid
- Glitter
- Small toys or decorations
- Water
- Glue
Steps to Follow:
- Glue a small tree or a small Santa to the inside of the jar lid.
- Fill the jar with water.
- Add a small amount of glitter.
- Screw the lid on tightly.
- Seal the edges with glue to prevent leaks.
- Shake gently to see the snow effect.
27. Egg Carton Christmas Tree Craft
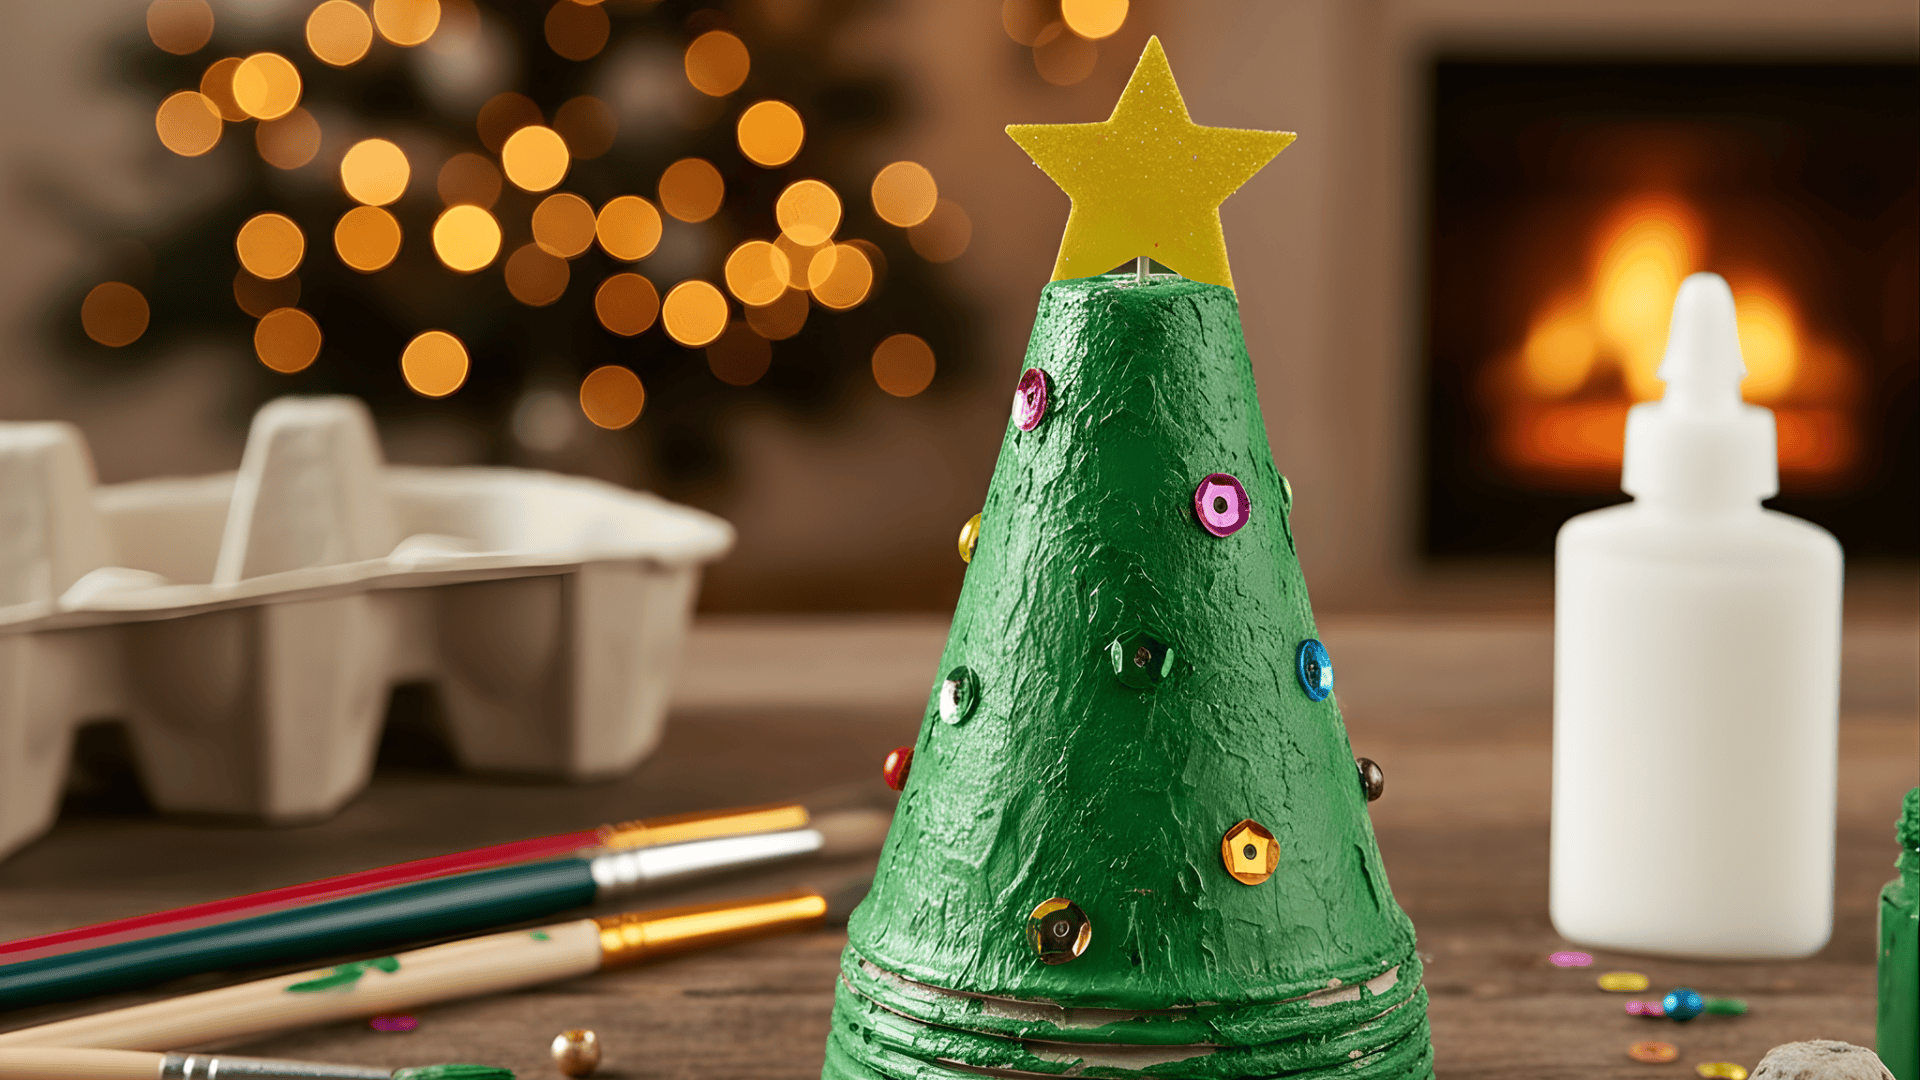
This craft turns simple egg carton pieces into cute little trees. Kids can paint and decorate them, making each tree look different.
Materials You Need:
- Egg carton
- Green paint
- Glue
- Small beads or sequins
- Scissors
Steps to Follow:
- Cut out one “cup” section of the egg carton.
- Trim the edges into a tree shape.
- Paint it green and let it dry.
- Add beads or sequins as ornaments.
- Glue a small star on top if you want.
28. Bottle Cap Reindeer or Snowman
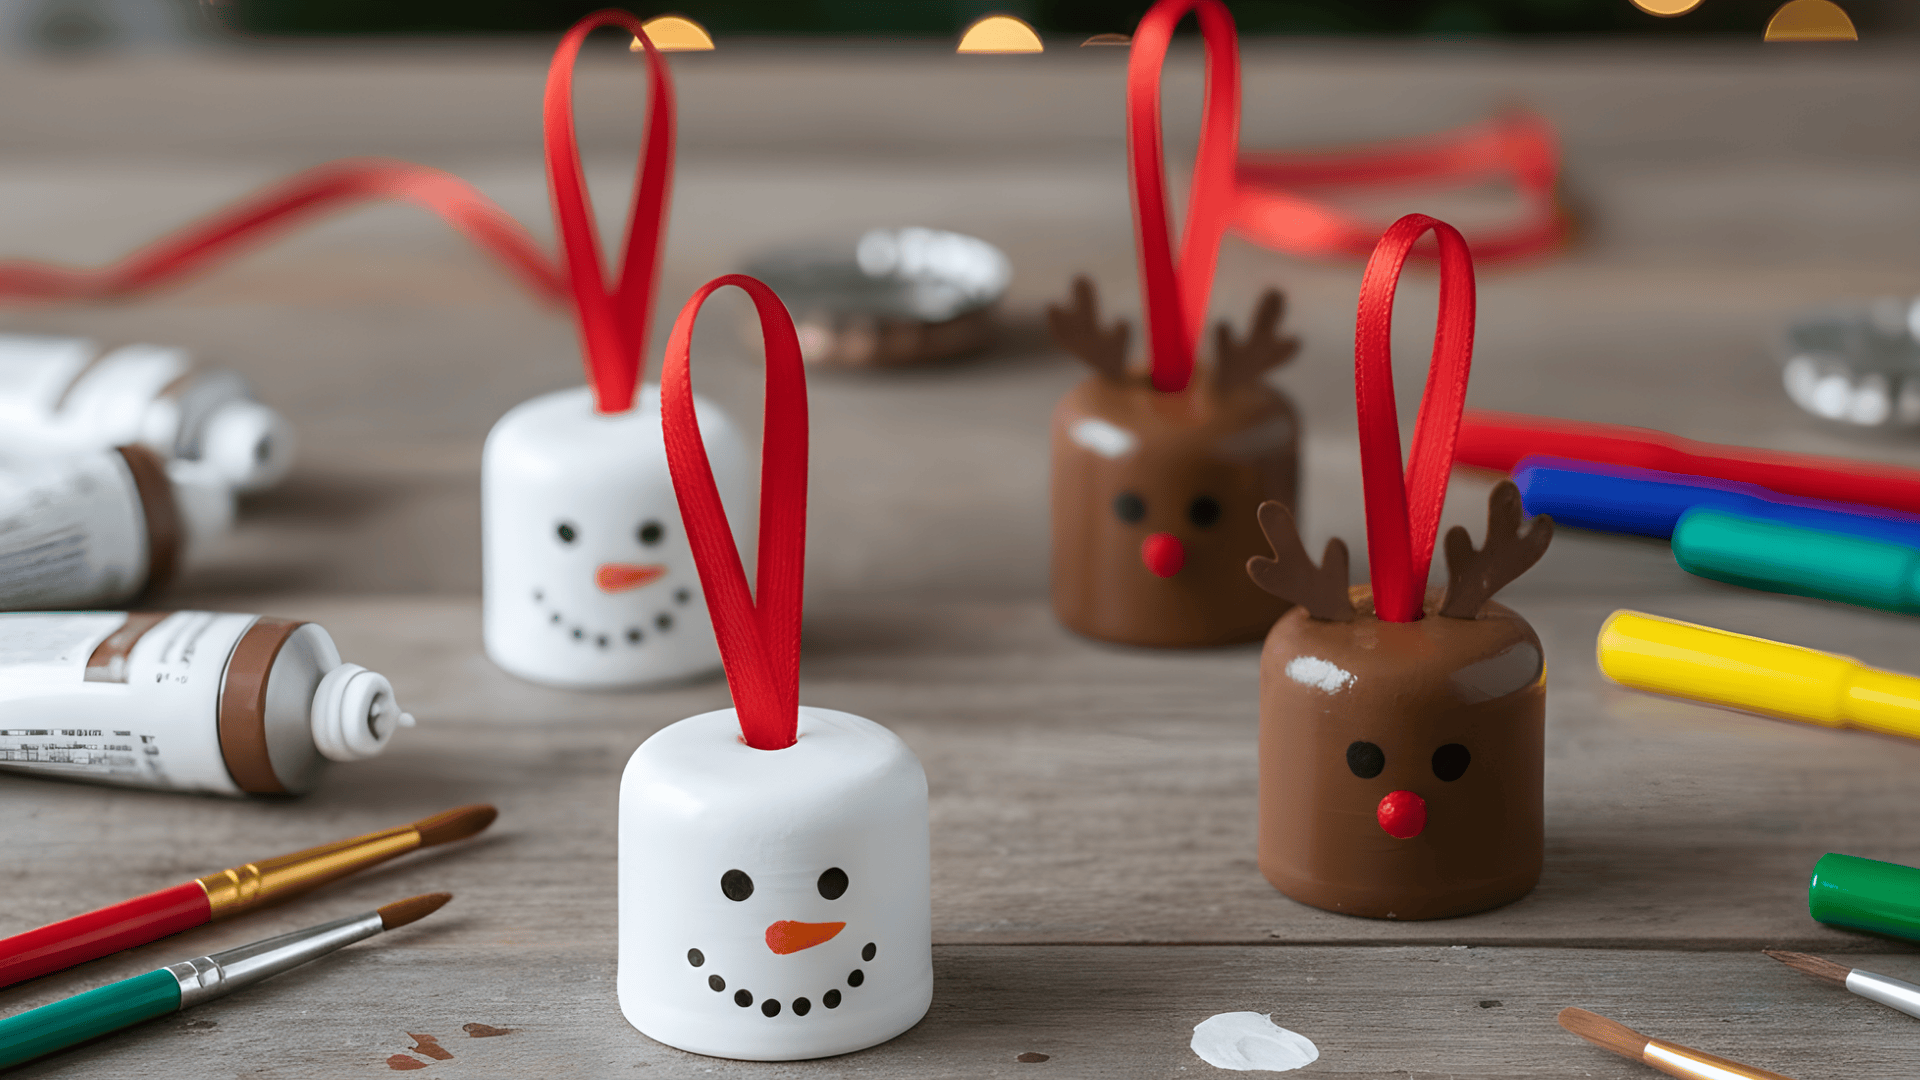
These bottle cap characters are simple, small, and great for decorating. Kids can paint them and add tiny details to make fun Christmas faces.
Materials You Need:
- Bottle caps
- White and brown paint
- Markers
- Glue
- Ribbon or string
Steps to Follow:
- Paint the inside of the caps white for snowmen or brown for reindeer.
- Draw simple faces with markers.
- Add tiny details like noses or buttons.
- Glue a ribbon loop on the back.
- Use them as ornaments or gift tags.
DIY Holiday Decorations Kids Can Make
These decorations are simple for kids to create and look great around the house. They help kids feel proud when they see their handmade pieces displayed for the holidays.
29. Popsicle Stick Christmas Trees
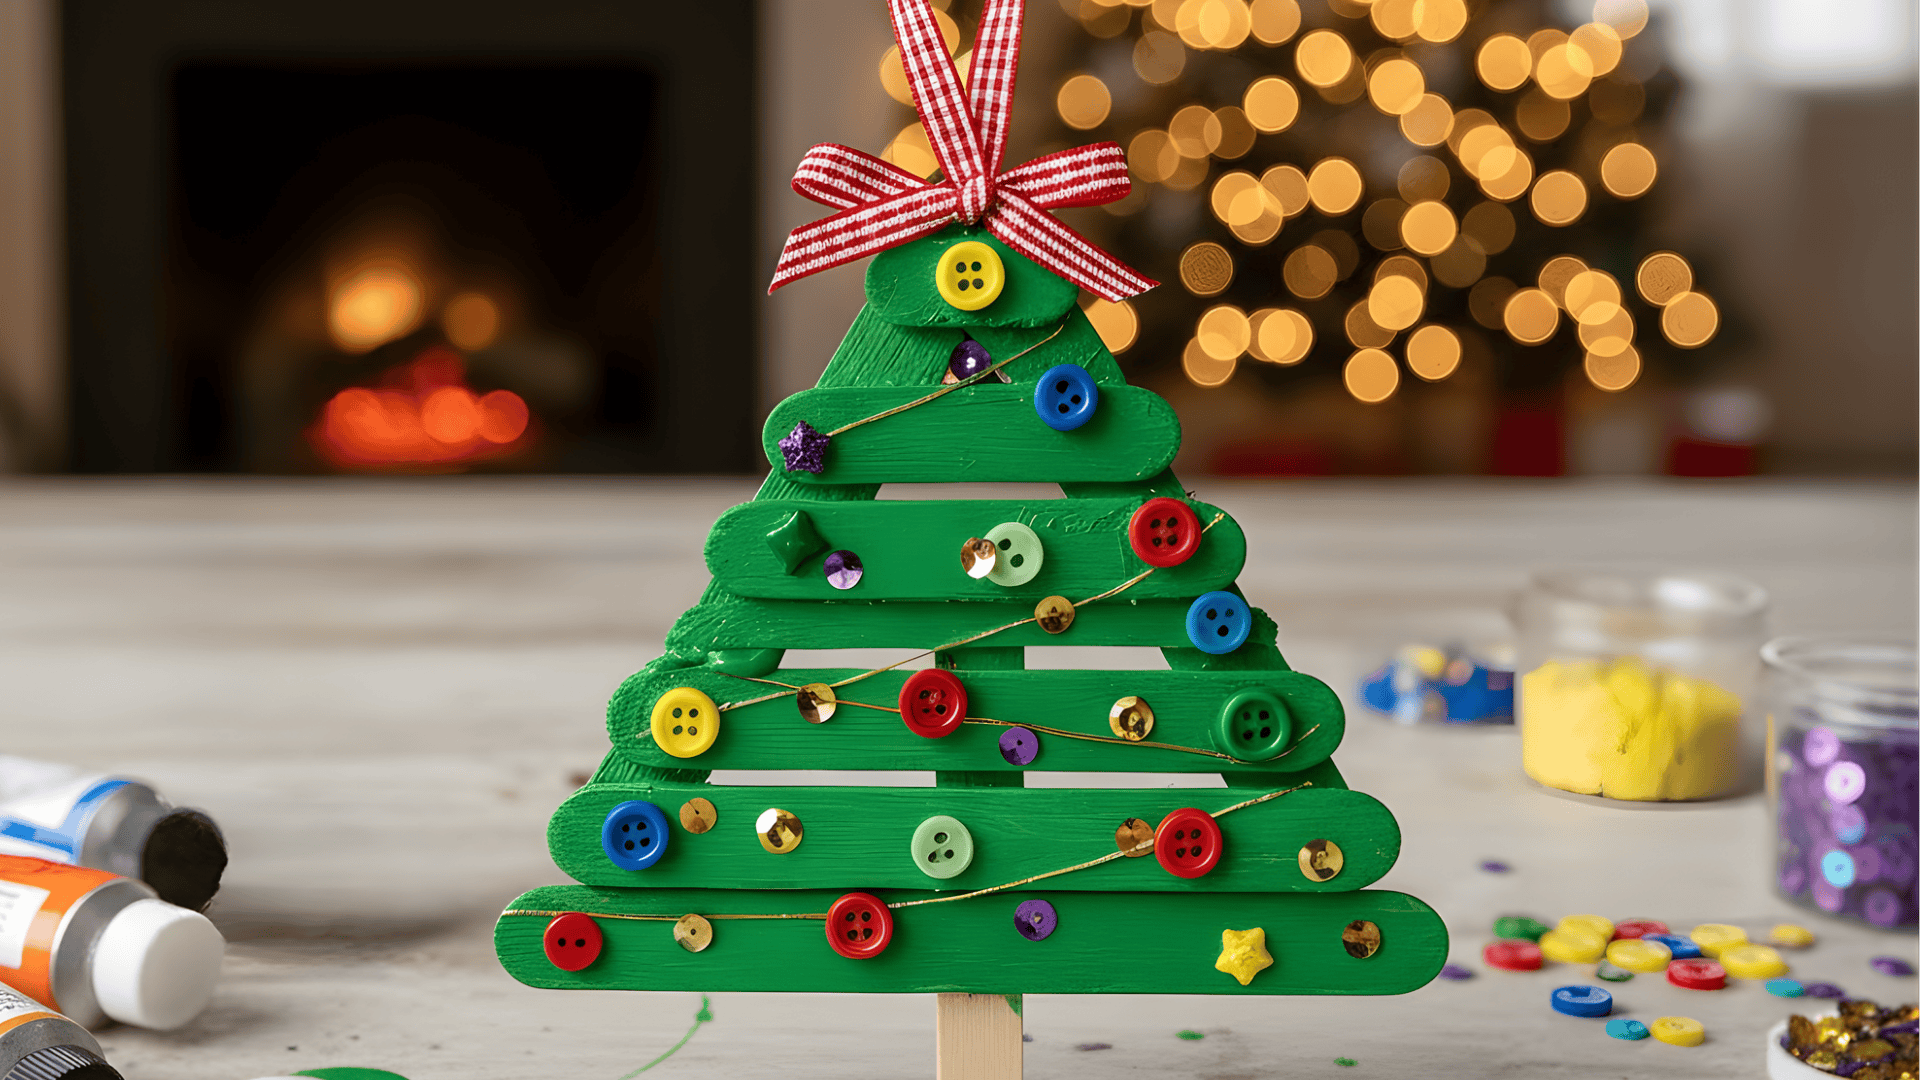
These popsicle stick trees are sturdy and easy to decorate. Kids can paint them, glue on small ornaments, and turn them into cute hanging decorations.
Materials You Need:
- Popsicle sticks
- Green paint
- Glue
- Buttons or sequins
- Ribbon
Steps to Follow:
- Glue three popsicle sticks into a triangle tree shape.
- Paint the triangle green and let it dry.
- Add buttons or sequins as ornaments.
- Glue a small stick to the bottom of the tree trunk.
- Tie a ribbon at the top to hang it.
30. Simple Angel Craft for Kids
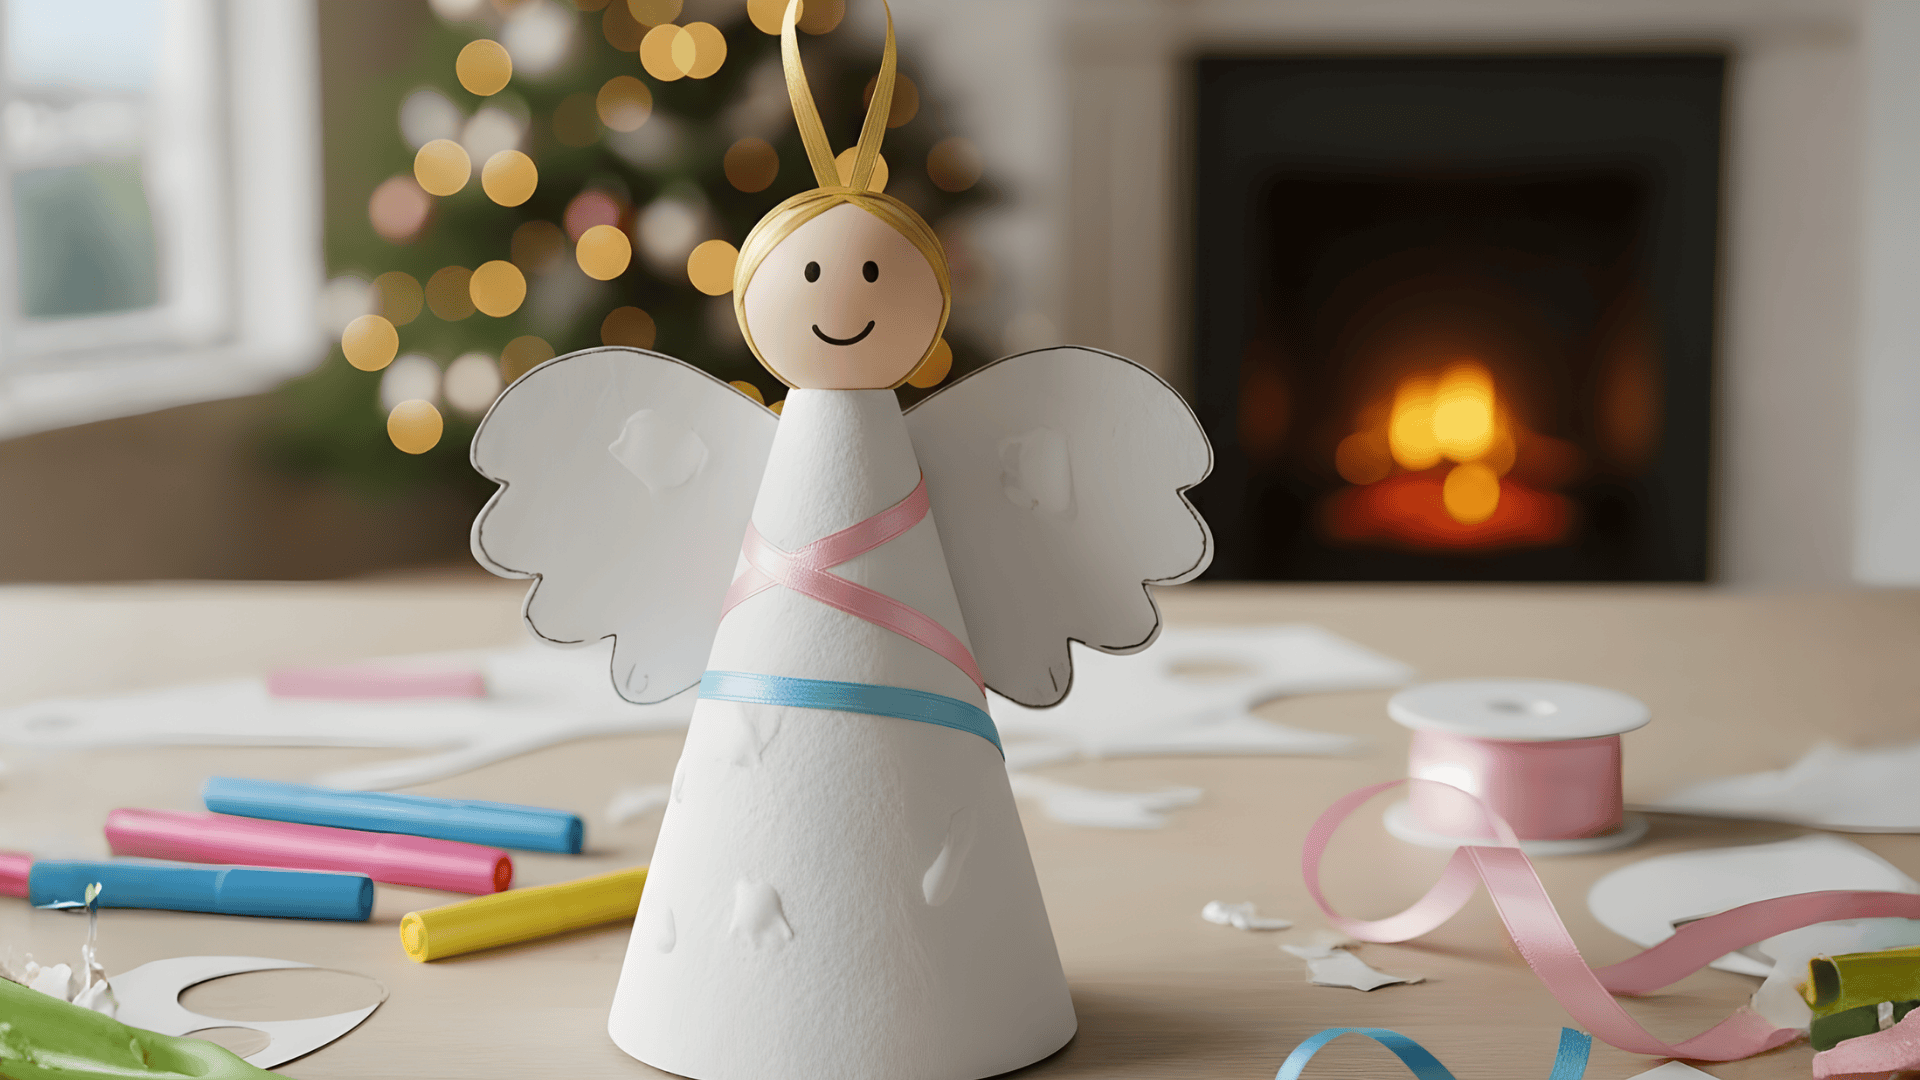
This angel craft is gentle, sweet, and easy for kids to make. Kids enjoy designing the wings and choosing soft colors to match their style.
Materials You Need:
- Paper or craft foam
- Markers
- Glue
- Scissors
- Ribbon
Steps to Follow:
- Cut out a simple angel shape.
- Draw a face and small details.
- Cut two wing shapes and glue them on the back.
- Add ribbon or glitter for decoration.
- Attach a ribbon loop for hanging.
31. Easy Christmas Garland Shapes
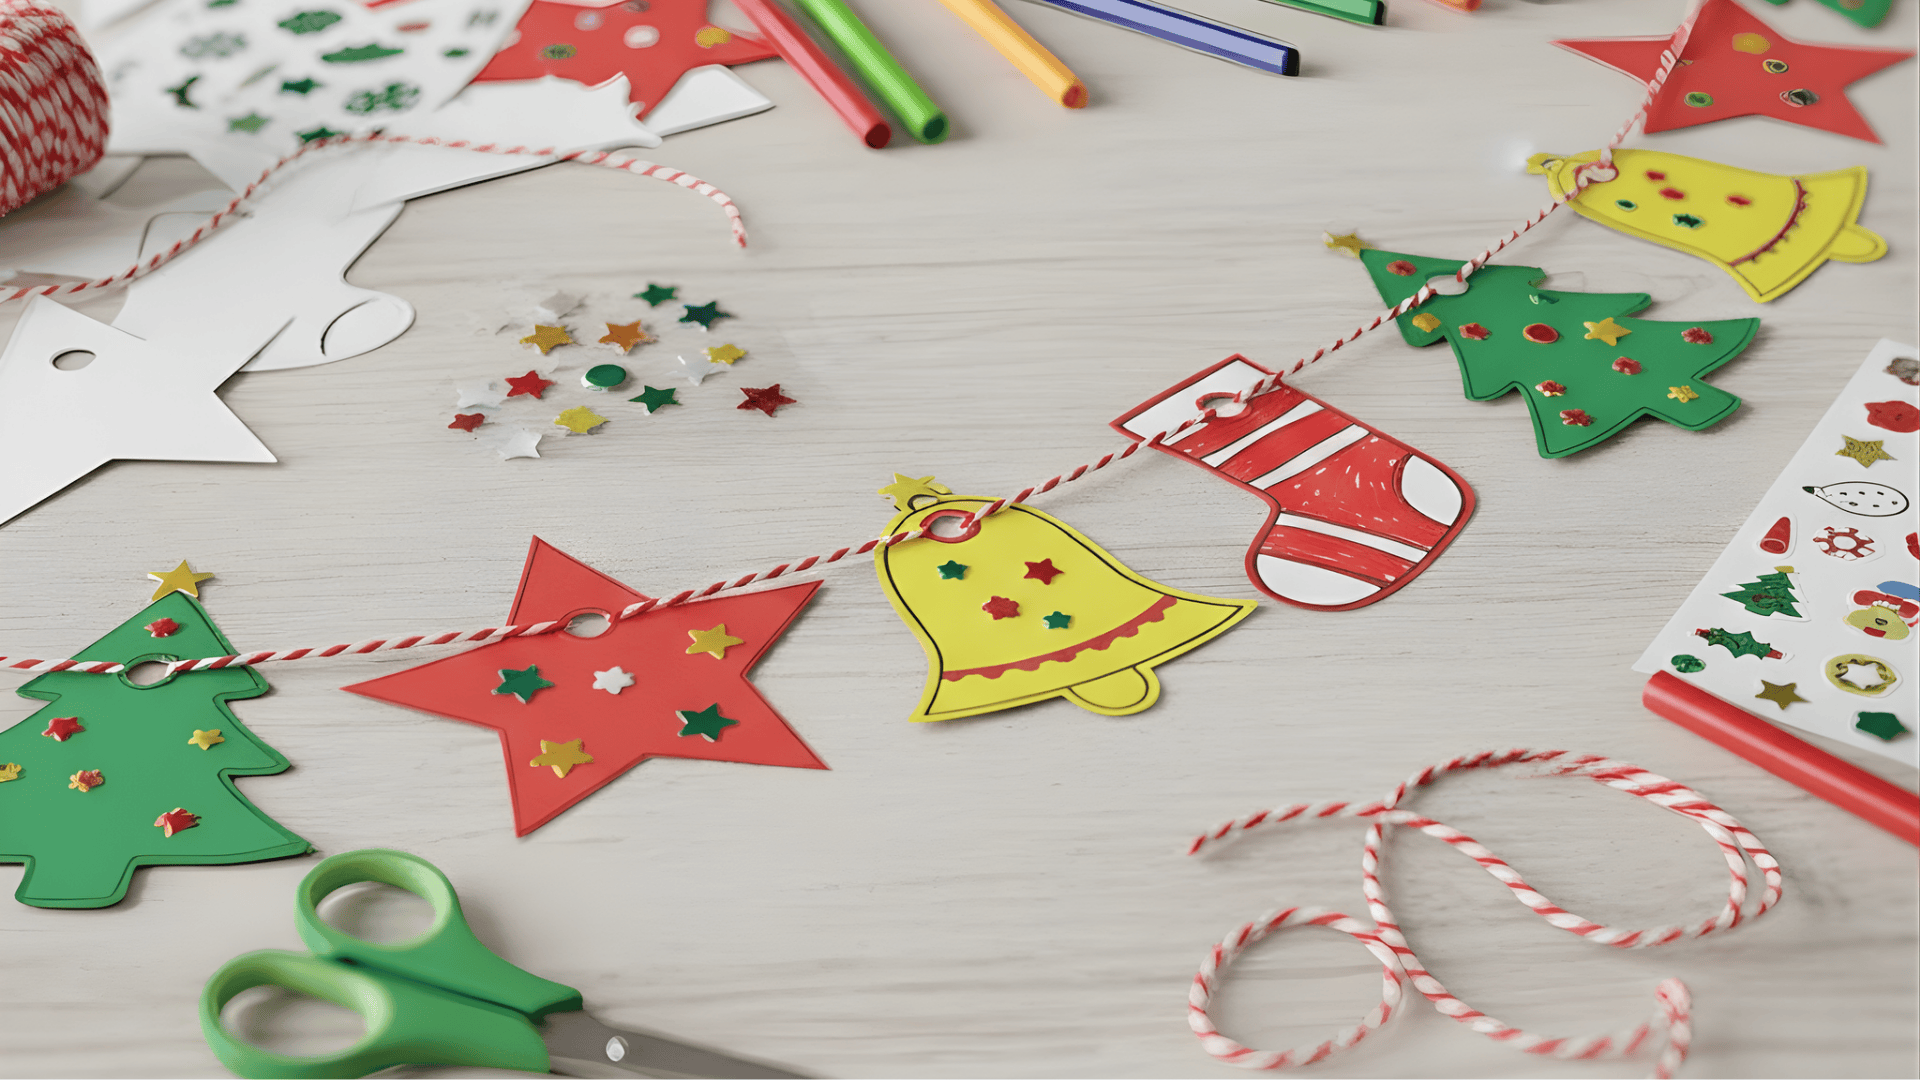
These garland shapes are great for decorating doors, windows, or classrooms. Kids can mix stars, trees, bells, and stockings to make a colorful banner.
Materials You Need:
- Colored paper
- Scissors
- String or yarn
- Glue
- Markers
Steps to Follow:
- Cut out simple shapes, such as stars or trees.
- Decorate them with markers or stickers.
- Punch small holes at the top of each shape.
- Slide them onto a long piece of string.
- Hang the garland across a wall or doorway.
32. Painted Pine Cone Christmas Trees
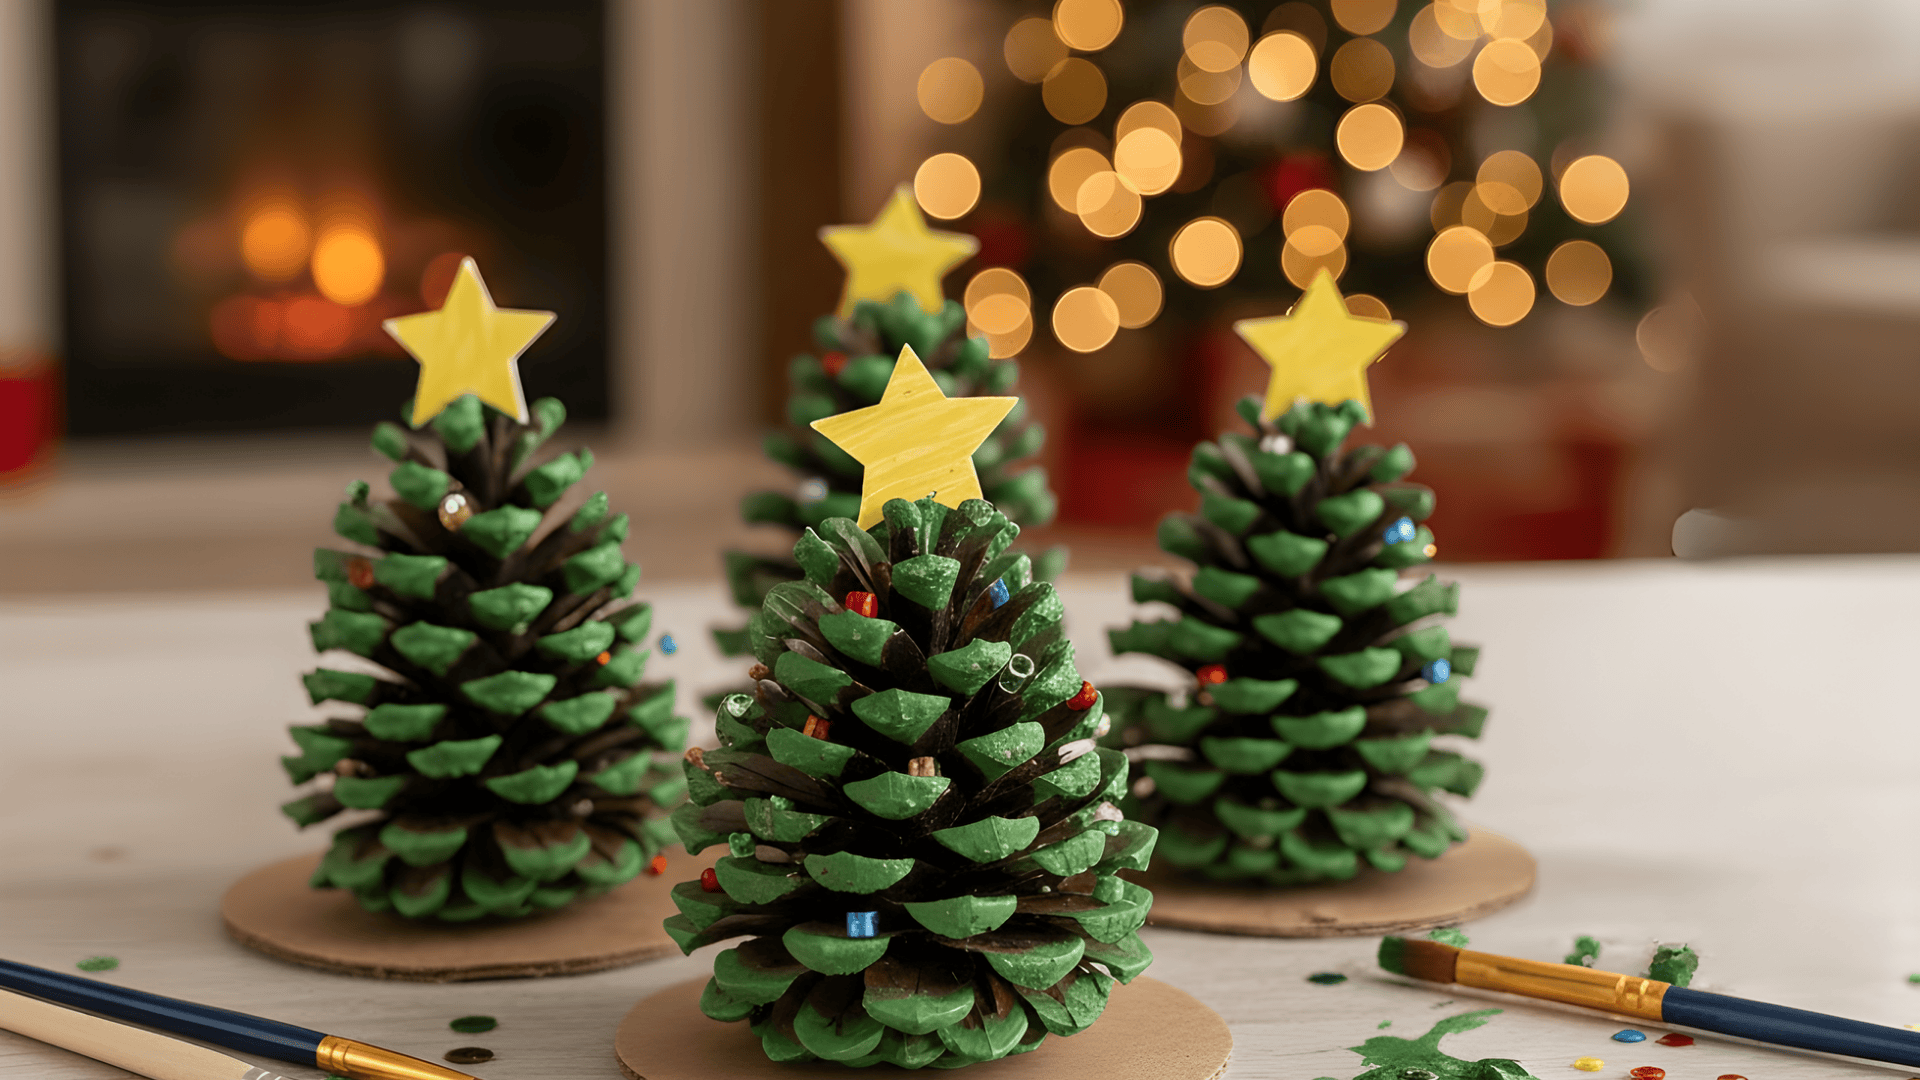
These pine cone trees look adorable and have a natural, rustic feel. Kids enjoy painting the cones and adding tiny “ornaments.”
Materials You Need:
- Pine cones
- Green paint
- Small beads or sequins
- Glue
- Paper star
Steps to Follow:
- Paint the pine cone green and let it dry.
- Add beads or sequins as tiny ornaments.
- Glue a paper star on the top.
- Place the pine cone on a small piece of cardboard as a base.
Quick Classroom-Friendly Christmas Crafts
These crafts work well for classrooms because they are fast, simple, and low-messy. They help kids stay engaged without needing many supplies or a long setup.
33. Group Foam or Felt Ornament Kits
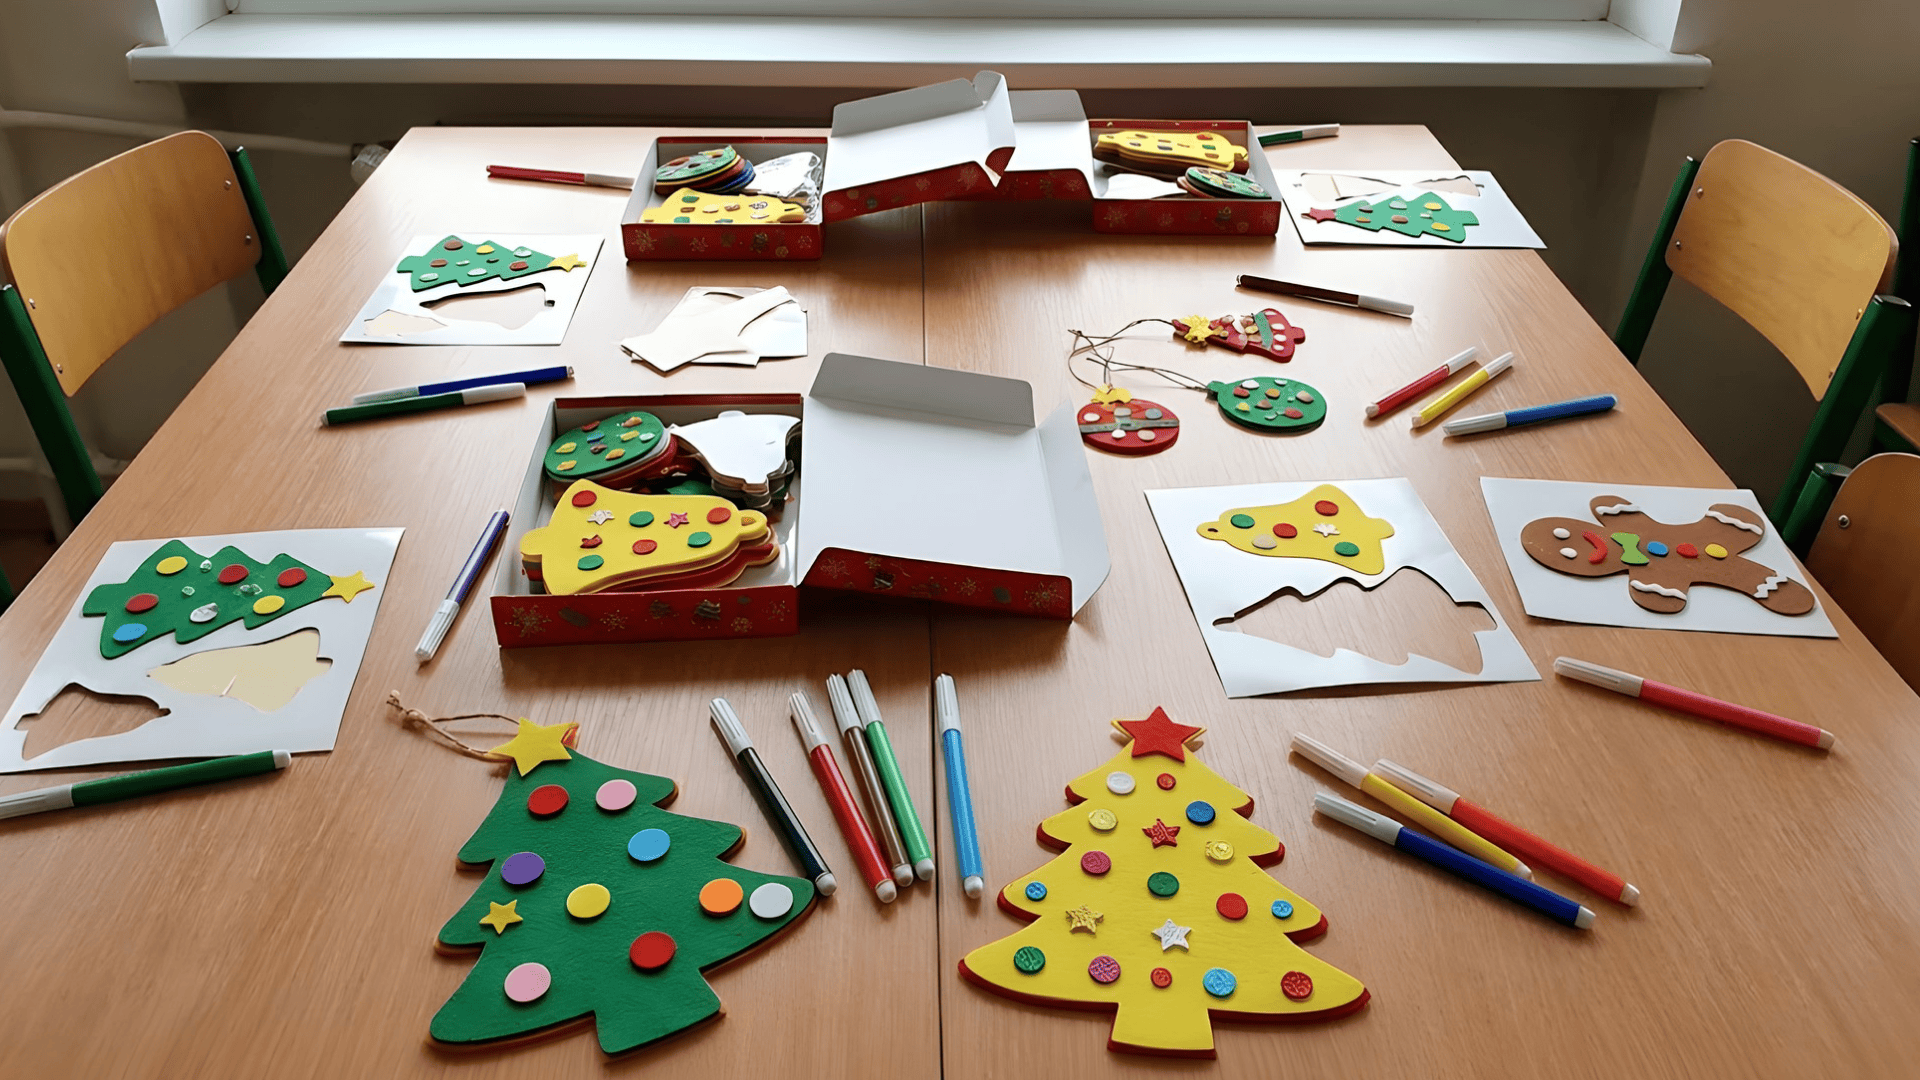
These kits are perfect for groups because everything comes ready to use. Kids only need to peel, stick, and decorate, which makes this craft easy to manage in busy classrooms.
Materials You Need:
- Foam or felt ornament kits
- Glue (optional)
- Markers
Steps to Follow:
- Hand out one ornament kit to each child.
- Let kids choose pieces they want to add.
- Peel and stick the shapes onto the ornament.
- Add marker details if they want extra designs.
- Attach the string and hang the ornaments to dry.
34. Fingerprint Christmas Lights Art
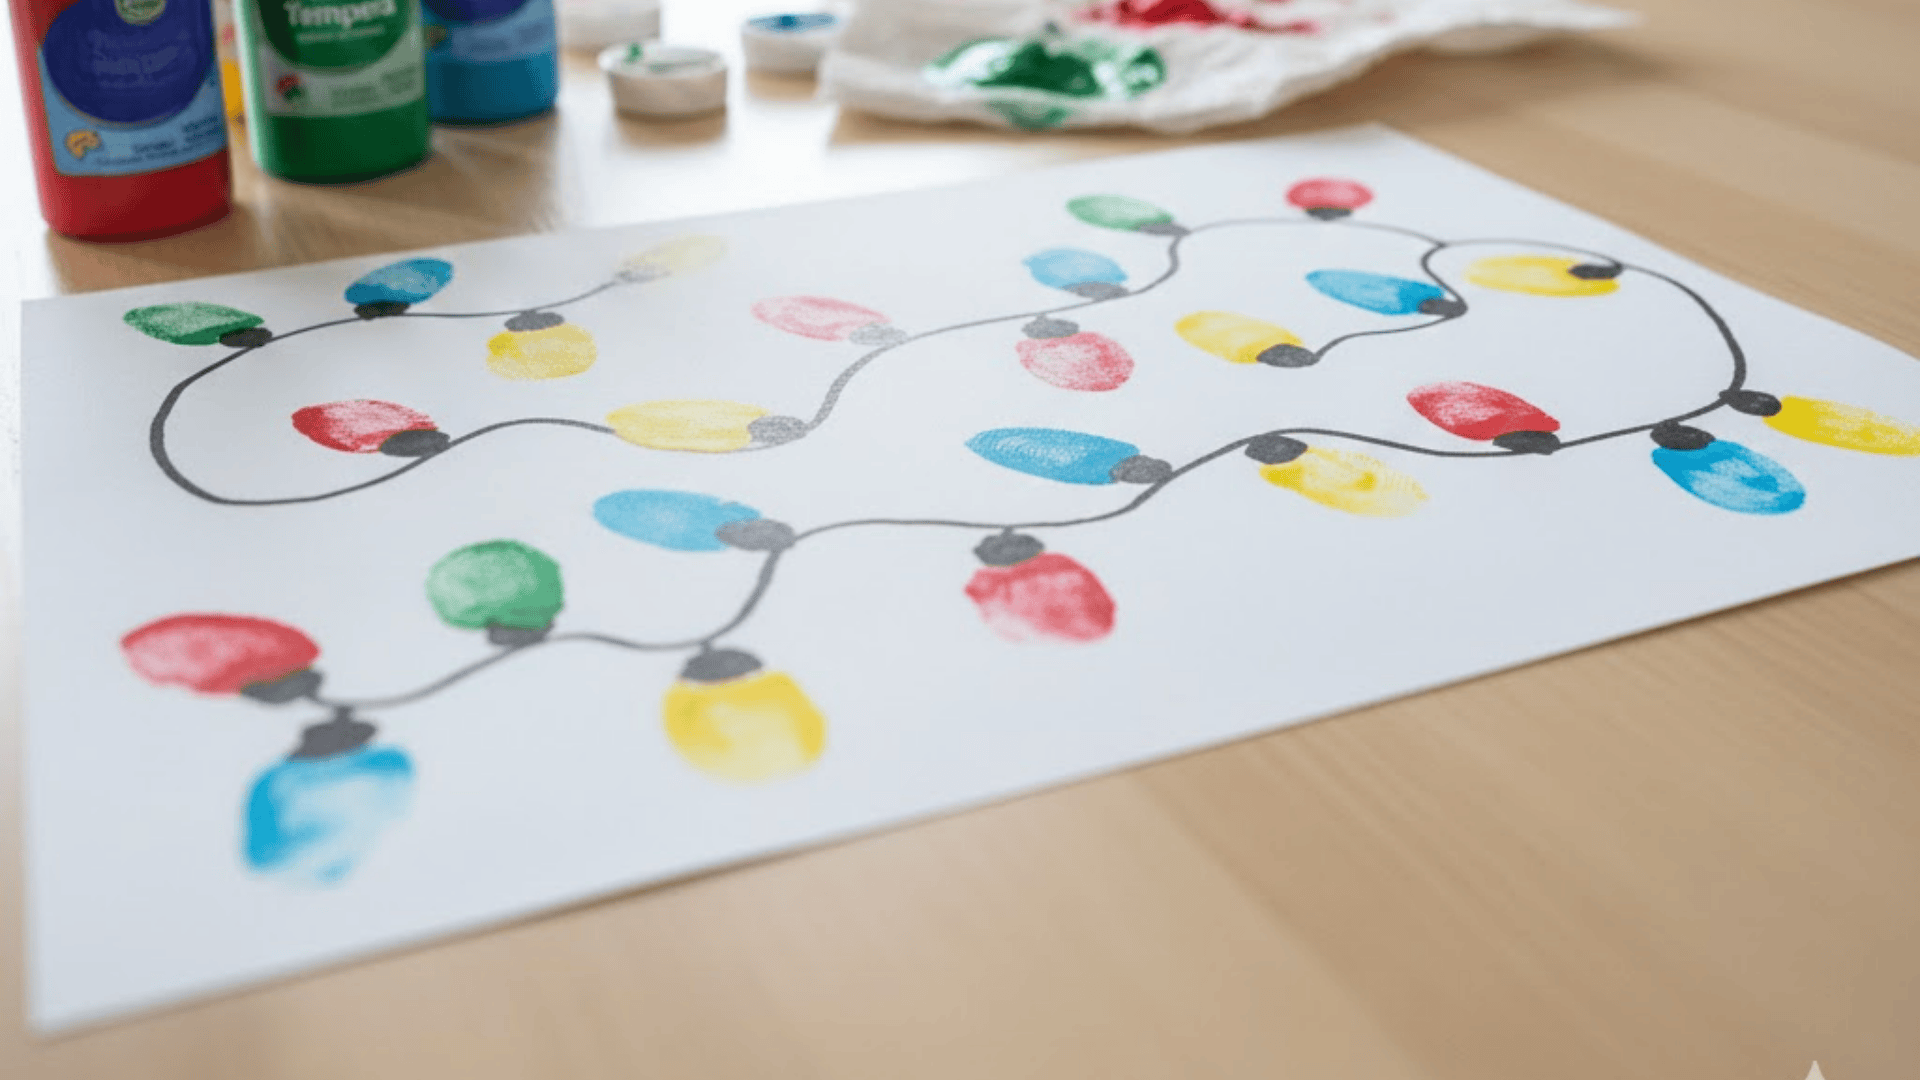
This craft is quick, cute, and perfect for younger kids. They enjoy making tiny fingerprints that look like colorful Christmas lights.
Materials You Need:
- White paper
- Black marker
- Washable paint
- Paper towel
Steps to Follow:
- Draw a simple wavy line across the paper for the “wire.”
- Add small loops where bulbs will go.
- Dip a finger into paint and press it along the line to make fingerprints.
- Use different colors for each “light bulb.”
- Let the page dry and display it on a wall or board.
35. Spoon & Fork Christmas Painting
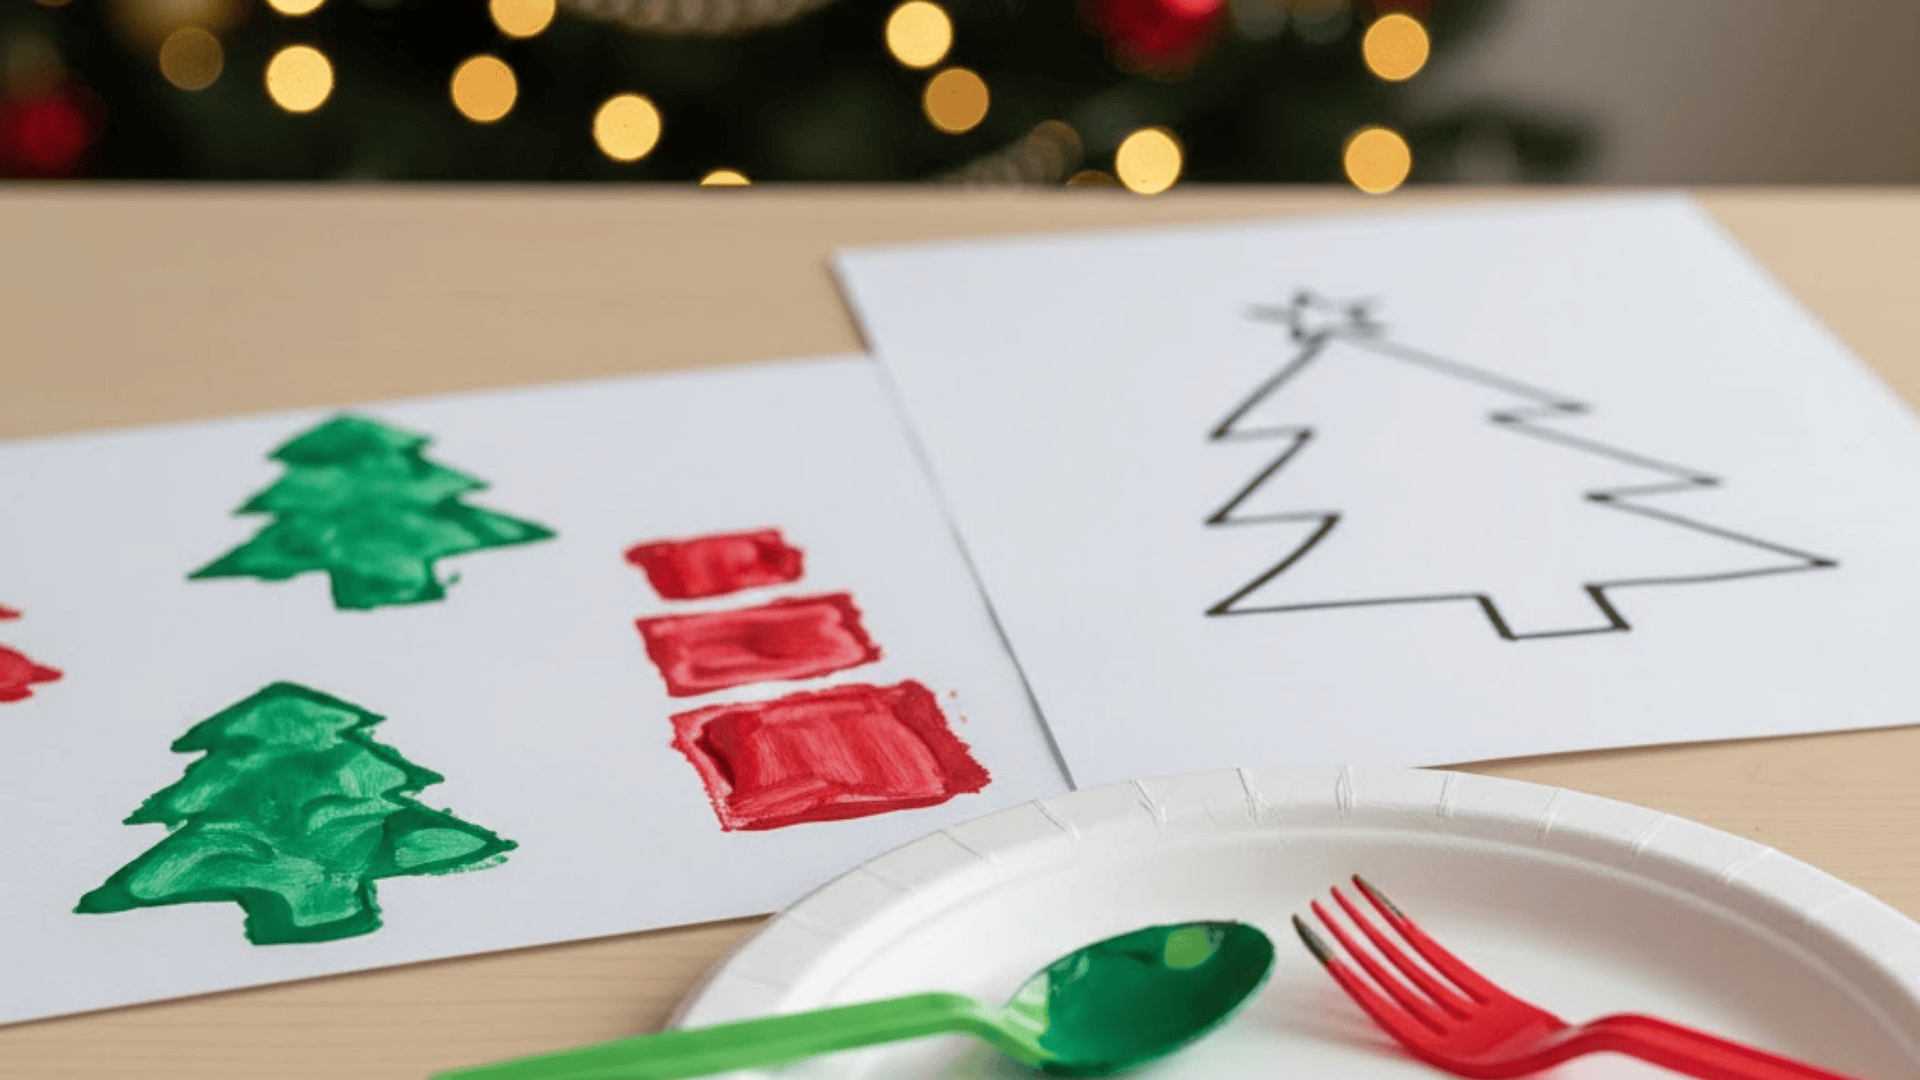
This painting activity is fun because kids use spoons and forks instead of brushes. They can make trees, snowmen, or simple textures using quick stamping motions.
Materials You Need:
- Plastic spoons and forks
- Paint
- Paper
- Paper plate
Steps to Follow:
- Pour small amounts of paint onto a paper plate.
- Dip a spoon or fork lightly into the paint.
- Press it on the paper to make shapes or patterns.
- Add details with markers once the paint dries.
- Display the finished art on a board or window.
These Christmas craft ideas give kids a simple way to enjoy the season while learning new skills. With easy steps and everyday supplies, each project becomes fun, doable, and full of holiday joy.
Tips for Crafting With Kids During Christmas
Crafting with kids is easier when you keep things simple and plan ahead. These tips help make the activity smoother, calmer, and more enjoyable for everyone:
- Keep Crafts Simple: Choose projects that need only a few steps and easy supplies.
- Use Washable Materials: Pick paints, markers, and glues that clean up fast.
- Match Materials to Age: Give younger kids larger pieces and tools they can handle safely.
- Prepare Ahead of Time: Cut shapes or set out supplies before the craft session begins.
- Let Kids Personalize: Encourage kids to choose their colors, designs, and decorations.
- Focus on Fun, Not Perfection: Enjoy the process and celebrate whatever kids create.
These small steps help keep kids engaged and reduce stress for adults. When the setup is simple and the expectations are low, everyone has a better time crafting.
Conclusion
Christmas crafts for kids are a fun way to slow down and make simple memories together.
You’ve seen plenty of easy ideas you can use at home or in the classroom, all with steps that are quick to follow and gentle on your time.
These crafts aren’t about perfection; they’re about connection, creativity, and enjoying the season with the kids you care for.
If you try even one project from this list, I hope it brings a little calm, a little joy, and a whole lot of holiday fun into your day.
If you want more easy craft ideas or help planning your next activity, just let me know; I’m here to help!